I’ve been slowly learning the best methods and temperatures to cook meat via the sous vide method. For those of you not familiar with this, I’ll give you a cheat link over to Wikipidia: Sous Vide Cooking.
So about three weeks ago I decided to cook a piece of chuck roast for 48 hours at 149 F, but about halfway through the cooking time my foodie friend and sous vide guru Stefan gave me the sage advice that I would achieve the results my hubby desired in said chunk of meat by cooking it only 24 hours at a higher temperature. Horrors, what was I to do? So I threw caution to the wind and bumped it up to 165 F for the last 24 hours. It came out out fall apart tender and my husband said it was the best chuck roast he had ever tasted.
I had only used half of the chuck roast, so two weeks later I decided to try only 24 hours at 165 F for the second half. It was very tender, but both of us thought the first one had the perfect texture. Don’t get me wrong, it was absolutely delicious, the first one was just amazingly absolutely delicious. Was this a controlled experiment? Heck no. I had too many differences with what I did. Was the first chuck roast the better half of the roast? (It was a 6-pound roast initially.) The first one I only seasoned it then seared in a hot cast iron skillet. For the second one I seasoned it then dusted it heavily with flour before searing, as I wanted a thicker gravy than the first one. Did the flour have anything to do with the texture of the meat? I have no idea. But I did get a thicker gravy!
Anyhoot, since I bothered to take the pictures, I’ll go ahead and step you through the process I did for the second roast. Who knows? Maybe it will prompt you to pick up a sous vide circulator and try it out!
24-Hour Sous Vide Chuck Roast with Gravy
1 3-pound chuck roast
Seasoning spice mix of choice
Ground black pepper and salt
Flour
1 tablespoon high heat oil, such as grapeseed oil
1/2 cup homemade beef stock
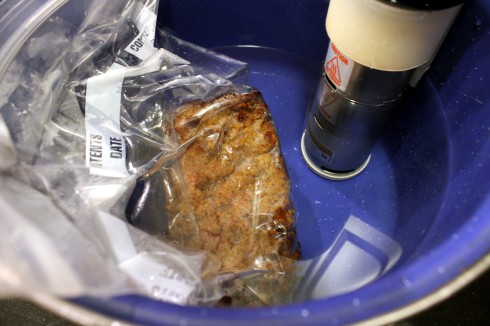
First, fill a large pot with water, insert the sous vide circulator, and set the heat at 165 degrees F.
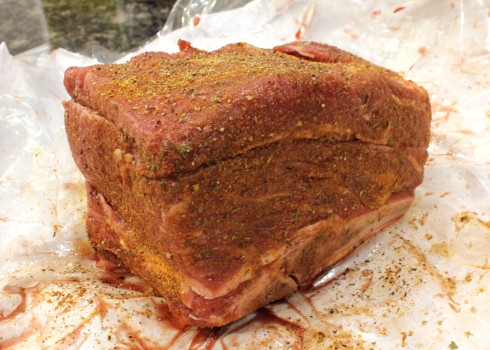
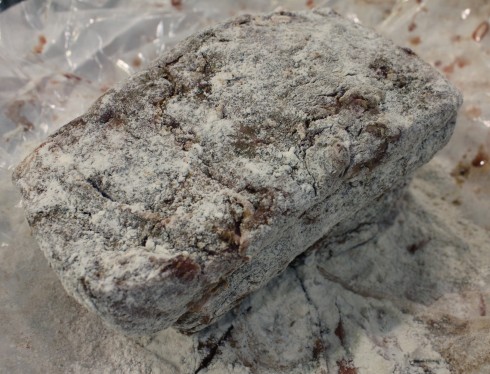
Season the beef liberally with a spice seasoning mix of choice. I used Santorini Sunset seasoning (available from Kouzouna’s Kitchen). Grind a bunch of black pepper over it, and lightly salt if your seasoning mix does not contain salt. Pat the roast all around with flour until it is thoroughly coated.
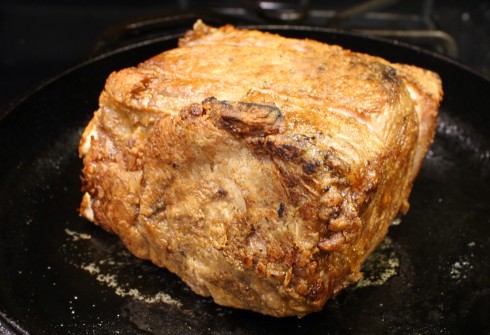
Heat a cast iron skillet to high heat and add the tablespoon of oil. Sear the roast on all sides until it is browned and crusty.
Place the roast in a gallon zip-top freezer bag, then remove all the air by zipping it almost shut and slowly immersing it into the pot of water until all the air is sucked out of the bag, then finish sealing the bag.
Cover the pot with cling-wrap to prevent evaporation. Now go find something to do for the next 24 hours, like eat your dinner, watch a movie, sleep, get up and do laundry, or whatever you find yourself doing for the next day.
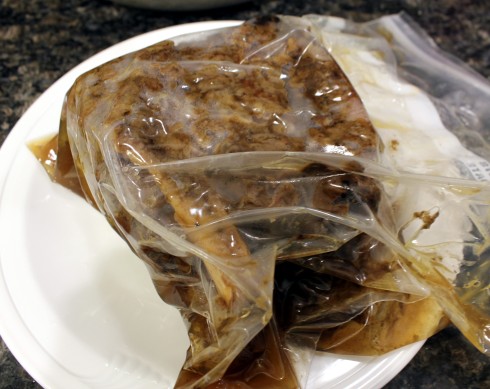
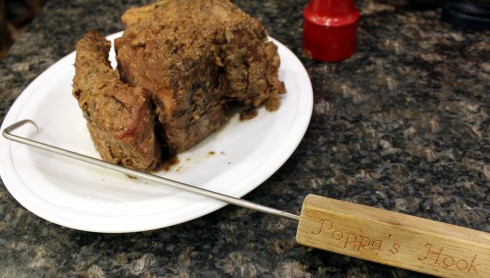
About 20 minutes before you want to eat the roast, turn off the sous vide, remove the bag from the pot, and remove the roast from the bag, saving the juices in the bag. Set the roast aside on a plate and cover with foil while you make the gravy.
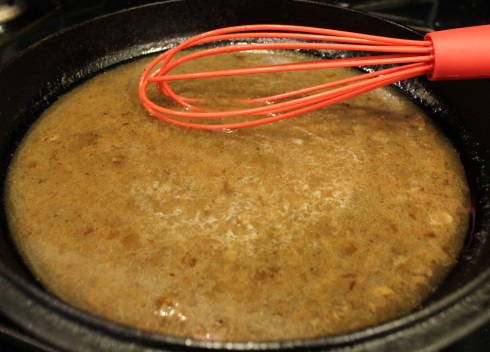
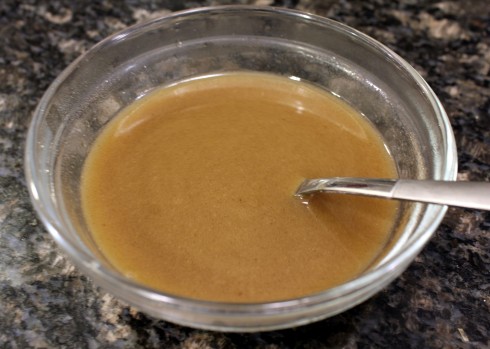
Pour the juices from the bag into a skillet set over medium-high heat. Add the 1/2 cup beef stock to it. Bring the sauce up to a simmer, and whisk constantly while keeping a simmer until the gravy has reduced and thickened.
To finish the gravy, add a half tablespoon of very cold butter and stir it in until just melted. Strain the gravy through a sieve (I also line it with mesh or cheesecloth) into a serving bowl.
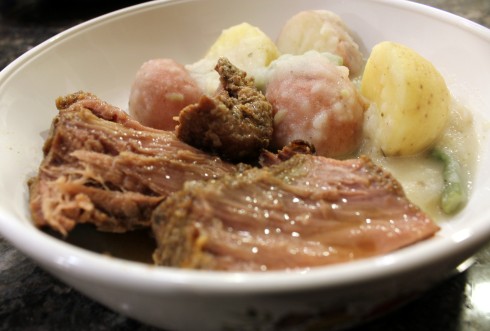
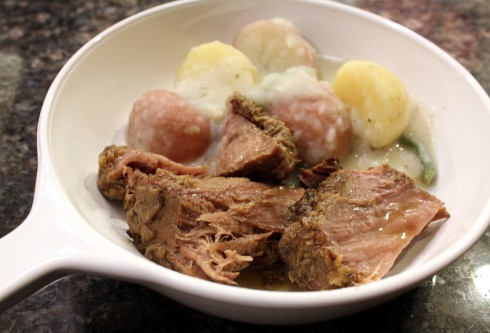
Serve the fall-apart tender meat with the gravy and sides of vegetables. We had rosemary buttered baby potatoes with green beans.






Love beef! xoxoxo ccc
LikeLiked by 1 person
Yumm yumm! xoxo
LikeLiked by 1 person
Looks delish! I think its hard to go wrong with chuck roast. 🙂 It used to be the cheap cut, but now it has become quite the coveted cut. 🙂
LikeLike
Thank you Jodi! We got several from our quarter cow we bought in the fall.
LikeLiked by 1 person
This looks delicious , I have to show it to my nephew who is a ” Sous Vide” fan and a scientist.
LikeLiked by 1 person
Thank you Gerlinde! Your duck leg confit sure looked tasty too!
LikeLike
Beautiful pics! So the second was only 24 while the first was 48? Was the it that much better to warrant the extra day? (Asks the guy who still doesn’t have one)
LikeLiked by 1 person
Hey there, thanks! Yes the first one was better at 48, but it spent the first 24 hours at 149F and the second 24 hours at 165F, and I have no clue if that had anything to do with it! I have not read your Top Chef blogs as I’m trying to catch up online with them first, lol!
LikeLiked by 1 person
I don’t usually make chuck roast because it is fatty. I make eye roast but I may try a chuck roast because it’s been so long. Maybe I’ll have a change of heart.
LikeLiked by 1 person
Thank you! The fat pretty much melts out of it at this long cooking time.
LikeLike
Wow. That’s cool, Kathryn, but way beyond my ability for a bazillion reasons including an inability to plan. Ha ha. I love it that you experiment and try new things. Hopefully, your husband knows how lucky he is! Have a great Sunday and stay warm. 🙂
LikeLiked by 1 person
Thank you Diana! I knew sous vide would not be everyone’s cuppa tea, but hey, I like to try new things! xoxo
LikeLiked by 1 person
Scrumptious for sure 😊
LikeLiked by 1 person
Thanks Garfield! 🙂
LikeLiked by 1 person
So, if I’m reading this correctly, you really can’t go wrong either way. Yes? Looks delicious!
LikeLiked by 1 person
You are correct, both ways are delicious!
LikeLike
I’ve heard about this method of cooking – I just have not tried it yet! Looks delicious – any method that makes meat tender and juicy is a plus for me.
LikeLiked by 1 person
Thank you Judi! It makes meat very tender and moist, you just have to be willing to wait for it!
LikeLike
This looks soooo delicious, Kathryn. Yum! Mega hugs.
LikeLiked by 1 person
Thank you Teagan! Huge hugs back. xoxo
LikeLiked by 1 person
I’ve seen this method on tv but haven’t given it a try – perhaps it’s time!! Looks delicious Kathryn! 😋
LikeLiked by 1 person
Thank you Linda! The sous vide immersion circulators can be had for under $100 on Amazon. 🙂
LikeLiked by 1 person
Cool! 😎
LikeLiked by 1 person
As always this sounds and looks so good and amazing! xxoo
LikeLiked by 1 person
Thank you my dear Lynn! xo
LikeLiked by 1 person
most welcome dearest KR! xo
LikeLiked by 1 person
Thanks for the lesson do you think this method is superior to a slow cooker?
LikeLiked by 1 person
You are welcome! Yes, I do Bernadette. I find the slow cooker dries out the meat too much in order to get it to the tenderness you desire.
LikeLiked by 1 person
Interesting. Thanks.
LikeLiked by 1 person
Looks amazing, Kathryn! Thanks for the detailed method 🙂
LikeLiked by 1 person
You are welcome!
LikeLiked by 1 person
You sure are a serious cook. I use a pressure cooker. Just so much faster and the results are great. But I can use the gravy tips. I don’t make gravy. I guess I’m not a patient cook like you, or serious enough for that matter.
LikeLiked by 1 person
Thank you Karina, I really never considered myself a serious cook, I just like to cook. I work full-time and blog as a hobby. I’ve had an old-fashioned manual pressure cooker since college which I use quite often, and also still have my original Rival Crock Pot from college that gets plenty of work-outs. But my husband kept insisting he wouldn’t eat pork anymore because it was always so dry, so I set out to prove him wrong, which I have now on several occasions since I started using the sous vide to cook it. I know a lot of tips about gravy, perhaps I’ll make a gravy-specific post in the future?
LikeLiked by 1 person
Doing a post about gravy sounds like a grave idea. I’ve had enough of my gravel tasting gravy. Schedule your gravy train and I’ll hop on board.
LikeLiked by 1 person
You are too funny! I have no idea when I’ll schedule it but hopefully you’ll see it when I do.. 🙂
LikeLiked by 1 person
Thanks for the shout out, Kathryn! Your chuck looks great. I’m pretty sure the flour didn’t make any difference to how the roast was cooked inside. The difference between the two versions may just be the longer cooking time (so you could also try 36 or 48 hours at 74C/165F), but I can’t rule out whether the different temperatures also had some special effect. That is something I’d like to experiment with a bit.
LikeLiked by 1 person
Thank you Stefan, I was looking for your feedback on this. I’m starting to think I like the longer cooking time, but I haven’t done one a straight 48 hours at 165F, remember I had already done 18 hours or so at 149F when I upped the temp. I’m still planning on experimenting too.
LikeLiked by 1 person
The optimal cooking time could also depend on the meat, e.g. Grass-fed versus corn-fed or wagyu versus Angus or an older animal versus a yonger animal or a leaner versus more marbled roast… The variables are endless, but unlike cooking a steak or fish fillet on the stove top, the cooking time for sous-vide is pretty flexible in most cases.
LikeLiked by 1 person
This cut of beef was a grass-fed cow finished with spent hops from a beer brewery. It was the very last of our quarter cow from last year, so it was a year in the freezer. Somehow we had overlooked it as the size of it caused it to get tucked out of the way. Our new quarter cow is completely grass fed. However the 6-pound roast was from the same cow and both the same aged in the freezer. Anyways, I appreciate your feedback. Heading to bed, have to be up in 8 hours. 🙂
LikeLike
That is one cut of beef I’ve never tried the sous vide method, I am always super lazy when it comes to cooking something for 24 hours. Which is odd, after all, you do nothing in those 24 hours…
I need to do this… but I guess you preferred the first method…. what to do? what to do? 😉
LikeLiked by 1 person
I know it’s a conundrum, isn’t it?? I do think my next experiment will to repeat the first method but use flour before searing, as I enjoyed the thicker gravy it produced. Then maybe I’ll have a definitive conclusion. 🙂
LikeLiked by 1 person
You mean doing the temperature switch and all? Or simply going 48 hours at lower temp?
LikeLiked by 1 person
I mean do the temperature switch. I know I don’t want to do the 48 hours at a lower temp. OR perhaps do 48 hours at the higher temp? Sigh, I can’t decide, lol.
LikeLiked by 1 person
I don’t know much about the sous vide method of cooking, but I learned a lot from reading this post. I really liked all the photos of the meat at the various stages during the process.
LikeLiked by 1 person
Thank you Sheryl, it’s a learning process!
LikeLike
Yum, yum, yum….I think I am coming over to eat at your house 🙂
There is a saying that goes…’all good things come to those that wait’….very apt in this case…love it ! 🙂
LikeLiked by 1 person
Ha ha, thank you Lynne, you are welcome any time! 🙂
LikeLiked by 1 person
Yum! I can just imagine how tender this beef was.
LikeLiked by 1 person
Thank you Debbie, so very tender!
LikeLike
The Roast looks so good that my mouth is watering. Can’t wait to read about the shrimp meatball below. Can you believe this lady, she’s a cook genius
LikeLiked by 1 person
Thank you!
LikeLike
Your welcome
LikeLiked by 1 person
I work full-time and follow hundreds of blogs, so sometimes it takes me awhile to read them all after work and on the weekends. 🙂
LikeLike
We are happy to just have to follow our blog, hope its worth the read for you. Hope you ate something good tonight
LikeLiked by 1 person
Not yet, it’s just after 7 pm here, we eat late. But I had an awesome Reuben sandwich for lunch!
LikeLike
Reubens are always fantastic. Do you use sour crought?
LikeLiked by 1 person
I actually had a rare occasion of meeting a friend for lunch at a restaurant today, and yes, saurkraut was on the sandwich. 🙂
LikeLike
So what’s the difference between brisket and corned beef anyway?
LikeLiked by 1 person
Excuse the late reply. Brisket is non-brined cut of beef off the back of the cow, corned beef is pretty much the same cut of beef but has been soaked in a salty/pickling spice brine for up to 5 days before cooking. 🙂
LikeLike
Your like an open book with all the answers and beautiful;)
LikeLiked by 1 person
I only learned about the sous vide method of cooking a short while ago. Apparently, it’s very popular. A number of chefs at local restaurants use it. It really keeps the meat tender. This dish looks fantastic! 🙂
LikeLiked by 1 person
Thank you Tonya! I have a few blogger friends that have been using it for a long time, and I finally broke down and bought a machine. Meat comes out incredibly tender! The reason restaurants like it so much is because you can keep the meat in the water bath at a controlled temp until you are ready to finish it off on the grill or pan, but it doesn’t cook any more than the temp you put it at so it’s never overdone.
LikeLiked by 1 person
It sounds great!
LikeLiked by 1 person
Sous Vide~ Always the best!!!
LikeLiked by 1 person
I love mine!
LikeLiked by 1 person
Yay!! 🙂
LikeLiked by 1 person
Delicious. Thanks for the recipe. 🙂
LikeLiked by 1 person
You are most welcome! Thanks for stopping by!
LikeLike
Thanks for the link-back!
LikeLike