Heirloom Tomatoes

Serranos, Jalapeno, and Pasilla Peppers
I am reblogging this recipe from last summer for you. I made another batch of this last weekend. This year, though, I had some beautiful heirloom tomatoes and my very own Serrano peppers that I grew to make it with! My husband said I didn’t make it spicy enough last year so I tossed in three Serranos this year instead of two, and one of them was the hotter fiery red and another one was already turning red. I also substituted the spicier Pasilla peppers instead of using Anaheim. He had no complaints this year. I hope you enjoy!
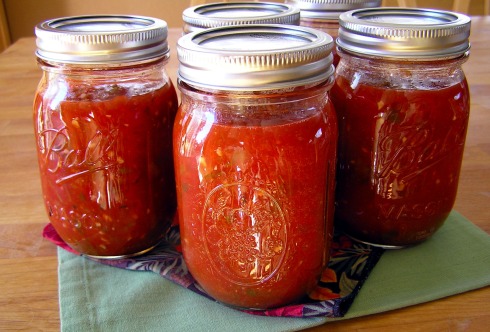
Canned Fire-Roasted Tomato Salsa
It was so much fun to get back into canning again! I have not canned anything in several years, but this year we have a bumper crop from my husband’s Hanging Tomato Plant Experiment. He got this crazy idea to plant a gazillion tomato seedlings (OK about 70) in hanging flower pot baskets upside-down, then sell them.

Hanging Tomato Plants on Side of House
Well, the idea worked, except he didn’t sell nearly enough of them. We have about 50 of them left, all hooked up to this crazy hanging basket contraption on two sides of our house, with an automated watering system he devised, which thank goodness works because we do go out of town time to time.

Hanging Tomato Plants on Deck
That being said, I harvested a bunch of our ripe beefsteak tomatoes for this canning project. I looked up a bunch of recipes online, and settled on one that fit my taste but then of course adapted it. I barely eeked out 5 full pint jars of this, and was hoping for some partially leftover to snack on the day I made it fresh, but that will have to wait, as I wanted full jars. However, my taste test passed with flying colors! If you have an abundance of tomatoes this year from your crop, you can make some too! Here is what I did:

Basket of Ripe Tomatoes
Homemade Canned Fire-Roasted Tomato Salsa
Adapted from Simply Recipes
5 to 6 pounds fresh tomatoes (I used 5 1/2)
3 large Anaheim peppers
2 large Serrano peppers
1 large Jalapeño pepper
1 large onion (I used sweet Walla-Walla), diced
3 cloves of garlic, peeled and minced
3/4 cup apple cider vinegar
1/4 cup fresh squeezed lime juice (this took about 2 largish limes)
1/2 cup loosely packed cilantro, chopped, including stems (fresh from my herb garden!)
2 teaspoons dried, crushed, Mexican Oregano
1 teaspoon ground cumin
2 teaspoons ground Sea Salt
1 teaspoon sugar
OK now you have the ingredients list. Next is the prep for the canning process, which is the one of the longest parts. Here is the special equipment stuff you need:
Canning Equipment:
5 or 6 pint canning jars (I used 5 but prepped 6 of them just in case)
Large stockpot for for canning (mine is 15-quart or so)
Flat steamer rack to fit pot (so cans don’t touch glass on metal directly, which can crack them)
Canning tongs for adding and removing jars from boiling water (you can do without but be careful!)
First I started prepping the jars and lids. Fill your stockpot about three-quarters of the way full with water, then put on high heat to boil. Meanwhile, go pick those ‘maters! Since it takes a long while for that much water to boil, now you can inspect your just-picked tomatoes for defects, then core and score them. Core the tomatoes and stems, then cut/slice off any bad spots. Score them lightly through the skin in half to make peeling easier. Now boil the jars for at least 10 minutes. At that point, go ahead and turn off the heat and let them sit in the hot water for now.

Anaheim, Serrano, and Jalapeno Peppers
This next job I assigned to by dear husband Paul, who has been towing the line for me in the cooking category recently with my workload. Lightly grease a hot grill with oil, then roast the peppers on all sides until blackened and charred all over. Put them in a paper or plastic bag for about 15 minutes.
Meanwhile, (again) roast those tomatoes on broil in your oven on a large rimmed cookie sheet for about 20 minutes, flipping them over halfway through. I would have had hubby do them on the grill with the peppers but didn’t want to overwhelm him with the task at hand. I think it worked out better that way as I needed the juice from the tomatoes.

Fire-Roasted Tomatoes
Once the peppers and tomatoes have cooled enough to handle, peel the skins off the peppers (with latex gloves!) then peel the skins from the tomatoes. Dice both of them up now (you might need to reserve the juices from tomatoes when chopping, as you need a minimum of 7 cups of diced tomatoes and their liquid to balance the acidity) and add to a very large saucepan or skillet with all the rest of the ingredients. ( p.s. do not use an aluminum pot, as it can leach the aluminum from the acid from the tomatoes.) Bring all of this up to a good boil, then reduce to simmer for 10 minutes.
While all that is simmering, place the lids and caps in a bowl and cover with boiling water. Oh yeah, put a teakettle of water on to boil about 10 minutes ago. Oops! I forgot that too. I hope you read this all the way through before attempting.

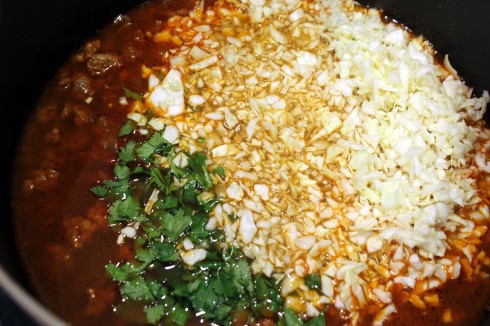
Pot of Simmering Salsa
After simmering, place half the salsa in a blender and puree, then add it back to the pot. If you like chunkier salsa , then you don’t have to do this. I decided on half and half. The original recipe recommends tasting the salsa at this point to either add more sugar if too bitter or more vinegar if too sweet, but I found this to be the perfect balance!
Now remove the jars one at a time from the canning pot and ladle the salsa into the jars, leaving a half-inch or more head space from the lid. Wipe the rim of the jars to remove any spilled salsa on them (which is easy to do!). Tighten the lids only hand tight, and do not over-tighten them. Place all the jars back into the canning pot still filled with hot water, then bring up to a roiling boil. Big boil OK? Not just a few bubbles. Process at a full boil for 15 minutes for 0-1000 ft. altitude, 20 minutes for 1000- 6,000 ft. altitude, and 25 minutes above that. I fell into the second category in case you are interested.

Canned Fire-Roasted Tomato Salsa
At your recommended boiling mark, turn off the heat and let sit five minutes. Remove the jars from the pot, then place them on some thick towels to cool down. The lids will “POP” when they have cooled when creating the suction for the canning process. I did not get to hear this phenomenon this time as I had to go upstairs to my home office to work for the remainder of the day.
So there it is! This took me a little under four hours from start to finish. Yes, it’s a half-day project, but it was completely satisfying to turn our homegrown tomatoes into some delicious salsa for future snacks and meals.
Tags: Anaheim pepper, apple cider vinegar, canned salsa, canning, cilantro, cumin, fire roasted, garlic, homegrown, homemade, jalapeno, lime juice, Mexican oregano, Pasilla peppers, serrano chile, tomatoes