Tag Archives: basil

Lazy Sunday Italian Tomato Gravy

6 Nov
Lazy Sunday Italian Tomato Gravy

Lazy Sunday Italian Tomato Gravy

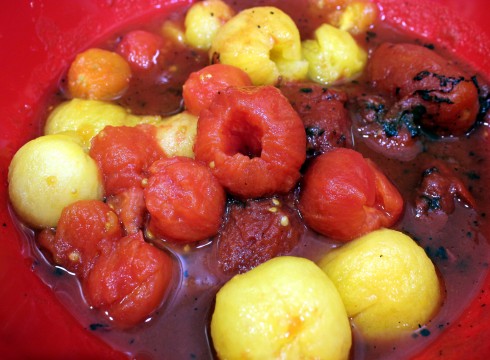
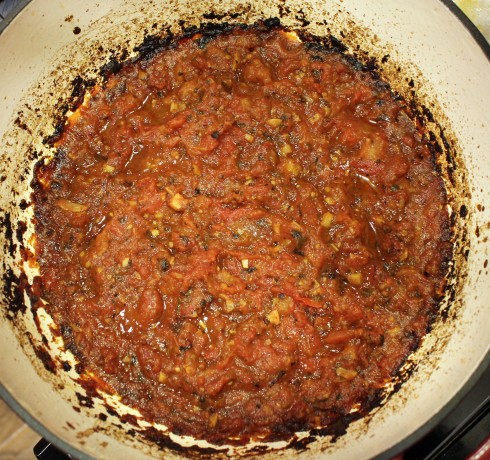
After we harvested the last of our ripe tomatoes before the first freeze hit, I decided to grab a bunch of the green tomatoes and hope for the best. These languished on the countertop for a couple of weeks as they slowly ripened. Yesterday I decided I better do something with the ones that finally ripened. Older tomatoes like this need to be cooked down, so slow-roasting them all day seemed the perfect way to spend my Sunday while binge-watching Chopped episodes. And it made the house smell divine!

While I used fresh tomatoes for half this recipe (I blanched and peeled them first), by all means use all canned tomatoes, and preferably San Marzano. Mine were fire-roasted but plain works equally as well. I had to add some additional water during the cooking since I didn’t have the canned juice to go with fresh tomatoes.

This recipe is halved, but by all means double it, as this tomato gravy can go with a multitude of dishes beyond pasta. We served it over rice with garlicky sauteed shrimp. I plan on poaching some eggs in the leftover sauce for a future meal. So rich and incredibly tasty!!

Lazy Sunday Italian Tomato Gravy
Adapted from Serious Eats/J. Kenji López-Alt

2 28-ounce cans whole peeled tomatoes
2 tablespoons extra-virgin olive oil
2 tablespoons butter
4 cloves garlic, minced
1/2 teaspoon red pepper flakes
1 1/2 teaspoons dried oregano
1 1/2 teaspoons dried basil
8 baby carrots
1/2 medium onion, halved
Kosher salt and ground black pepper

Fresh and Canned Peeled Tomatoes

Fresh and Canned Peeled Tomatoes

Lower rack in oven to bottom position and preheat oven to 275 degrees. In a large bowl, crush the tomatoes thoroughly with your hands. Transfer 1 1/2 cups of the crushed tomatoes to a container and refrigerate until later.

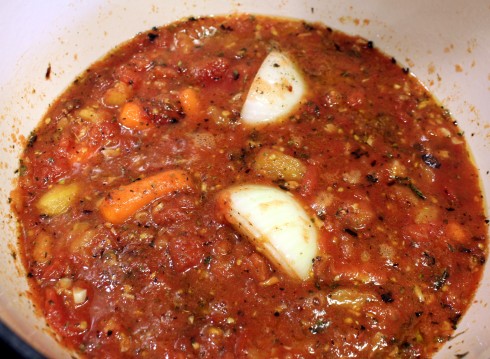
Heat olive oil and butter over medium heat in a Dutch oven until butter is melted. Add garlic, red pepper flakes, oregano, and basil, and cook for about two minutes until garlic is fragrant. Stir in the tomatoes, carrots and onion until combined. Season with salt and pepper. Bring to a simmer.

Tomato Gravy Ready to Slow Cook

Tomato Gravy Ready to Slow Cook

Cover the pot with the lid slightly ajar and place in preheated oven. Walk away and enjoy your day, coming back to stir about every 1 1/2 to 2 hours. Add a little water if needed throughout. The sauce should reduce by about half and darkened to a deep red, about 5 to 6 hours.

Remove from oven, then discard onion quarters and carrots. Add the reserved tomatoes and stir to combine. Taste and adjust seasoning with additional salt and pepper. Serve immediately over pasta, rice or any which way you want. Leftovers can be refrigerated up to a week or frozen. Reheat from frozen with 1/2 cup water.

p.s. Austin Street Taco followers: I’ve closed my cart down now for the winter, but had a meeting today about a possible and exciting future venue next year! Stay tuned!

Download and Print this Yummy Recipe!

Zucchini Pizza Casserole

3 Sep
Zucchini Pizza Casserole

Zucchini Pizza Casserole

While Harvey was flooding Houston and other parts of the south, Oregon has been hell-bent on burning itself down. The air quality is downright nasty and unhealthy right now — and has been — for several weeks. But through that all our local farmer’s market still plugged on, albeit many vendors and shoppers short. And with the lack of shoppers came an abundance of fresh produce my way in exchange for some of my Austin Street Tacos, and equally as much free to take home at the end of the day.

One of my dear blogging friends, Jodi over at The Creative Life in Between, had a perfect recipe posted on her site a couple of weeks ago that made the perfect candidate for some of the produce. While my time is short for blogging while running my cart, I did have a reprieve today to post this fabulous recipe as the concert I was going to sling tacos at tonight was canceled due to the smoke.

I pretty much made this recipe as written, using ground burger and halved the recipe. I’ll just linky you over to her recipe, as she has a handy-dandy printable of it too! I know MANY of you have an abundance of zucchini out there, so please plan on adding this to the list of many things to make with it. It’s quite easy AND delicious!

Click here for the recipe —> Zucchini Pizza Casserole

Chicken Dumpling Casserole

5 Nov
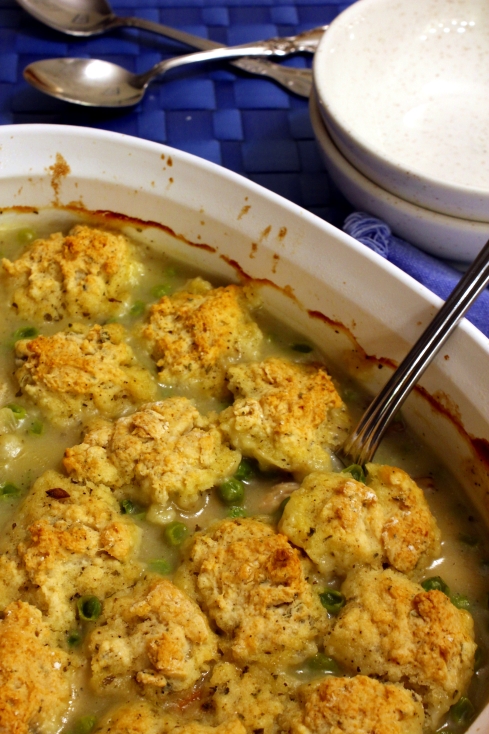
Chicken Dumpling Casserole

Chicken Dumpling Casserole

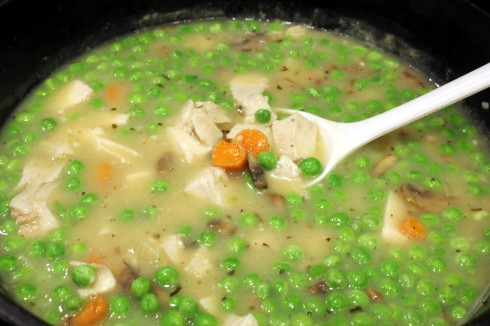
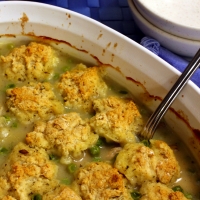
The last time I made chicken dumplings the hubs complained it was too soupy, so decided to make it into a casserole where it would thicken up nicely for him. Typically I would make this with celery in it, but since I didn’t have any and trips to the store are few and far between for me, I substituted some fresh mushrooms we had on hand instead. And to make it a tad fancier, I added some basil that I dried from my garden to the dumplings too.

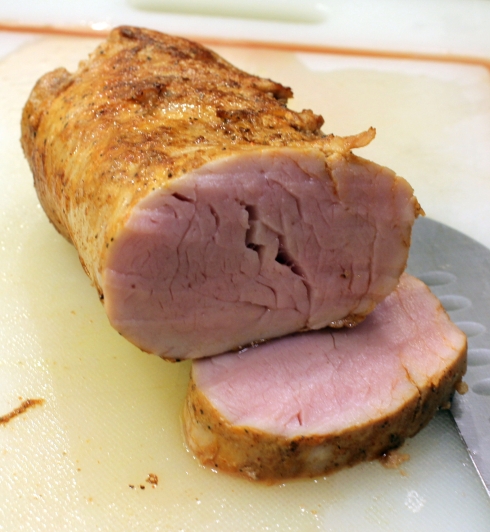
I precooked the chicken with my sous vide immersion circulator earlier in the day, but you can substitute rotisserie chicken instead. I have been experimenting with that cooking method and FINALLY cooked a pork tenderloin that was juicy and tender as any beef tenderloin you could have!

Juicy Pork Tenderloin

Juicy Pork Tenderloin

Yes, pork is safe to eat when pink in the middle! My husband was a little put off by the pink, so he pan-seared his slices in a hot cast iron pot for a few seconds on each side. No sous vide recipe as of yet until I have a solid recipe for you.

But back to the dumplings. This is thick and hearty, yummy comfort food, perfect for welcoming in the winter!

Chicken Dumpling Casserole

1/2 cup chopped onion
1/2 cup chopped carrots
1/2 cup chopped mushrooms
2 tablespoons olive oil
1 tablespoon butter
2 cloves garlic, minced
3 tablespoons flour
Salt and ground black pepper, to taste
1/2 teaspoon dried basil
3 cups homemade or low sodium chicken stock
1 cup frozen peas, thawed
2 cups cubed cooked chicken

Dumplings

1 cup biscuit/baking mix
1 teaspoon dried basil
1/3 cup milk

Preheat oven to 350 degrees.

In a large skillet, sauté onions, carrots, and mushrooms in the olive oil and butter until tender, about 10 minutes. Add garlic in the last minute.

Carrots, Onions, and Mushrooms

Carrots, Onions, and Mushrooms

Stir in flour, salt and pepper, basil and mix until blended. Add the chicken broth and bring to a boil, stirring constantly. Reduce heat and simmer until thickened, about 5 minutes. Add peas and chicken and mix to combine. Pour into an oil-sprayed 2-quart casserole dish.

Chicken Dumpling Filling

Chicken Dumpling Filling

For the dumplings, combine baking mix and basil in a small bowl. Stir in milk with a fork until moistened. Drop by tablespoonfuls over the chicken mixture.

Bake uncovered 30 minutes. Cover and bake 10 minutes longer. Serve in bowls with a side salad.

Download and Print this Recipe

Download and Print this Yummy Recipe!


Grated Heirloom Tomato and Shrimp Pasta

27 Aug
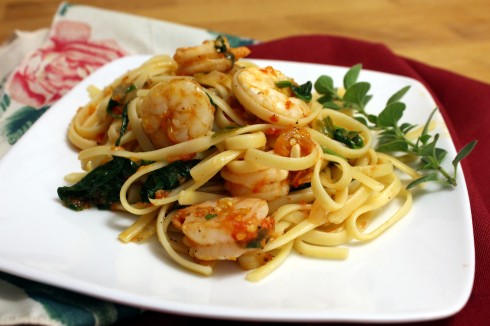
Grated Heirloom Tomato and Shrimp Pasta

Grated Heirloom Tomato and Shrimp Pasta

My good WP and FB friend Kat shared a video a couple of weeks ago of how to make a fresh box grater tomato sauce, and with a garden full of ripening tomatoes I knew I would be making a fresh-grated tomato sauce in the immediate future.

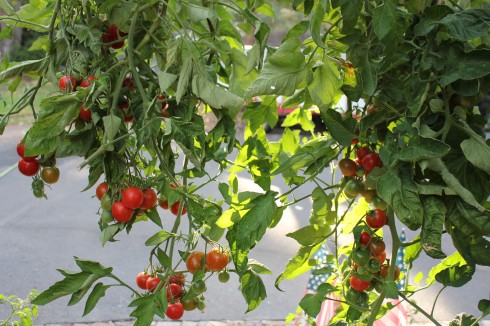
Hanging Tomato Plants

Hanging Tomato Plants

And of course I had to add shrimp, as my hubby and I are really enjoying our lack of daughter’s presence for dinners this summer so that we can eat this scrumptious shellfish, which is the ONLY seafood she doesn’t like.

The tomatoes in our garden are really small this year, so I didn’t even bother to slice them in half before grating. I just trimmed a tiny slice off the top, then grated away! I am sold on this method of preparing tomatoes for a sauce. Since I was planning on adding shrimp to this, I gussied everything up and cooked it for a short spell so that the shrimp would have a delicious sauce to simmer in.

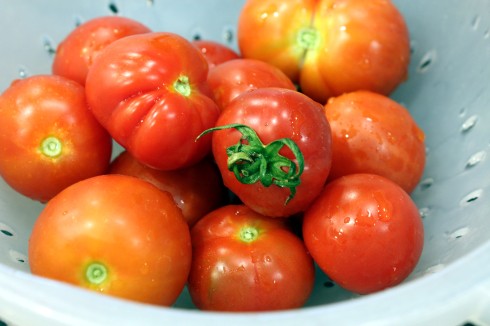
Fresh Picked Heirloom Tomatoes

Fresh Picked Heirloom Tomatoes

My husband said I should put a tomato meter rating on my recipes, like the movie review site Rotten Tomatoes does, lol. With that, we give this recipe 5 ripe tomatoes! (Note: This recipe feeds two. Feel free to double as necessary.)

So what am I waiting for?! Here is the recipe:

Grated Heirloom Tomato and Shrimp Pasta

4 ounces dry Linguine or other pasta
3 tablespoons olive oil, divided
2 cloves garlic, peeled and minced
1/4 sweet onion, chopped
Large splash of good white wine
Enough tomatoes for 1 cup grated sauce
1 tablespoon chopped fresh oregano leaves
1 tablespoon chopped fresh basil leaves
Salt or Mrs. Dash and ground black pepper, to taste
Large pinch of crushed red pepper flakes
1/4 pound raw shrimp, peeled and deveined
2 cups fresh spinach, roughly chopped

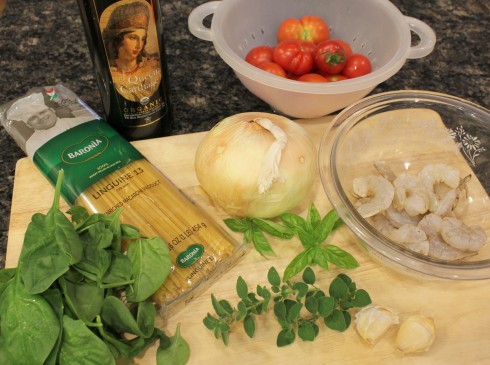
Shrimp and Pasta Dish Ingredients

Shrimp and Pasta Dish Ingredients

Cook pasta according to package directions. When done, reserve about a half cup of liquid, then drain and return to pot, cover and keep warm on lowest setting. Add small splashes of reserved pasta water and stir occasionally to keep it from sticking while preparing the rest of the dish.

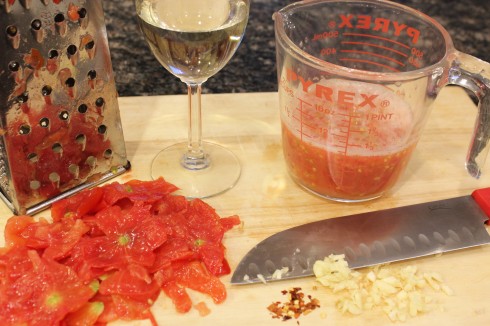
While pasta is cooking, slice a small piece off the top of each tomato and grate flat-handed on a box grater down to the skin. Grate enough tomatoes for 1 cup of sauce.

Grated Tomatoes and Such

Grated Tomatoes and Such

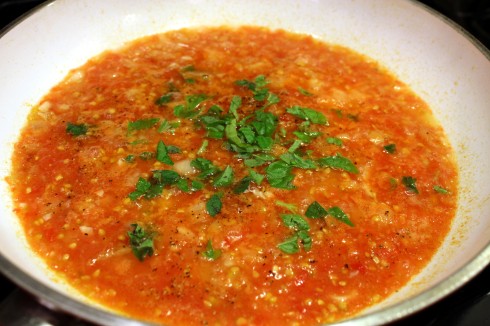
Add half the oil to a skillet over medium heat and cook the onion until translucent. Add the garlic for a minute more then add in a splash of wine. Add the rest of the oil, the grated tomato sauce, oregano, basil, and seasonings. Bring to a low simmer.

Simmering Fresh Tomato Sauce

Simmering Fresh Tomato Sauce

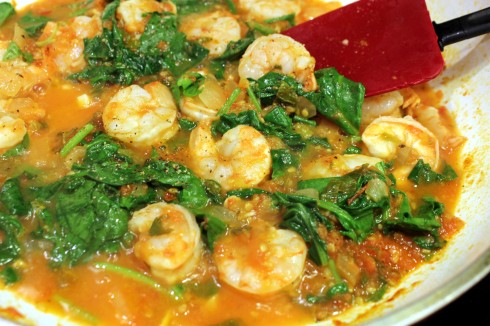
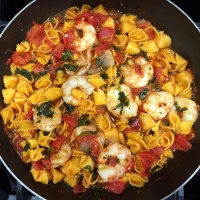
Nestle the shrimp into the sauce and cook for a few minutes, then flip over with tongs and cook for a few more until almost done. Last, add the chopped spinach, and simmer until wilted and shrimp are just cooked through.

Shrimp and Spinach Added to Sauce

Shrimp and Spinach Added to Sauce

Stir in the cooked pasta and additional reserved water until desired consistency. Serve on plates with a side salad and/or rustic bread.

Cooked Pasta Added to Sauce

Cooked Pasta Added to Sauce

Note how I did NOT add any cheese to this, as apparently the European world eschews cheese on seafood so I followed suit. I did not miss the cheese at all! I must say, this is the brightest, freshest tomato sauce I have ever tasted.

Oh! And if you want to see the referenced video, here it is: How to Make Fresh Tomato Sauce | Food and Wine

Download and Print this Recipe

Download and Print this Yummy Recipe!


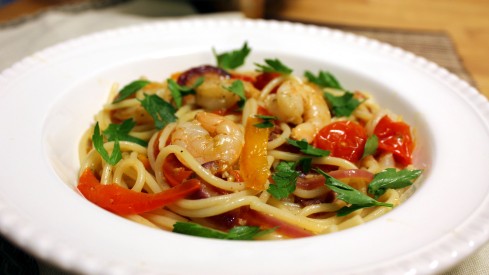
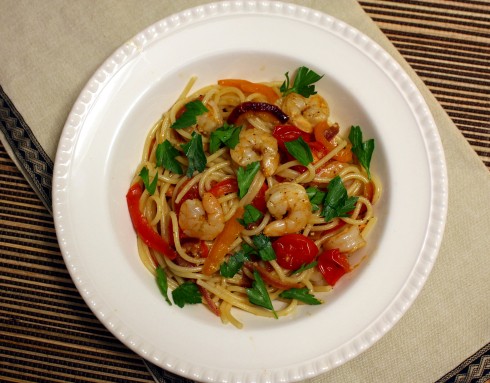
Drunken Shrimp with Spaghetti and Peppers

18 Jun
Drunken Shrimp with Spaghetti and Peppers

Drunken Shrimp with Spaghetti and Peppers

When I saw this recipe come up in my reader board last week, I knew this was exactly what I would be making for dinner. Thank you so much Marisa for the inspiration and a new favorite shrimp and pasta dish!

We’ve been on a huge shrimp kick lately in this house, largely because we’ve scored some great deals on shrimp lately and also because the teenage daughter does not like shrimp and has been nearly non-existent for dinners at home as of late. That’s bonus for hubs and I because that means shrimp for dinner!

We already had most everything on hand already so all I had to do was buy a yellow pepper to pretty it up and a fifth of brandy. Don’t skip the wine and brandy if you can tolerate alcohol, as both add such a unique flavor to the dish! Otherwise you can sub a little chicken broth and maybe a splash of vinegar for some zing.

This will be a meal I plan on making often, and once you try it I think you’d agree! This serves two, so double or triple if feeding more.

Drunken Shrimp with Spaghetti and Peppers
Adapted from Spaghettoni with Shrimp & Peppers by Marisa’s Italian Kitchen

1/2 pound raw shrimp
Large squeeze of fresh lemon juice
Ground pepper and Mrs. Dash or salt, to taste
1/2 tablespoon butter
1/8 cup olive oil
1/2 cup sliced red onion
1/2 cup sliced red pepper
1/2 cup yellow or orange pepper
1 clove garlic, minced
1/2 cup cherry or grape tomatoes, halved
A couple fresh basil leaves, chopped
Pinch of crushed red pepper flakes
Additional ground pepper and Mrs. Dash or salt, to taste
1/4 cup white wine
1/8 cup brandy
1 tablespoon butter
4 ounces dried spaghetti
Grated Parmesan cheese, for serving
Chopped parsley, for serving

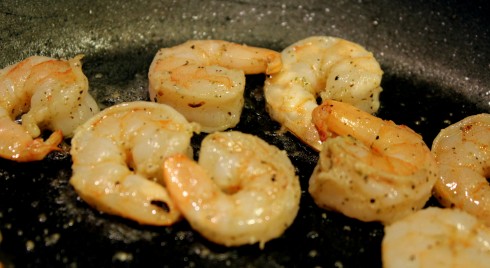
Shrimps!

Shrimps!

Season the shrimp with lemon juice and ground pepper and Mrs. Dash, or salt, to taste. Quickly sauté in a large skillet with the half tablespoon of butter until just pink. The shrimp will cook a little more later. Remove from pan and set aside

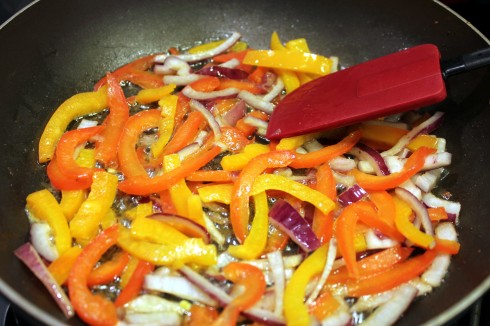
Set a pot of water for the spaghetti to boil on the stove. Meanwhile, heat the olive oil in the same large skillet and cook the red onion and peppers for about 5 minutes.

Medley of Peppers and Onions

Medley of Peppers and Onions

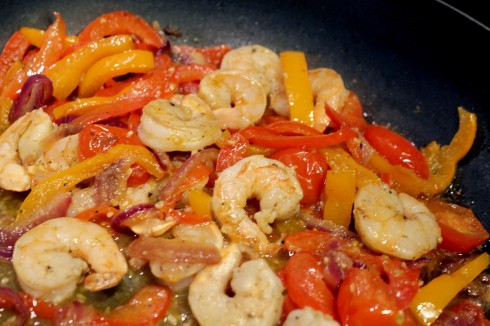
Stir in the garlic, tomatoes, basil, red pepper flakes and additional seasonings, to taste. Cook for several more minutes, then add in the white wine, brandy and the butter. Stir to combine, then let simmer for about 10 minutes. Add the reserved shrimp in the last few minutes of simmering time.

Shrimp and Pepper Sauce Ready for Pasta

Shrimp and Pepper Sauce Ready for Pasta

Your pasta water should be boiling while you let the sauce simmer, so add the pasta and cook according to package directions. When done, drain, and divide the pasta into bowls or on plates. Pour the shrimp sauce over the pasta and serve with fresh grated Parmesan cheese and chopped parsley. Serve with a side salad.  (I totally spaced on adding the Parmesan before shooting the photos, but I did grate some over it!)

Drunken Shrimp with Spaghetti and Peppers2

Drunken Shrimp with Spaghetti and Peppers2

Download and Print this Recipe

Download and Print this Yummy Recipe!

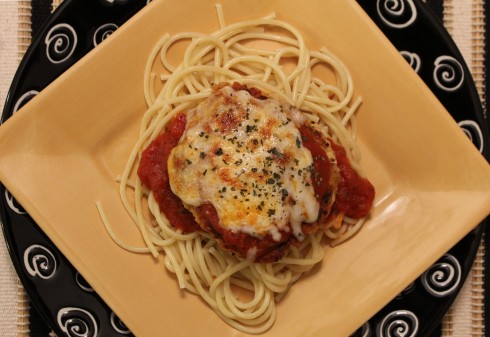
Pan-Fried Chicken Parmesan Croquettes

6 Feb
Pan-Fried Chicken Parmesan Croquettes

Pan-Fried Chicken Parmesan Croquettes

Finding creative ways to use leftover deli rotisserie chicken (or even home-roasted for that matter) can sometimes be a challenge. I was pretty stoked when this recipe for chicken croquettes showed up in my WP reader board for a unique and delicious way to use up some leftover cooked chicken. (Thank you Fabulous Fare Sisters for making my day!)

My local grocery just started offering rotisserie chicken breasts pieces for sale instead of the whole chicken. OMG what??? I am not a huge fan of dark meat (although I know it is juicier, but I let hubby always take care of that part of the chicken.) But wow, it was so nice to get some deli-roasted chicken *knowing* all the leftovers would be used up before freezing it and turning it into chicken stock. Yes, that is a nice feeling indeed…

These tasty croquettes were not that hard at all to make, and delivered on taste and were not dry at all. We were all very impressed! The adapted recipe version I am giving you made 5 croquettes, so now I have two in the freezer for an easy future meal for just the hubs and I when daughter isn’t home for dinner. Hooray!

Pan-Fried Chicken Parmesan Croquettes
Adapted from Chicken Parmesan Croquettes at Fabulous Fare Sisters

2 1/2 to 3 cups finely chopped cooked chicken (I used my Ninja food processor)
1 large egg
1/2 cup seasoned bread crumbs (homemade are good!)
1 tablespoon minced garlic
1/3 cup mayonnaise
1/4 cup chicken stock or broth (low sodium or homemade)
Ground pepper and salt or Mrs. Dash seasoning, to taste
1 tablespoon dried oregano (from our garden!)
2 tablespoons vegetable oil
1 cup marinara sauce, heated through
Shredded Mozzarella cheese for topping the croquettes
Dried or fresh basil, for garnish

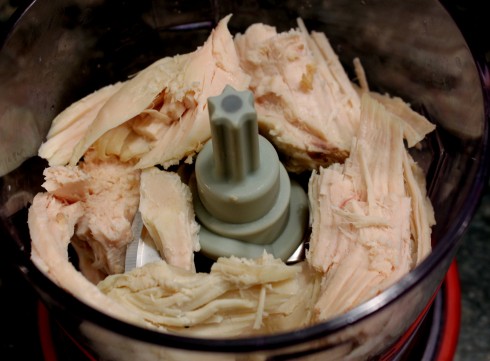
Cooked Chicken in Ninja Processor

Cooked Chicken in Ninja Processor

Finely chop/mince the cooked chicken, either with a knife or in a food processor.

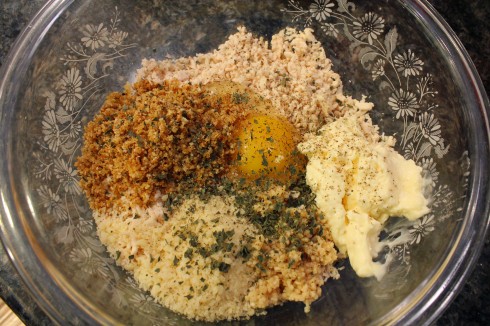
In a large mixing bowl, add the first 8 ingredients and combine together using your hands until blended well.

Croquette Ingredients

Croquette Ingredients

Form mixture into patty size of choice — we ended up with 5.  Add oil to skillet over medium heat, then cook on each side until golden, about 3 minutes each side (remember the chicken is already cooked).  Add more breadcrumbs on top (if you have more) when you flip over for extra flavor.

Frying the Croquettes

Frying the Croquettes

Preheat broiler in oven or toaster oven.

Croquettes Ready for Broiling

Croquettes Ready for Broiling

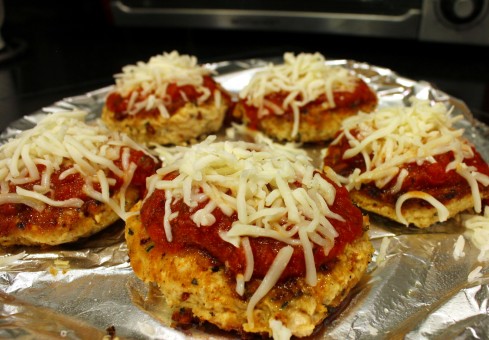
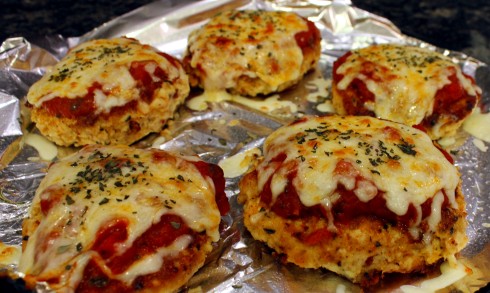
Top each croquette with a couple of tablespoons of heated marinara sauce of choice, then Mozzarella, and broil until cheese is bubbly, about 5 minutes.

Broiled Croquettes

Broiled Croquettes

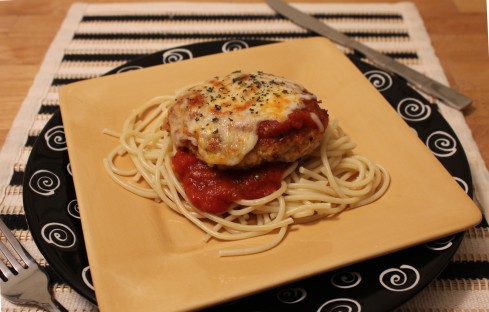
Garnish with dried or fresh chopped basil. We served this over cooked pasta, but you can serve with any grain or pasta and a salad.

Pan-Fried Chicken Parmesan Croquettes

Pan-Fried Chicken Parmesan Croquettes

Download and Print this Recipe

Download and Print this Yummy Recipe!

Spicy Canned Tuna Ceviche

7 Jun
Spicy Canned Tuna Ceviche

Spicy Canned Tuna Ceviche

I planned on making this for my Saturday lunch, but all sorts of errands got in the way. After a two and a half hour shopping binge trip at three stores, it was time to pick up my 16-year-old daughter from her 4-hour SkidCar course at noon (which I begrudgingly got up at 7:30 am on a weekend to take her to it). I had bought all the ingredients for this recipe, in addition to restocking our refrigerator with staples. Our freezer in the fridge went KAPUT a couple of weeks ago, and then the refrigerator side slowly went downhill until it barely kept milk cold enough to drink. We’d been “cooler camping” at our house for the last few days until our new fridge arrived and had to toss out a bunch of stuff. Thank goodness we have a chest freezer in the garage, as I would have been heartbroken to lose the rest of our quarter cow we bought last fall. Nonetheless, after all that shopping I didn’t have time to make this, let alone get the groceries out of the car before I had to pick her up! So we stopped at a local fresh Mexican food joint on the way home and I had a taco and she had a burrito.

For dinner last night, I made my staple summer-time grilled tortilla pizza! I marinated then grilled the chicken, tossed the tortilla on the grill, added pesto, artichoke hearts, the chicken, mozzarella and fresh basil from my herb garden.

Fresh Basil in Herb Garden

Fresh Basil in Herb Garden

I made this and other tortillas pizzas all last summer. If you want the recipes, click here —> Grilled Tortilla Pizzas.

Fresh Grilled Chicken, Artichoke and Pesto, Tortilla Pizza

Fresh Grilled Chicken, Artichoke and Pesto Tortilla Pizza

p.s. You are asking yourself, what is a SkidCar course? It’s an amazing driving course using a special car and hydraulics to teach someone how to drive on ice and snow (or how to get out of a skid on any surface), even if there is no snow on the ground! My daughter will get a 30% discount on insurance now, we checked with our company. Win-win, and I’ll feel more secure now when the snow flies again in the winter with her driving skills. I arrived about 5 minutes early and got to see my daughter go into several “skids” and safely recover from them! For information on that course (not available in all areas) click here —> SkidCar course).

And yes, I made this great lunch today, finally. It was every bit as delicious as I expected it to be, and my husband said he really like it a lot! Now on to the recipe!

Spicy Canned Tuna Ceviche
Credit for this goes to Gina for Canned Tuna Ceviche at Skinnytaste.com

2 tablespoons minced red onion
1 to 1 1/2 limes, juiced (about 1/8 cup)
1 teaspoon olive oil
1 can chunk white albacore tuna packed in water, drained
2 tablespoons chopped fresh cilantro (or parsley)
1/2 to 1 jalapeño, deseeded and minced
1 medium seeded plum tomato, finely diced
Dash of Sriracha sauce (optional)
Sea salt and freshly ground black pepper, to taste
Romaine lettuce leaves, for serving
Sliced avocado, for garnish
Tortilla chips, for garnish

Fresh Ceviche Ingredients

Fresh Ceviche Ingredients

In a medium bowl, combine the red onion, lime juice, and olive oil. To that, add the tuna, cilantro, jalapeño, tomato, and Sriracha, if using. Taste and add salt, pepper, and more lime juice, if needed.

Ceviche Ready to Chill

Ceviche Ready to Chill

Gosh I’m a messy cook! Cover and refrigerate for a minimum of 20 minutes. Serve on a bed of romaine lettuce leaves garnished with slices of avocado and tortilla chips. A wonderful light summer lunch salad!

Spicy Canned Tuna Ceviche

Spicy Canned Tuna Ceviche

Download and Print this Recipe

Download and Print this Yummy Recipe!

Roasted Cauliflower and Chicken Sausage Casserole

26 Apr
Roasted Cauliflower and Chicken Sausage Casserole

Roasted Cauliflower and Chicken Sausage Casserole

I “borrowed” this recipe from my foodie blogging friend Seana over at Cottage Grove House. Her recipes have never failed me, and this one didn’t either. The flavors in this are bright and flavorful! If we hadn’t left town for a couple of days this would have been completely consumed. The original recipe called for almond meal and nutritional yeast, but since I couldn’t find either of those I subbed in with ground roasted almonds and shredded Parmesan cheese.

Side note: This made a LOT of food for my small family so I plan on halving it next time. Part of that was my fault for using a pound of chicken sausage instead of 1/2 pound — DOH! But the family liked it and that’s what counts, right? 😀

All Natural Chicken Sausage

All Natural Chicken Sausage

Roasted Cauliflower and Chicken Sausage Casserole
Adapted from Roasted Cauliflower and Chicken Sausage Casserole at Cottage Grove House

1 medium head of cauliflower (roughly 2 pounds) cut into bite size florets
2 teaspoons minced garlic
2 1/2 tablespoons extra virgin olive oil, divided
1 pound organic chicken sausages, removed from casings (1/2 pound would be plenty, too)
1 cup diced onion
1/8 teaspoon dried, crushed thyme
1 28-ounce can Italian-style diced tomatoes with garlic, oregano and basil
Sea salt and freshly ground black pepper to taste
1/2 cup roasted almonds, ground in a food processor
1/2 cup shredded Parmesan cheese

Roasted Cauliflower

Roasted Cauliflower

Preheat oven to 375°F.  In a large bowl, toss the cauliflower florets with the minced garlic and 1 1/2 tablespoons olive oil. Spread the cauliflower on a baking sheet and roast for approximately 20 minutes, turning them over halfway through cooking time. When the cauliflower is lightly browned, remove from the oven and set aside.

Browning the Chicken Sausage and Onions

Browning the Chicken Sausage and Onions

Heat the remaining tablespoon of olive oil in a large skillet over medium high heat. Add the chicken sausage, breaking it up as you add it. Cook for 10 to 12 minutes until it is cooked through and browned thoroughly. Lower the heat to medium low and add the onions, and thyme. Sauté the mixture for about 5 to 7 minutes until the onions have started to soften.

Tomatoes Added to Chicken Sausage Mixture

Tomatoes Added to Chicken Sausage Mixture

Add the Italian diced tomatoes to the skillet, with its liquid. Stir thoroughly and cook for 5 more minutes. Add salt and pepper to taste. Last, stir in the cauliflower until all pieces are coated with the tomato liquid.

Cauliflower Added to Mixture

Cauliflower Added to Mixture

Spray a 3-quart casserole with olive oil and pour the cauliflower and sausage mixture into the dish. In a small bowl combine the ground almonds and Parmesan cheese and distribute evenly over the casserole. Place in the oven and bake for 25 minutes. Remove and let stand for 5 minutes before serving.

Casserole Ready for Almond Cheese Topping

Casserole Ready for Almond Cheese Topping

Download and Print this Recipe

Download and Print this Yummy Recipe!

Creamy Squash, Spinach, and Chicken Polenta Casserole

17 Apr
Creamy Squash Spinach and Chicken Polenta Casserole

Creamy Squash Spinach and Chicken Polenta Casserole

Strange ingredients? Please hear me out. This is NOT weird at all and received multiple thumbs up from the family. Gosh, even the leftovers were awesome. There is something about the down-home creamy corn base from the polenta and slightly sweet taste from the squashes and then the spinach and chicken that just made this an incredibly surprising meal! My eyes gone wide, you know what I mean? WOW! (This actually doesn’t even need the chicken and could be vegetarian, but the meat was already defrosted.)

I had the defrosted chicken breast and a fresh bag of spinach, and set my sights on something new for the combination. I have made my Balsamic Chicken and Spinach more times than I can count the past few years. Somehow I came across some vegetarian polenta and spinach casserole recipes, and tasked myself with coming up with a recipe my family would actually eat.

I found a great recipe with fresh spinach and mushrooms but it used pre-made polenta cakes. Another recipe I found had a creamy homemade polenta base with zucchini, squash and tomatoes. Well, the daughter doesn’t “do” mushrooms, I only had fresh spinach and dried polenta grain on hand, so decided to mix up the two recipes and came up with my own original. You will NOT be disappointed. (Aside note: I was following the vegetarian version recipes and totally spaced on browning the chicken until assembly. Yikes! So please, follow my instructions below instead of doing what I did. Or, omit chicken altogether. It all worked out, we only ate 10 minutes later than the original plan.)

Creamy Squash, Spinach, and Chicken Polenta Casserole

1 pound boneless, skinless chicken (breasts or thighs)
Ground black pepper, and salt or Mrs. Dash, to taste
1 tablespoon olive oil
1 1/2 cups water
2 cups milk
1 tablespoon butter
1 cup dried polenta (course cornmeal)
2 tablespoons olive oil
1/2 to 3/4 cup chopped onion
1 small zucchini, sliced and quartered (about 1 cup)
1 small yellow squash, sliced and quartered (about 1 cup)
1 15-ounce can of diced tomatoes with oregano, garlic and basil (if yours are plain diced, add dried or fresh herbs to taste)
1 8 to 10-ounce bag fresh spinach
Ground black pepper, to taste
1/2 cup shredded fresh Mozarrella cheese
1/2 cup shredded Parmesan cheese

Cut the chicken into bite-sized pieces and season to taste with ground black pepper and salt or Mrs. Dash. Heat a skillet with the 1 tablespoon of olive oil over medium heat and brown the chicken about 5 to 7 minutes, stirring often. Set aside.

Cooking the Creamy Polenta

Cooking the Creamy Polenta

Heat 1 1/2 cups of water in a medium sauce pot to boil. Stir together the milk and polenta to make a slurry, then add to the boiling water. Bring up to a simmer then reduce the heat and simmer for about 25 minutes, stirring occasionally, until thickened. (If you want you could brown the chicken now in this step. I just didn’t want you to forget!)

Creamy Polenta Poured into Pan

Creamy Polenta Poured into Pan

When the polenta is done, pour it into an oil-sprayed 13 x 9 or so sized casserole dish and set aside.

Chopped Onion, Zucchini, and Squash

Chopped Onion, Zucchini, and Squash

Meanwhile, add the 2 tablespoons olive oil to a skillet over medium heat. Add the onion, garlic, zucchini, and squash and sauté until the onions are softened.

Vegetable Mixture Simmering

Vegetable Mixture Simmering

Add the tomatoes (and spices if tomatoes aren’t pre-seasoned). Bring up to a simmer for 10 minutes.

Add the browned chicken and mix to combine. Now, by handfuls, tear up the spinach and add to the mixture and stir in until all is added and wilted.

Spinach Wilting into Vegetables

Spinach Wilting into Vegetables ~ WAIT ~ You don’t see that forgotten chicken in the background you had to cook first, right??

Meanwhile (again), preheat the oven to 350 degrees. After the vegetable mixture is done, spread it evenly on top of the polenta in the casserole dish. Top with a combination of shredded Mozarella and Parmesan cheeses.

Creamy Squash Spinach and Chicken Polenta Casserole Ready to Bake

Creamy Squash, Spinach, and Chicken Polenta Casserole Ready to Bake

Bake for about 25 minutes until it is heated through and bubbly and the cheese has melted. Turn the heat up to broil and broil for 5 minutes. Take out of oven and let rest for 5 minutes. Serve on plates or in bowls. Nothing else is needed, as this is an entire meal! If this weren’t so fugly coming out of the casserole dish, I’d call it guest-worthy (taste-wise)!

p.s. (My sister arrived today from Texas for 10 days, so I might not get a post out for awhile. Enjoy browsing my archives if you want if you are a newcomer!)

Casserole Half-Eaten

Casserole Half-Eaten~ YEP! Three of us pretty much wiped out half of a lasagna pan of this in one sitting!


Download and Print this Recipe

Download and Print this Yummy Recipe!

Grilled Chicken Tortilla Pizza ~ Two Ways!

25 Jun
Tortillas Pizzas and Monkey on Unicycle Pizza Cutter

Because one cannot have too many Monkey on a Unicycle Pizza Cutters, right?

I have a friend who joked that my family will only eat grilled tortilla pizzas the rest of the summer. I am afraid she might not be far off the mark! This week’s riff included my daughter’s standard pepperoni and black olive, and my new take on the chicken pesto version by adding quartered artichoke hearts. My husband still was not sold on the pesto idea (even though he really liked my last one) and his vision was a remake of a popular take-and-bake pizza with both chicken and bacon.

I let him fry up the bacon outside on the grill’s external propane burner while I grilled the chicken on the regular grill. Teamwork!

Grilled Chicken and Artichoke Pesto Pizza

Grilled chicken, cut into bite-sized pieces
10-inch flour tortilla
Pesto sauce (store-bought or homemade)
Canned or frozen artichoke hearts, quartered
Sliced tomato
Fresh mozzarella cheese chunks
Fresh basil ribbons

Grilled Chicken, Artichoke, Bacon and Mushroom Pizza

Grilled chicken, cut into bite-sized pieces
10-inch flour tortilla
Marinara sauce (store-bought or homemade)
Canned or frozen artichoke hearts, quartered
Sliced mushrooms
1 or 2 slices cooked bacon, torn into chunks
Fresh mozzarella cheese chunks

Marinating Chicken

Marinating Chicken

Start off by cutting the smallish chicken breast in half lengthwise and pound it thin, grind a bunch of black pepper over it, and marinate it in an olive oil and vinaigrette dressing (store-bought) for a half hour. You can use any oil-based dressing for this, or make your own! Or for a time-saver, you can use rotisserie chicken from the deli.

Grilling the Chicken

Grilling the Chicken

Meanwhile, preheat the grill to high heat. When ready, cook the chicken on the grill about 4 minutes on each side, or until no longer pink in the center. Remove, tent with foil, and set aside. Turn the heat on the grill down to medium to medium-low.

Frying up the Bacon

Frying up the Bacon

If you have a bacon-eating spouse, they can cook the bacon while you are grilling.

Spray the tortilla(s) on one side and grill for about 3 minutes, until crisp and starting to puff up on the top side. Remove to plate, then spray the non-grilled side with oil. Flip over, then spread sauce of choice over top on the grilled side. Then add your toppings of choice.

Tortilla Pizzas Ready to Grill

Tortilla Pizzas Ready to Grill

Place back on grill, cover, and cook for about 5 more minutes until cheese is melted. Add a green salad on the side, and dinner is served!

Tortilla Pizzas Fresh off the Grill

Tortilla Pizzas Fresh off the Grill

Download and Print this Recipe

Download and Print this Yummy Recipe!