Authentic Tex-Mex Cheese Enchiladas with Chile Gravy
I was on a mission to both redeem and console myself after the prior night’s dinner disaster. I was wanting some Tex-Mex. Gooey, cheesy, spicy Tex-Mex. The kind of stuff you get at those mom and pop shops in the little towns scattered between the wide-open roads and ranches of Texas.
I’ve made plenty of Tex-Mex dishes in the past, and have a standard chile con carne recipe used for a lot of them. But mostly, when I cook up a Tex-Mex dish I don’t rely much on a recipe. It’s my take that any taco, burrito, tostada, or enchilada are just different shapes and cooking methods for pretty much the same ingredients, right?

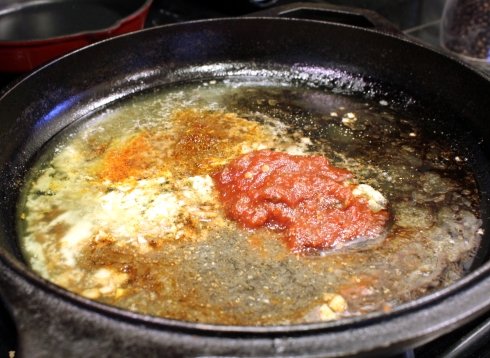
Spices for Chile Gravy
But there was one dish I had yet to conquer, and that was the Authentic Tex-Mex Cheese Enchiladas with Chile Gravy. And what better place to start than the recipe from the Enchilada Queen herself, Sylvia Casares? She hails from the small town of Brownsville, Texas and currently owns two enchilada restaurants in Houston as well as offers cooking schools and catering.
I found a scaled-down version, time-wise, of her recipe in Texas Monthly magazine. I took my time and cooked everything linearly, instead of concurrently. Basically, I didn’t do any “meanwhile” cooking. But please, feel free to multitask on this one, I was enjoying each individual process so that I could become more familiar with each step for the next time I make these.
When the enchiladas came out of the oven, I was all set to take a plated shot (as best I could, as they come out of the pan pretty messy), but when I went to pick up the plate to move it to the table, it slipped out of my hands! In my spastic move to keep it from tumping upside down onto the floor, I smashed my other arm right on top of the plate, making a mess of not only the plate, but my shirtsleeve. The dish didn’t crash to the floor, but I was left with a pretty pitiful-looking plate of enchiladas and beans. And a dirty shirt. Thank goodness I had the foresight to wear an old camping shirt for this foray. I just sighed and thought “forget it, I’m hungry.” And sat right down to eat the mess.

The Ill-Fated Shirt
Ohhhh, but it was sooo good! I got a thumbs-up from the hubby and two thumbs up from my daughter. Even when she had the leftovers the next day she said “Mom, these are really really good! Are you going to make them again sometime?” The answer is a definite Yes!
I’m giving you the full recipe below as printed in Texas Monthly, but I did scale it down a tad since the dish I use for enchiladas only holds 9 rolled tortillas, which makes about two meals for my family of three. The full version makes 12 enchiladas. Suggested serving sides are refried beans and Mexican rice.
Authentic Tex-Mex Cheese Enchiladas with Chile Gravy
From Sylvia Casares via Texas Monthly
Prepare the Chile Gravy
1 1/2 cups white onion, roughly chopped
5 garlic cloves
1/4 pound lean ground beef
2/3 cup vegetable oil
2/3 cup flour
2 cups beef broth (I used homemade)
3 tablespoons chile powder (I used half New Mexico Red and half Ancho)
2 teaspoons salt
1 teaspoon cumin
1/8 teaspoon cayenne
1 teaspoon ground black pepper
Combine onion and garlic in a blender (or food processor) and purée on high for about one minute or until smooth.

Onion Garlic Puree
Add purée, ground beef, and 1/2 cup water to a small saucepan and simmer over low heat for 30 minutes (skim froth from surface). Note from me: Don’t freak out if your onion/garlic/meat mixture turns a bit green in the first part of cooking it. It’s a natural reaction and all turns brown eventually.
In a large skillet, heat vegetable oil over medium heat until hot. Lower heat, add flour, and stir continuously until the roux turns a light golden brown.
Heat beef broth and 2 cups water over low heat in a small saucepan or in a microwave oven. Combine all spices and add to flour mixture along with broth and ground beef and cook over low heat for about 5 minutes or until mixture is the consistency of gravy.

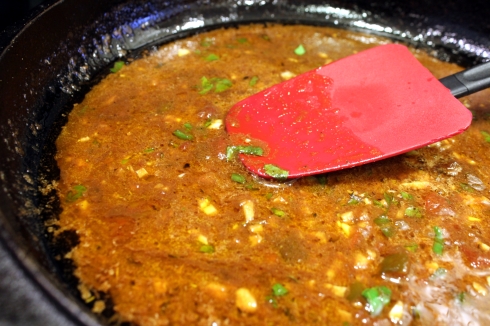
Authentic Chile Gravy
Let rest for at least 10 minutes before using. Makes about 5 cups.
Prepare the Tortillas Dipped in Guajillo-Árbol Chile Sauce
7 guajillo chiles, stems and seeds removed
2 árbol or ancho chiles, stems removed (I used Ancho)
12 corn tortillas
Put chiles and 1/2 cup water (I used about 1 cup) in a small saucepan. Bring to a boil, lower heat, and simmer for 15 minutes, adding water if needed. Let cool 15 minutes.

Chile Peppers Cooking
Purée the chiles and water in a blender or food processor on high speed until liquefied. Pass the purée through a strainer to remove any skins.
When almost ready to assemble the enchiladas, dip tortillas in the guajillo-árbol chile sauce one at a time and put on a plate. Cover and set aside for 30 minutes.

Guajillo-Ancho Chile Sauce
Assemble the Enchiladas
1 cup vegetable oil
Chile Gravy
Tortillas Dipped in Guajillo-Árbol Chile Sauce
5 cups grated cheddar cheese (reserve 1 cup for garnish) (I used cheddar for the tortillas and Monterey jack for the top)
1 cup white onion, diced
Preheat oven to 375 degrees. Heat oil in a medium skillet over medium-high heat. Place one tortilla at a time in the hot oil and quickly turn with tongs or a nonstick spatula. Total time in oil should be about 5 seconds. Stack on a plate and use immediately in next step.

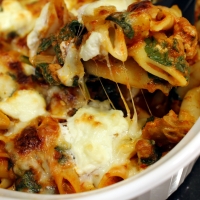
Enchiladas Smothered in Chile Gravy
Distribute a row of about 1/3 cup (about 2 ounces) of cheese down the middle of each tortilla. Roll up and place side by side in a 9-by-11-inch baking pan. Pour the chile gravy over the enchiladas and garnish with reserved grated cheese and diced onion. Bake until sauce bubbles and cheese is melted, 10 to 20 minutes; do not allow to brown. Makes 12 enchiladas (serves 4 to 6).

Enchiladas Ready to Bake

Download and Print this Yummy Recipe!
Tags: ancho, arbol, authentic, cheddar, cheese, chile gravy, corn tortillas, enchiladas, guajillo, monterrey jack, peppers, sauce, Sylvia Casares, Tex-Mex