Tag Archives: monterrey jack

Homemade Tomato Soup (with Grilled Cheese, of Course!)

11 Feb
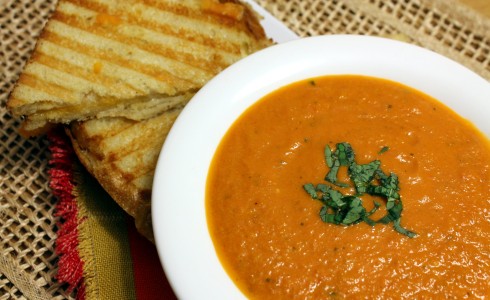
Homemade Tomato Soup and Grilled Cheese

Homemade Tomato Soup and Grilled Cheese

I have been wanting to try my hand at homemade tomato soup for years, especially since we grow and can our own tomatoes. When my friend Suzanne over at Pug in the Kitchen posted this recipe, I knew it was time. Besides, I had a can of San Marzano tomatoes that had been in my pantry over a year, and what about those 20 pints of canned jars of tomatoes I forgot about in the garage? How did I forget about canning those from the fall? I grabbed a few for my pantry lest I forget again.

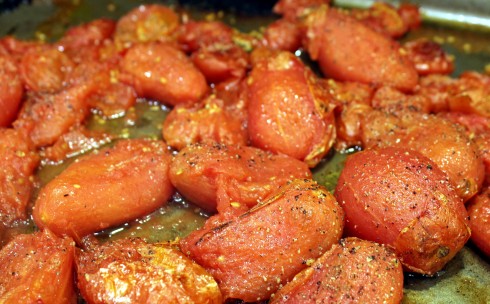
This soup comes together quite easily after some initial prep. And if you are wondering how long it takes for tomatoes to caramelize in a hot oven, it takes 18 minutes according to the smoke alarm that went off during my 20-minute timer. I suggest using a vent fan during this process. 😉

My husband was amazed at the taste of this soup. According to him, it did not taste like tomato soup from a can. Errrmmm… We’ll leave it at that. Oh, and don’t forget to cook up some ooey-gooey grilled cheese sammies for dunking! We used sourdough bread and a combination of Monterrey jack, sharp yellow cheddar, and pepper jack that was leftover from Super Bowl. This makes about 3 to 4 dinner-size servings.

Homemade Tomato Soup
Adapted from Tomato Soup at A Pug in the Kitchen

1 28-ounce can San Marzano or good quality tomatoes, liquid reserved
1 pint homemade canned tomatoes (about 1 large cup fresh), liquid reserved
Ground pepper and sea salt, to taste
Olive oil, for tomatoes and vegetables
1/2 cup chopped celery
1/2 cup chopped carrot
1/2 cup chopped onion
1 large clove garlic, peeled and minced
1 bay leaf
Small piece of Parmesan rind
3 large leaves fresh basil, chopped
1 tablespoon butter
1/4 cup heavy cream
Additional basil, chiffoned for garnish

Preheat oven to 450 degrees. Place all the drained tomatoes on a rimmed baking sheet and drizzle with oil. Season to taste with ground black pepper and sea salt. Roast until caramelized or until your smoke alarm goes off (18 to 20 minutes).

Roasted and Caramelized Tomatoes

Roasted and Caramelized Tomatoes

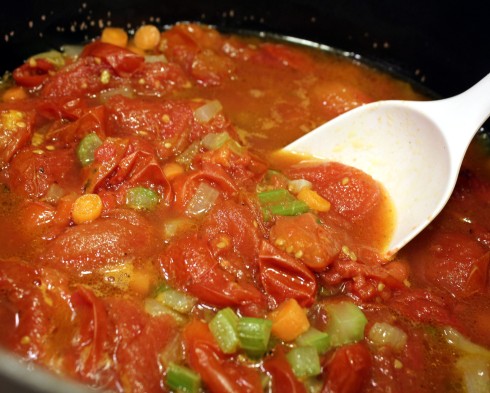
Heat about a tablespoon of oil in a soup pot or Dutch oven over medium heat. Add the celery, carrot, and onion and cook until they start to soften, about 10 minutes. Add the minced garlic and cook about a minute more until fragrant. Add the roasted tomatoes and the reserved tomato juice (About 2 cups, add water if you don’t have that much. My canned tomatoes had a lot of of liquid.) Also add the bay leaf and cheese rind. Bring to a simmer and cook for about 30 minutes until vegetables are very tender. Remove the bay leaf, then add the chopped basil. Taste for seasoning.

Simmering Soup

Simmering Soup

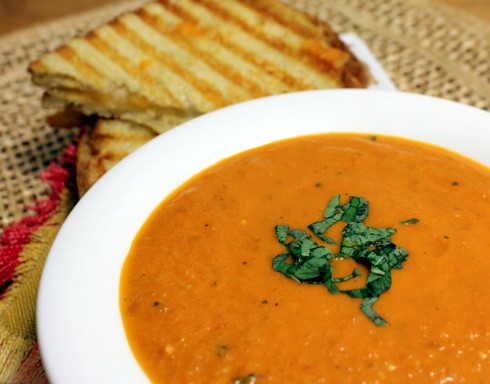
Pour into a large blender and puree until smooth (or use an immersion blender if you have one. I need one!) Return soup to the pot, then add the butter and cream and stir until incorporated. Keep warm while you griddle up some grilled cheese. Ladle into bowls, top with additional basil, and serve immediately with grilled cheese sandwiches.

Homemade Tomato Soup

Homemade Tomato Soup

Download and Print this Recipe

Download and Print this Yummy Recipe!


Skillet Huevos Rancheros with Homemade Tortilla Strips

14 Mar
Skillet Huevos Rancheros with Homemade Tortilla Strips

Skillet Huevos Rancheros with Homemade Tortilla Strips

I’ve been eying similar tomato sauce and egg dishes lately from the Middle East region, but “Shakshuka” uses quite a few spices that I simply don’t have. (And I have a LOT of spices!) But the ingredients and spices I almost always have on hand are Mexican in origin. Hence, I bring to you a riff on Shakshuka, Tex-Mex style!

My husband and I were disappointed I only cooked four of the six eggs. We both had large lunches, and decided one egg each would suffice. Oh boy, were we wrong! While are daughter munched happily on her second egg, we longed in silence. However, there was plenty of sauce leftover to make a repeat for lunch the next day!

Skillet Huevos Rancheros with Homemade Tortilla Strips

For the Ranchero Sauce:
1 tablespoon olive oil
1 Serrano (or jalapeño) pepper, diced small
1 cup onion, chopped
2 cloves garlic, peeled and minced
1 28-ounce can pureed tomatoes
1/4 teaspoon New Mexico ground chile (or chili powder)
1/8 teaspoon ground cumin
1 15-ounce can black beans, drained and rinsed
Salt and ground black pepper, to taste

For the Rest of It:
1 tablespoon olive oil
4 6-inch corn tortillas
Sea salt, to taste
4 to 6 large eggs
1/2 cup fresh-grated Monterrey Jack cheese
1/2 cup fresh-grated cheddar cheese
Handful fresh cilantro, (chopped) for garnish
Sour cream, for garnish

Simmering the Rancheros Sauce

Simmering the Rancheros Sauce

Preheat oven to 450 degrees. To make the sauce, add a tablespoon of oil to a cast iron or oven-proof skillet over medium heat. Add the spicy pepper, onion, and garlic, and cook for about 7 minutes until onions are softened. Pour in the can of tomatoes, then bring to a simmer. Lower the heat and simmer for 10 minutes. Stir in the black beans, and salt and pepper, to taste.

Prepping the Tortilla Strips

Prepping the Tortilla Strips

While the sauce is simmering, brush both sides of the corn tortillas with oil and sprinkle with a little salt. Cut into thin strips. Place on a baking sheet in a single layer and place in the preheated oven. Bake for about 3 minutes on each side, until lightly browned. Remove and set aside. (I tried making the strips before the sauce, and got so busy that I burnt my first batch. Lucky for me I always have a large bag of corn tortillas in the pantry!)

Eggs Nestled in Tomato Sauce

Eggs Nestled in Tomato Sauce (LOOK! There is plenty of room for two more eggs, silly!)

When the sauce has thickened, remove from the heat. Make indentations in the sauce with the back of a large spoon, and crack each egg into the wells. Return the pan to the heat and cover. Simmer gently for about 15 minutes, until the whites are partially set.

Skillet Eggs Ready for the Broiler

Skillet Eggs Ready for the Broiler

Turn the oven to broil. Sprinkle the grated cheese over the dish, then place the skillet under the broiler. Cook until the cheese is melted and bubbling and the eggs are cooked to your liking. This shouldn’t be more than a few minutes, unless you like hard-cooked eggs. Remove the skillet (carefully!) from the oven. Garnish with the tortilla strips and cilantro, scoop out your eggs and sauce, and serve with sour cream if you want.

Skillet Huevos Rancheros

Skillet Huevos Rancheros

Download and Print this Recipe

Download and Print this Yummy Recipe!


Authentic Tex-Mex Cheese Enchiladas with Chile Gravy

14 Jun
Authentic Tex-Mex Cheese Enchiladas with Chile Gravy

Authentic Tex-Mex Cheese Enchiladas with Chile Gravy

I was on a mission to both redeem and console myself after the prior night’s dinner disaster. I was wanting some Tex-Mex. Gooey, cheesy, spicy Tex-Mex. The kind of stuff you get at those mom and pop shops in the little towns scattered between the wide-open roads and ranches of Texas.

I’ve made plenty of Tex-Mex dishes in the past, and have a standard chile con carne recipe used for a lot of them. But mostly, when I cook up a Tex-Mex dish I don’t rely much on a recipe. It’s my take that any taco, burrito, tostada, or enchilada are just different shapes and cooking methods for pretty much the same ingredients, right?

Spices for Chile Gravy

Spices for Chile Gravy

But there was one dish I had yet to conquer, and that was the Authentic Tex-Mex Cheese Enchiladas with Chile Gravy. And what better place to start than the recipe from the Enchilada Queen herself, Sylvia Casares? She hails from the small town of Brownsville, Texas and currently owns two enchilada restaurants in Houston as well as offers cooking schools and catering.

I found a scaled-down version, time-wise, of her recipe in Texas Monthly magazine. I took my time and cooked everything linearly, instead of concurrently. Basically, I didn’t do any “meanwhile” cooking. But please, feel free to multitask on this one, I was enjoying each individual process so that I could become more familiar with each step for the next time I make these.

When the enchiladas came out of the oven, I was all set to take a plated shot (as best I could, as they come out of the pan pretty messy), but when I went to pick up the plate to move it to the table, it slipped out of my hands! In my spastic move to keep it from tumping upside down onto the floor, I smashed my other arm right on top of the plate, making a mess of not only the plate, but my shirtsleeve. The dish didn’t crash to the floor, but I was left with a pretty pitiful-looking plate of enchiladas and beans. And a dirty shirt. Thank goodness I had the foresight to wear an old camping shirt for this foray. I just sighed and thought “forget it, I’m hungry.” And sat right down to eat the mess.

 The Ill-Fated Shirt

The Ill-Fated Shirt

Ohhhh, but it was sooo good! I got a thumbs-up from the hubby and two thumbs up from my daughter. Even when she had the leftovers the next day she said “Mom, these are really really good! Are you going to make them again sometime?” The answer is a definite Yes!

I’m giving you the full recipe below as printed in Texas Monthly, but I did scale it down a tad since the dish I use for enchiladas only holds 9 rolled tortillas, which makes about two meals for my family of three. The full version makes 12 enchiladas. Suggested serving sides are refried beans and Mexican rice.

Authentic Tex-Mex Cheese Enchiladas with Chile Gravy
From Sylvia Casares via Texas Monthly

Prepare the Chile Gravy
1 1/2 cups white onion, roughly chopped
5 garlic cloves
1/4 pound lean ground beef
2/3 cup vegetable oil
2/3 cup flour
2 cups beef broth (I used homemade)
3 tablespoons chile powder (I used half New Mexico Red and half Ancho)
2 teaspoons salt
1 teaspoon cumin
1/8 teaspoon cayenne
1 teaspoon ground black pepper

Combine onion and garlic in a blender (or food processor) and purée on high for about one minute or until smooth.

Onion Garlic Puree

Onion Garlic Puree

Add purée, ground beef, and 1/2 cup water to a small saucepan and simmer over low heat for 30 minutes (skim froth from surface). Note from me: Don’t freak out if your onion/garlic/meat mixture turns a bit green in the first part of cooking it. It’s a natural reaction and all turns brown eventually.

In a large skillet, heat vegetable oil over medium heat until hot. Lower heat, add flour, and stir continuously until the roux turns a light golden brown.

Heat beef broth and 2 cups water over low heat in a small saucepan or in a microwave oven. Combine all spices and add to flour mixture along with broth and ground beef and cook over low heat for about 5 minutes or until mixture is the consistency of gravy.

Authentic Chile Gravy

Authentic Chile Gravy

Let rest for at least 10 minutes before using. Makes about 5 cups.

Prepare the Tortillas Dipped in Guajillo-Árbol Chile Sauce
7 guajillo chiles, stems and seeds removed
2 árbol or ancho chiles, stems removed (I used Ancho)
12 corn tortillas

Put chiles and 1/2 cup water (I used about 1 cup) in a small saucepan. Bring to a boil, lower heat, and simmer for 15 minutes, adding water if needed. Let cool 15 minutes.

Chile Peppers Cooking

Chile Peppers Cooking

Purée the chiles and water in a blender or food processor on high speed until liquefied. Pass the purée through a strainer to remove any skins.

When almost ready to assemble the enchiladas, dip tortillas in the guajillo-árbol chile sauce one at a time and put on a plate. Cover and set aside for 30 minutes.

Guajillo-Ancho Chile Sauce

Guajillo-Ancho Chile Sauce

Assemble the Enchiladas
1 cup vegetable oil
Chile Gravy
Tortillas Dipped in Guajillo-Árbol Chile Sauce
5 cups grated cheddar cheese (reserve 1 cup for garnish) (I used cheddar for the tortillas and Monterey jack for the top)
1 cup white onion, diced

Preheat oven to 375 degrees. Heat oil in a medium skillet over medium-high heat. Place one tortilla at a time in the hot oil and quickly turn with tongs or a nonstick spatula. Total time in oil should be about 5 seconds. Stack on a plate and use immediately in next step.

Enchiladas Smothered in Chile Gravy

Enchiladas Smothered in Chile Gravy

Distribute a row of about 1/3 cup (about 2 ounces) of cheese down the middle of each tortilla. Roll up and place side by side in a 9-by-11-inch baking pan. Pour the chile gravy over the enchiladas and garnish with reserved grated cheese and diced onion. Bake until sauce bubbles and cheese is melted, 10 to 20 minutes; do not allow to brown. Makes 12 enchiladas (serves 4 to 6).

Enchiladas Ready to Bake

Enchiladas Ready to Bake

Download and Print this Recipe

Download and Print this Yummy Recipe!


Roasted Summer Vegetable Tian

31 Jul
Roasted Summer Vegetable Tian Assembled

Roasted Summer Vegetable Tian Assembled

Wow! This was so darned good that I plan on putting this in my rotation as much as possible. I have to thank my foodie blog friend Richard over at REMCooks for this idea. He got it from another friend and mixed it up a bit by adding some of his homemade hot sauce. I decided to leave that out but threw on some fresh chopped herbs from my herb garden instead. One of my local stores just started selling organic produce and I made a special trip just to buy the fresh, organic veggies for this. If you cruise on over to Richard’s blog he has a great history of Tian in his post, so I won’t bother repeating that here. But wowee! This was soooo delicious! It’s a light, fresh, mouthful of summer in every bite.

Roasted Summer Vegetable Tian

1 tablespoon olive oil
1 1/2 cups sweet onion, diced small
2 teaspoons minced garlic
Butter to grease the casserole dish
1 medium yellow squash
1 medium zucchini
2 medium red potatoes
2 medium tomatoes
Ground black pepper, to taste
1 tablespoon fresh chopped basil
1 tablespoon fresh chopped tarragon
Olive oil to drizzle
1/2 cup shredded Parmesan cheese
1/2 cup shredded Monterrey Jack cheese

Roasted Summer Vegetable Tian 2

Roasted Summer Vegetable Tian

First chop and slice up all those veggies. I don’t have any fancy slicing apparatus so this took me about 15 minutes. Maybe I’m just slow. I tried to get nice even slices but even then that wasn’t very successful, but close enough! Preheat the oven to 400 degrees. Add the oil to a skillet heated to medium and saute the onions and garlic until softened, about five minutes.  Grease a two-quart casserole dish (any shape) with butter. I used my Tarragon Chive Lemon Butter compound for that task, but just regular ole’ butter will do. Once the onions and garlic are soft, spread them in the bottom of the casserole dish.

Now layer the slices on edge, alternating the vegetables around the contour of the dish, then fill up the middle after that. I ended up with different amounts of slices so my alternating became messy at the end. Then I began running out of room and began stuffing the rest of everything in there willy nilly. If you are a perfectionist you may just want to compost the rest or save it for another dish. I still think it came out purdy, what do you think? Grind a bunch of black pepper over it, sprinkle the chopped basil and tarragon over it, then drizzle some olive oil over the rows.

Now pop that purdy thang in the oven, covered, for about 30 to 40 minutes. Because of high altitude I did the 40 minutes. Remove from oven, uncover, and spread the two cheeses over top. Return to oven, uncovered for 15 minutes. In the last few minutes I bumped the oven to broil to crispy up some of the cheese. Remove from oven, and let sit a few minutes before serving. This makes enough for four to six servings. We ate this with some leftover rotisserie chicken. What a truly delightful, summer-tasting dinner!

Roasted Summer Vegetable Tian

Roasted Summer Vegetable Tian

p.s. Once again we are headed to our RV property on the coastal river. We are going with my parents and will be meeting up with a childhood friend (and her three boys) that I’ve not seen in 25 years! I’m very excited for this trip, but once again, no weekend post. So I’ll see you next week!

Creamy Poblano Tortilla Soup with Chicken and Hominy

23 Jan
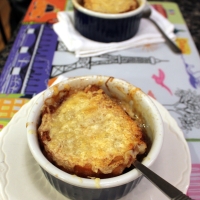
Creamy Poblano Tortilla Soup with Chicken and Hominy

Creamy Poblano Tortilla Soup with Chicken and Hominy

Well I preempted a post about my husband’s amazing spicy beans and rice dish for this crazy good soup I made. As you may already know, I’m on a soup kick lately, which I do in spurts. This soup has such amazing textures and flavors that I felt compelled to share it next instead. Somehow I ended up finding a creamy Poblano soup recipe while surfing the net well over a week ago for who knows what, I don’t even remember now. So on my next grocery trip, I bought a Poblano (also known as a Pasilla) pepper for it, then threw in a Serrano pepper into the bag for good measure that day. Then the week dragged on, we ate a variety of meals, then I discovered the peppers hidden under the lettuce in the veggie drawer almost a week later. GASP! I was so worried they were expired. But the foodie spirits were with me and they were still nice and crisp and fresh and ready to use. I had to go back in my browser history to find the dang recipe, as all the keywords I used in my search to find it again didn’t bring it up. Whew, I found it! The recipe came from a defunct restaurant on a website that hasn’t been updated in several years, but I ended up finding several variations of the recipe on other sites. So now I present you my take on this.

What makes this soup so interesting is the method to achieve the creaminess. You grind up corn tortillas in a food processor or blender with some spices and flour, then use that to make a roux. This roux then makes the creamy base for the soup along with chicken broth, with a tad of sour cream thrown in at the end. So you get an incredibly creamy soup but with the corn tortilla taste instead of the blander all-flour taste. One of the recipes called for adding corn “cobettes,” but I added yellow hominy instead. It’s all corn. I made this twice as difficult to make because I cooked the chicken for the soup from scratch, which then made the chicken broth for the soup. As always, feel free to substitute canned or boxed low-sodium chicken broth and some leftover or rotisserie chicken to save yourself the time in the kitchen. But I really enjoy making chicken broth from scratch (even though I have still have about 6 quarts of turkey and chicken broth in the freezer!).

Poblano, Serrano, Onion, Avocado, and Ground Tortilla Mix

Poblano, Serrano, Onion, Avocado, and Ground Tortilla Mix

As a side note, when I was de-seeding and chopping up the Serrano pepper (with latex gloves, yes!), my eyes started watering and I literally started choking. Yowza! That was one hot pepper, I could tell! So I only used 1/4 of the pepper instead of the whole one I was planning on. Good call, me-thinks. You can omit the Serrano altogether, too, if your family doesn’t like too spicy. In the end, my daughter inhaled the soup (but no it wasn’t a seconds or thirds soup for her) and my hubby said he really liked the flavors, but got confused by the textures. He asked if there were dumplings in it. (That was the hominy.) Sigh. But MY rating is  four-star plus!
Creamy Poblano Tortilla Soup with Chicken and Hominy

3 white or yellow corn tortillas (6-inch)
2 tablespoons flour
1/2 teaspoon Ancho (aka Dried Pasilla) chili powder or regular
1 teaspoon ground cumin
Lots of ground pepper to taste
2 tablespoons vegetable oil
1/2 medium onion, chopped
1 Poblano (or Pasilla) pepper, chopped
1/4 to 1 Serrano pepper, finely diced (or omit)
1 teaspoon minced garlic
3 tablespoons butter or substitute
4 cups homemade chicken or turkey broth, or low sodium subbed
1 cup yellow or white canned hominy, rinsed and drained (freeze the rest)
1/4 cup sour cream
1 1/2  to 2 cups cooked chicken, cut bite-sized
Shredded Monterrey Jack cheese
Fresh diced avocado

Start out by slicing up the tortillas into manageable chunks for your food processor or blender. Add those to your device then add in the chili powder, cumin and ground pepper. I only have a blender, so it was a bit trickier. I used the “pulse” mode, and pulsed all that a few times, then had to scrape it down, then kept pulsing and repeating the scraping until it was the texture of a coarse cornmeal, as shown in photo below.

Spicy Ground Tortillas and Flour Mixture

Spicy Ground Tortillas and Flour Mixture

In a deep-dish cast iron skillet (or sturdy dutch oven or soup pot) heat the oil over medium-high heat and add the chopped onion, Poblano, and Serrano peppers. Cook for just a few minutes then turn down to medium heat, add the minced garlic, and stir for a total of about another 8 minutes, until the onion is translucent. Now add the  butter, let it melt, then add that cormeal-ish flour mixture to the pan and stir and mix and smoosh down like crazy for the next 5 minutes or so, to form the “roux.” The main thing is to keep stirring constantly and mixing around so nothing burns in there.

Making Corn Tortilla Roux

Making Corn Tortilla Roux

At this point, verra slowly, and I mean slowly, start drizzling in the chicken broth while you whisk and stir. Just keep adding it slowly until about half of it has been added and totally mixed in smoothly. Once that is done, you can now add the rest of the broth then crank up the heat to bring to a boil. Once it’s boiling, turn down to a simmer then add the hominy and cook for about 10 more minutes, stirring occasionally.  Last, mix in the sour cream, bring up to a simmer again, then cook for another 10 minutes but don’t let it come to a boil again. Well, that’s it! Ladle into bowls and serve with chopped avocado and shredded cheese. Yowza that was good! I can say Yowza twice in my post, right? OK make that three times. I hope you enjoy this!

p.s. This is my first post using my new camera skills! No flash, no ucky yellow tone from overhead lightbulb. I’m enjoying my camera again!