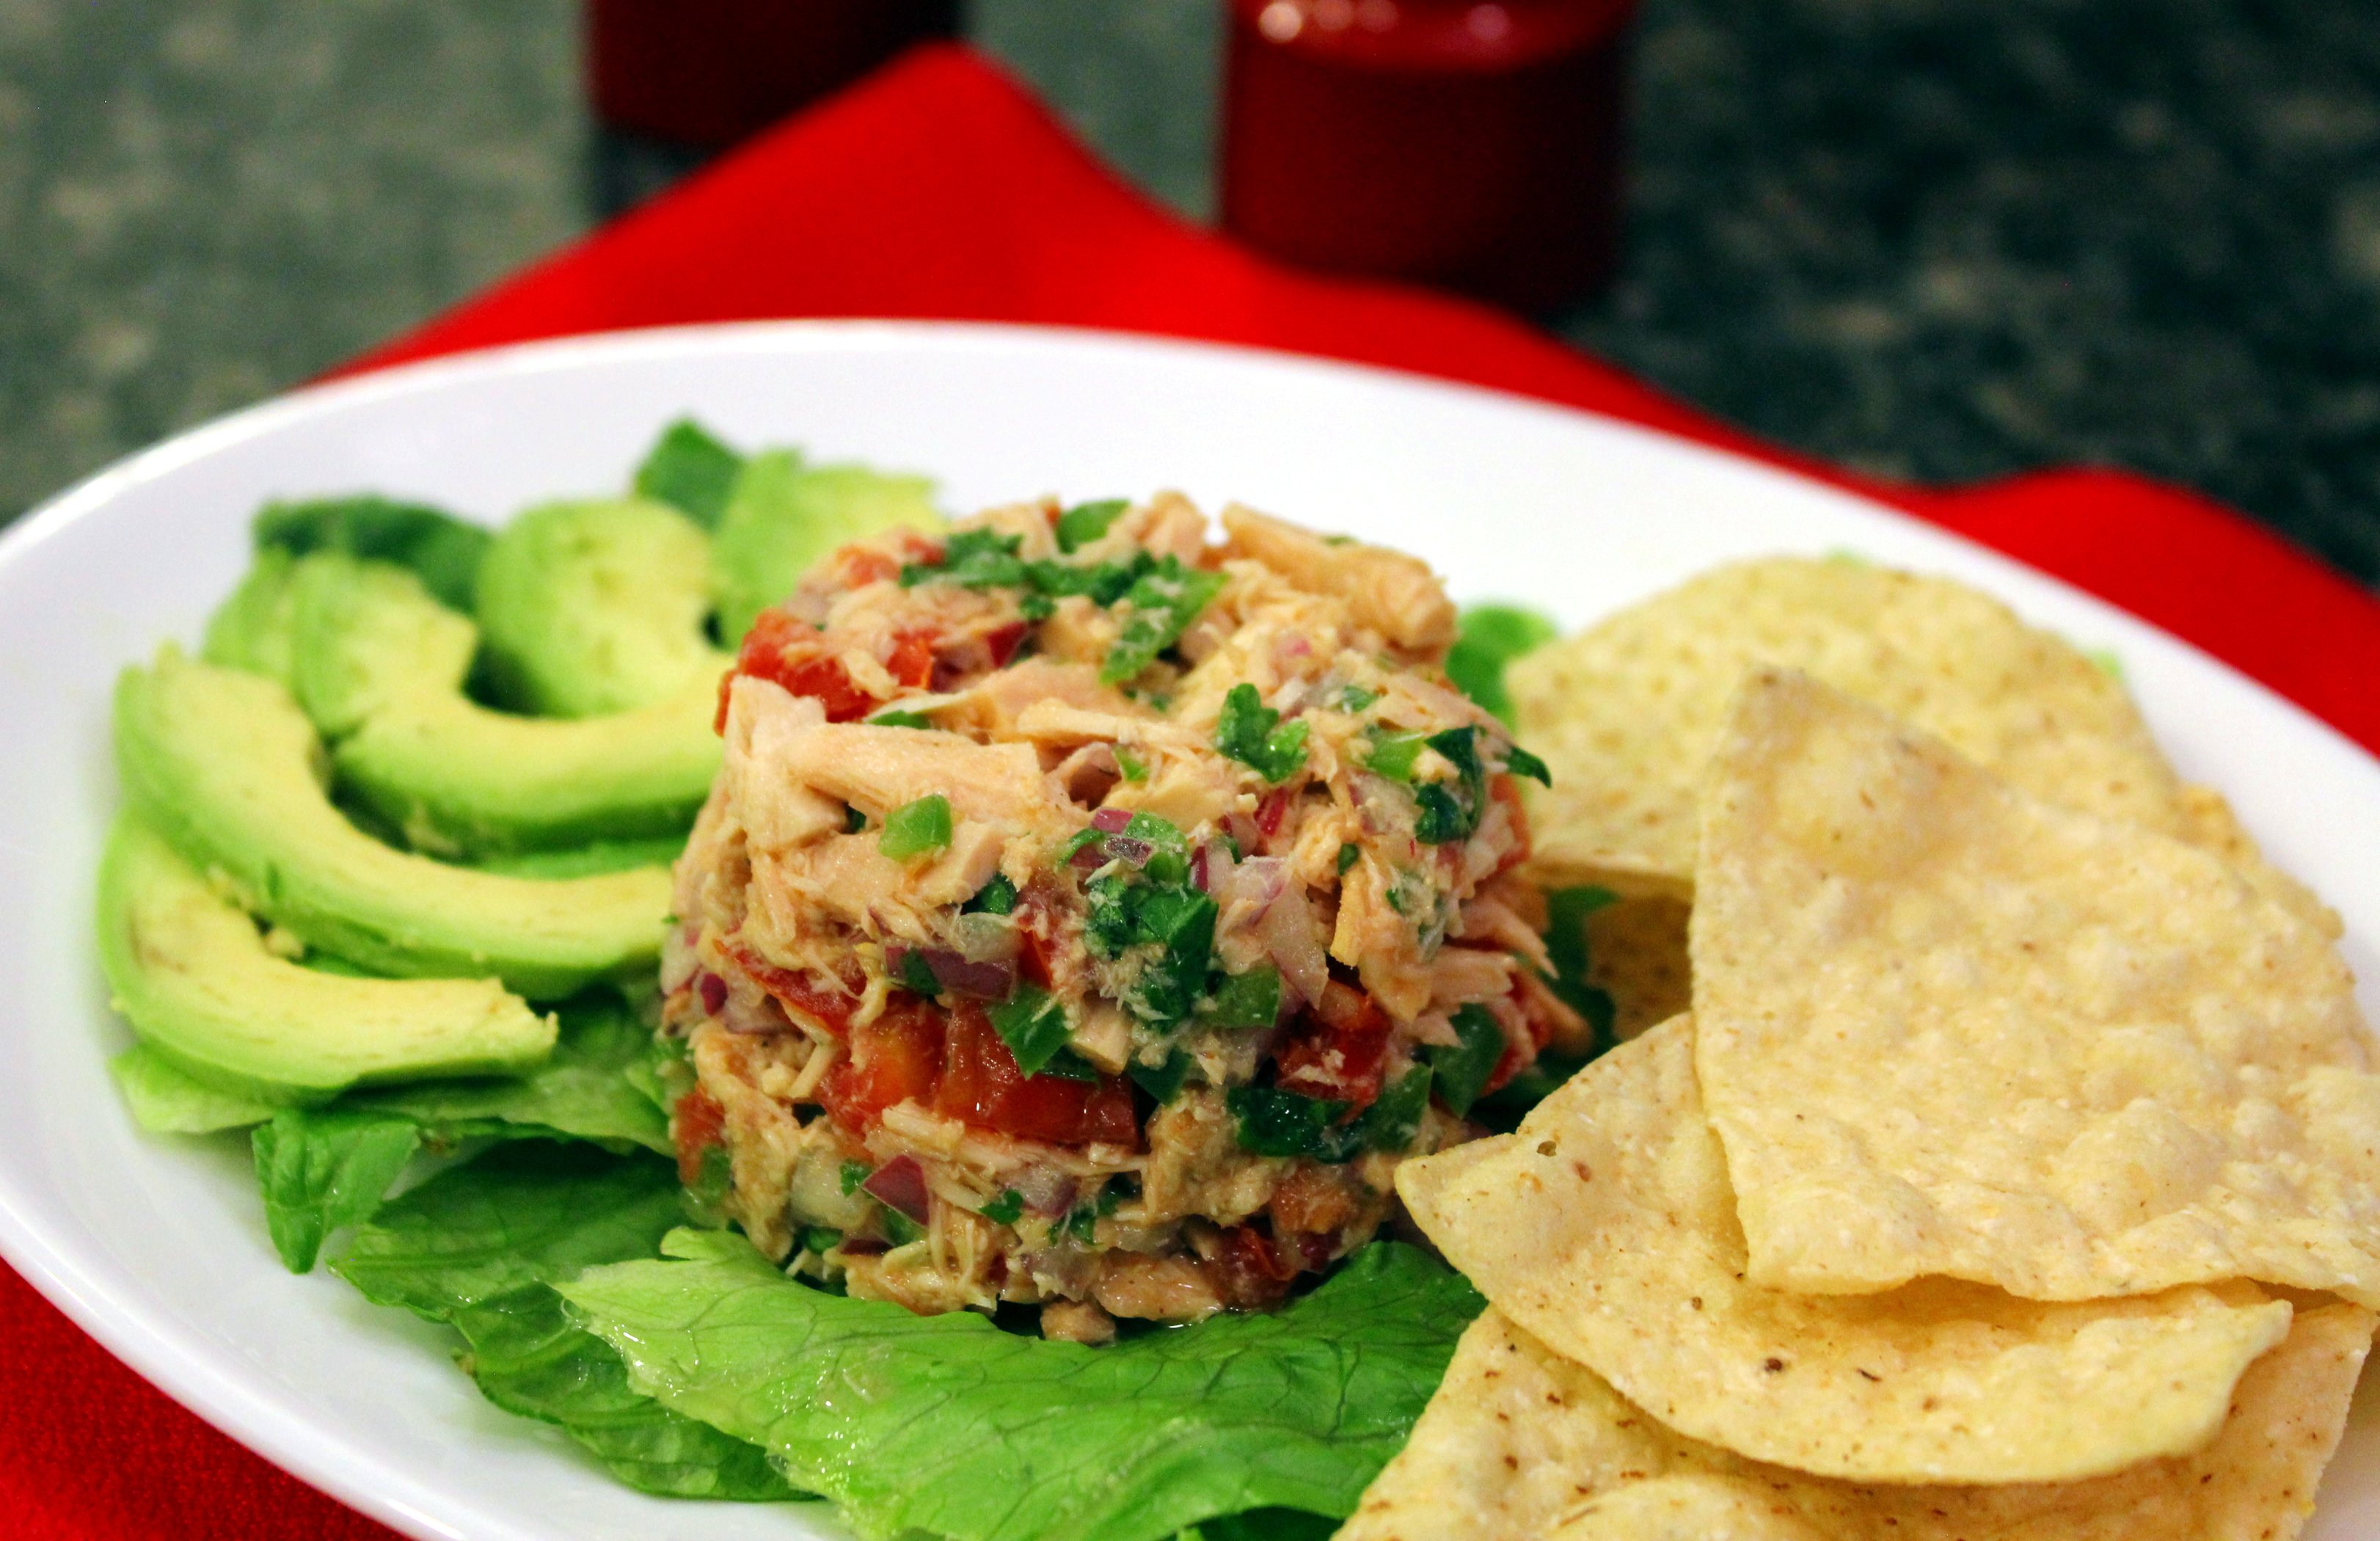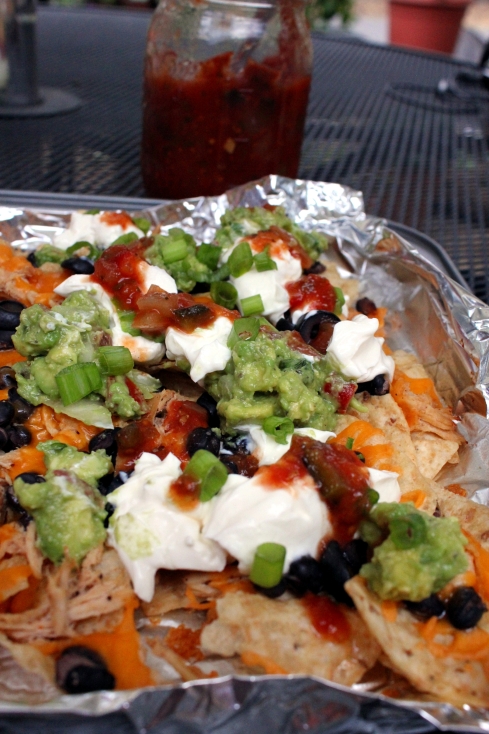
Chunky Guacamole Grilled Nachos with Chicken
It’s about time I had a new recipe, yes? Since I’m off camping (once again) this weekend, I’m posting mid-week so as not to leave you empty-handed. This time we are going to Clear Lake for an annual reunion to celebrate my uncle’s (dad’s side) birthday. This will be his 88th! Happy Birthday Uncle Joe!
Although we’ve cooled down the past few days, last week it was sweltering hot after we got back from our river camping trip. And when it’s that hot, I always fire up the grill for dinner. I thought some loaded chicken nachos sounded pretty darn good. I was going to grill the chicken, but decided instead to throw it in the crockpot with the seasonings then plug in the appliance outdoors on the deck. And then I shredded the chicken when it was done, mixed up some chunky guacamole made with a serrano pepper from my garden, assembled the nachos then slapped them on the grill! (OK I slid them, not slapped.) 😀

My Serrano Pepper Plant is Producing Awesomely!
This was a plenty filling dinner out on our deck on the patio table. I had leftover shredded chicken, black beans, and sliced olives so decided to make a Grilled Mexican Tortilla Pizza the next night. Hey you get several recipes this time! Olé!

Crockpot Taco Chicken
Chunky Guacamole Grilled Nachos with Chicken
For the chicken:
1 large boneless, skinless chicken breast
1 tablespoon taco seasoning mix (recipe here, or store-bought)
1 cup chicken broth
1/2 lime, squeezed

Guacamole Ingredients
For the chunky guacamole:
2 medium avocados, peeled, pitted and chopped
1 medium Roma tomato, deseeded and chopped
1 serrano pepper, stem cut and deseeded and finely minced
1/4 cup chopped onion
1 tablespoon cilantro
Sea salt and ground black pepper, to taste
For the nachos:
Tortilla chips
Grated block cheddar cheese (it melts better than pre-shredded)
Shredded chicken
More grated cheese
Canned black beans, rinsed and drained
Sliced black olives, drained
Chunky guacamole (recipe below)
Sour cream
Fire-roasted salsa (recipe here, or store-bought)
Chopped green onion

Shredded Chicken
Add the chicken ingredients to a crockpot and cook on high for 4 hours. Remove chicken and shred, then set aside.

Guacamole Ready to Smash
Meanwhile, prepare the chunky guacamole. Add all the prepped ingredients to a bowl, then smash up and mix with a fork until desired consistency. Cover with plastic wrap then refrigerate.
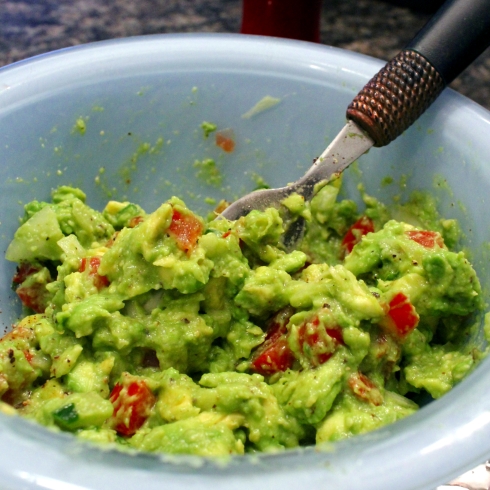
Chunky Guacamole
Preheat the grill to high heat on one side. Line a large baking sheet with foil, then layer tortilla chips in one layer on the foil. Spread with grated cheese, then chicken, then more cheese, black beans, and black olives.

Preparing the Nachos
Slide the foil sheet onto the heated side of the grill then cover, grilling for about 10 minutes until the bottoms of the chips are crispy. Move the nachos to the unheated side of the grill then cover again, grilling until the cheese has melted.

Grilling the Nachos
Slide nachos back onto the baking sheet, top with chunky guacamole, sour cream, salsa, and chopped green onion to taste. Enjoy!
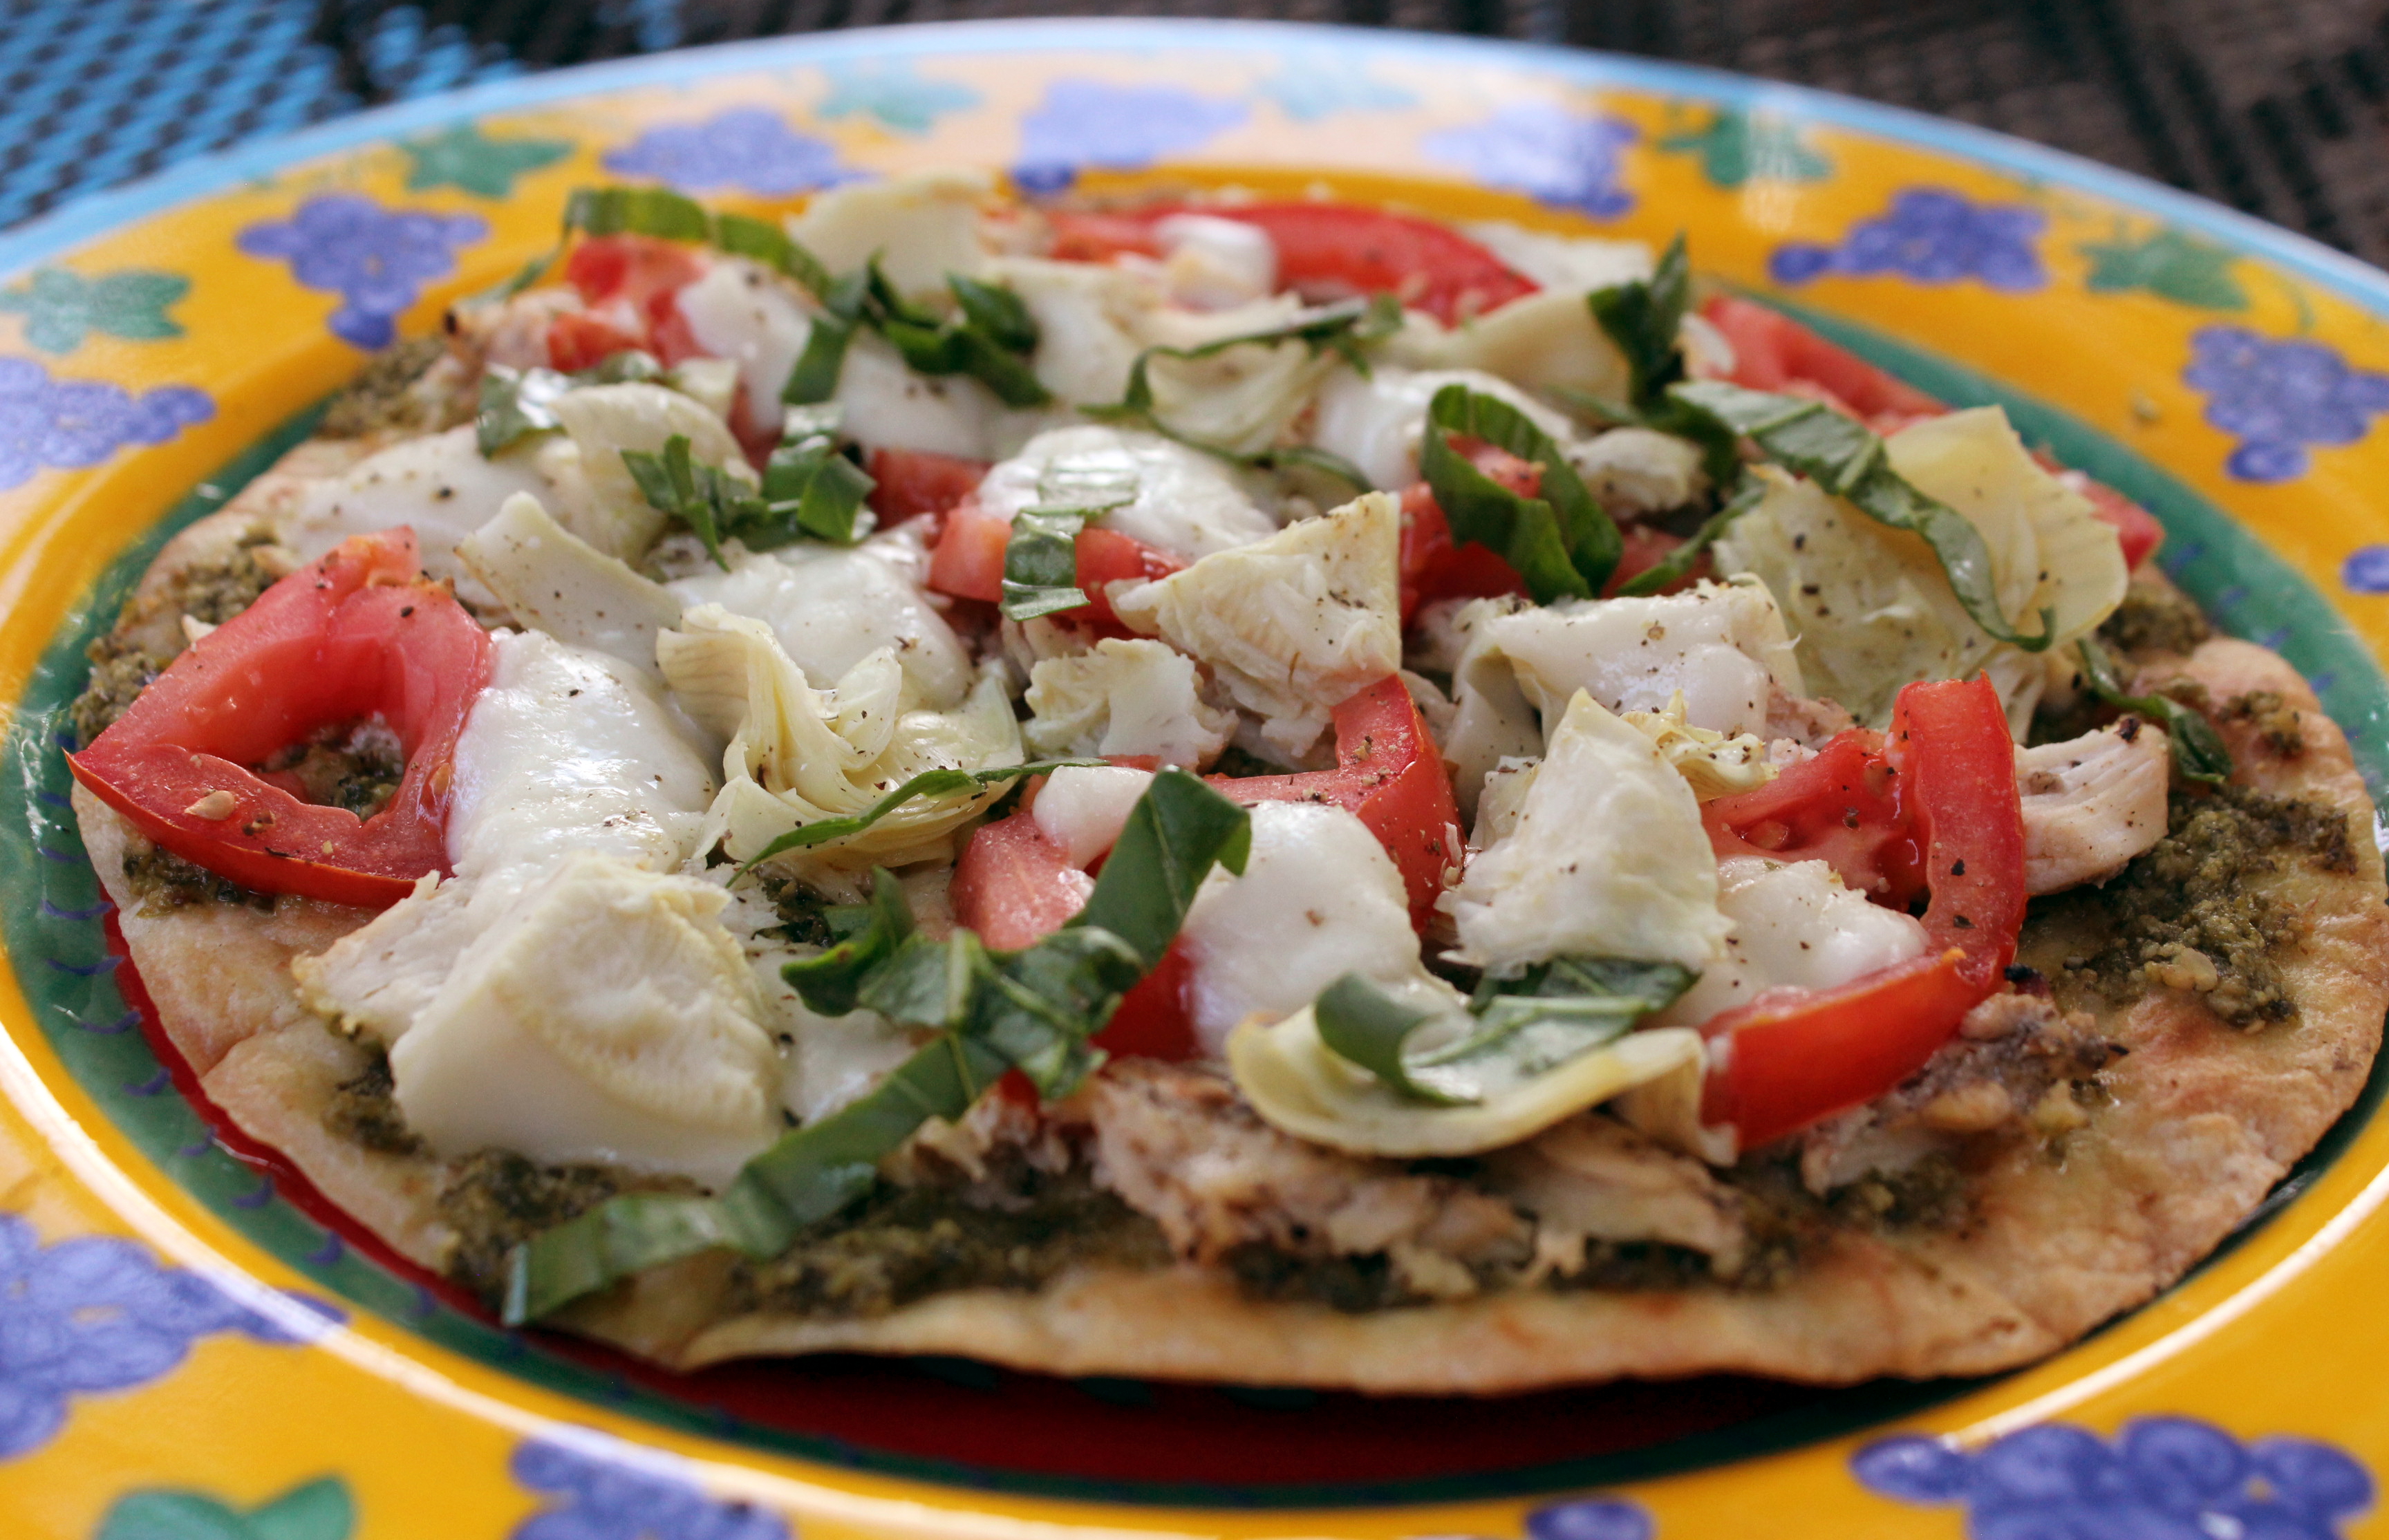
Now here is a recipe for what to make with any leftover ingredients you have from the nachos, depending on the size of your family or if your teenage daughter decides she’s going to a friend’s house for dinner instead of eating your excellent nachos. Just a couple of photos with this one and paper plates, it was that kind of night!
Grilled Mexican Tortilla Pizza
10-inch flour tortillas
Oil spray
Canned black beans, rinsed and drained
2 teaspoons olive oil
Fire-roasted salsa (recipe here, or store-bought)
Cooked shredded chicken (use deli rotisserie chicken or leftovers)
Sliced black olives, drained
Thinly sliced onion
Jarred sliced jalapeños
Grated Colby Jack cheese
First add the black beans to a blender or food processor, then drizzle in olive oil and process until creamy, scraping down the sides and adding oil as needed. Set aside.

Prepping the Mexican Pizza
Preheat the grill to medium to medium-low, and spray the tortilla(s) on one side and grill for about 3 minutes, until crisp and starting to puff up on the top side. Remove to plate, then spray the non-grilled side with oil. Flip over, then spread the creamy beans evenly over the tortilla. Top evenly with salsa, shredded chicken, black olives, onion, jalapeños and cheese.

Grilling the Mexican Tortilla Pizza
Place back on grill, cover, and cook for about 5 more minutes until cheese is melted. You might need to move it to the unheated side if it’s getting too crispy on the bottom and the cheese isn’t melted yet. Add a green salad on the side, and dinner is served!

Download and Print this Yummy Recipe!
Tags: avocado, black olives, cheddar cheese, chicken, chunky guacamole, cilantro, Colby Jack Cheese, crockpot, fire-roasted salsa, flour tortillas, green onion, grilled, jalapenos, lime, nachos, serrano pepper, sour cream, taco mix, tomato, tortilla chips