Tag Archives: cheese

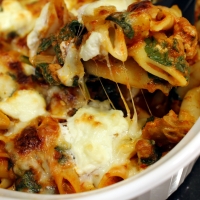
Sausage and Spinach Pasta with Homemade Ricotta

18 Mar
Sausage and Spinach Pasta with Homemade Ricotta

Sausage and Spinach Pasta with Homemade Ricotta

This is a very quick and easy dinner to throw together, especially if you have your favorite homemade spaghetti sauce stashed in the freezer (nevermindthefacthatIjustgotlaidoffanddon’tneedtimesavingrecipesrightnow). And if you make the ricotta in the morning (or even use store-bought) then you are way ahead of the game! And pssst, did you know making your own ricotta is super easy? I sure didn’t!

Prior to my life-changing event on Friday, I was always looking for dinner shortcuts. When I saw my friend Debbie’s post for Baked Pasta with Meatballs and Spinach, I knew it was something I totally wanted to make, but didn’t have the time to bother with making meatballs. So I did the next best thing and used the meatball ingredients as the base for the pasta. In hindsight, if I had made this in my large cast-iron skillet, I could have just popped it straight from the stove top into the oven! (I didn’t have the foresight, but I’m going to remember this for sure next time.)

Sausage and Spinach Pasta with Homemade Ricotta
Adapted from The Mountain Kitchen

2 cups dried pasta (I used Mostaccioli)
8 ounces ground hot Italian sausage
6 ounces baby spinach
Ground pepper, to taste (some red chile flakes would be great too)
4 cups homemade spaghetti sauce, or your favorite jarred
1 cup shredded mozzarella (not bagged variety)
1/2 cup ricotta cheese (homemade or store bought)

Preheat oven to 350 degrees. Cook pasta according to package directions.

Meanwhile, cook the sausage in a large skillet (cast iron if you have one!) until cooked through. Drain any grease, if necessary. Leaving the sausage in the pan, add 1/4 cup water and the spinach, stirring until wilted. Season with ground pepper, to taste.

Sausage and Spinach

Sausage and Spinach

Add the spaghetti sauce to the skillet, combine, and bring to a simmer.

Sauce Mixture

Sauce Mixture

Pour into a large casserole dish (or leave in in the skillet if using cast-iron), then stir in the cooked pasta, half the mozzarella and half the ricotta cheese. Sprinkle with the rest of the mozzarella and place dollops of the remaining ricotta over top.

Casserole Ready to Bake

Casserole Ready to Bake

Place in oven for about 10 minutes, then turn the oven to broil and cook until golden brown on top, about 5 to 7 more minutes. Serve immediately. WOW, so much flavor for so few ingredients!

Sausage and Spinach Pasta with Homemade Ricotta

Sausage and Spinach Pasta with Homemade Ricotta

BONUS! Here’s Debbie’s recipe for Homemade Ricotta:

Homemade Ricotta

4 cups whole milk
2 cups heavy cream
1 teaspoon salt
3 tablespoons white wine vinegar or lemon juice

Homemade Ricotta Cheese

Homemade Ricotta Cheese

Add 2 layers of cheesecloth (I used meshed cotton veggie bags) over a sieve or strainer on top of a bowl. Pour the milk and cream into a saucepan and bring to a full boil, stirring occasionally. Watch it carefully so it doesn’t overboil! Turn off heat and stir in the vinegar or lemon juice and let it sit for a few minutes. Pour the mixture over the cheesecloth and allow it to drain for about 25 minutes. Then place in refrigerator for several hours or overnight. Store unused cheese in a tightly sealed container in the refrigerator.

Holiday Cheese Bites

17 Dec
Holiday Cheese Bites

Holiday Cheese Bites

I saw these fun little crackers posted on Food52, and they seemed easy enough for me to attempt to make. Of course the big warning sign not to make them should have been the words “flour” and “roll the dough.” I can just look at a canister of flour and get it all over my clothes. And with my hand injury? Who was I kidding that I could roll out a hard, frigid piece of clay?

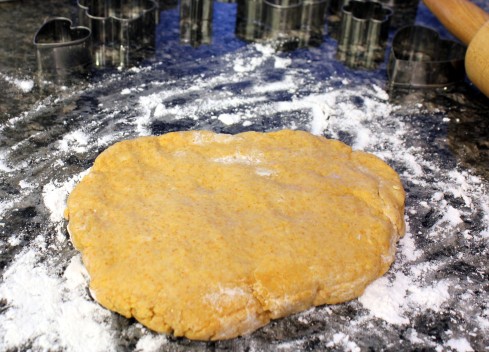
Chilled Cracker Dough

Chilled Cracker Dough

Nonetheless, I attempted to make these little cheese bites, endearingly called “coins” in the recipe. I opted to use some fancy-schmancy mini-cutters, in the hopes that the cute shapes would distract from the final results.

Cheese Bites Ready to Bake

Cheese Bites Ready to Bake

I don’t have a proper food processor, so instead of “slowly adding the milk in a stream with the food processor running,” I kept having to turn off my Ninja, take the top off, add a little milk, whir it again, then repeat. Sketchy at best, huh? Then when it came to rolling the dough out, I found my injured hand and wrist didn’t have enough strength to wrestle the dough into submission, so enlisted the help of my daughter. I ended up with some really uneven thicknesses, which resulted in a: burnt crackers and b: really puffy under-cooked crackers. I had enough of option c: perfectly done crackers to fill a small bowl for your enjoyment.

Holiday Cheese Bites

Holiday Cheese Bites

For those of you who would like the recipe, please head over to Food52 to read it here: Spicy Cheese + Smoked Paprika Coins

p.s. The flavor of these are really good! The dough has smoked paprika, sage, and cayenne pepper along with the cheese. If you are a skilled baker, please try this recipe out and let me know how they turned out!

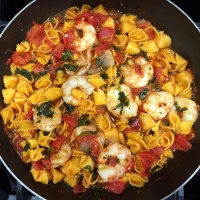
Fried Artichokes and Shrimp Pasta

2 Jul
Fried Artichokes and Shrimp Pasta

Fried Artichokes and Shrimp Pasta

What can I say? This dish is simply AH-MAZING! I am a huge fan of artichokes, but fried? And also jumbo shrimp? Shut the door and lock me in! When I saw this recipe over at Meals with Mel (please stop on by her site to check it out. Hi Melody!!) I knew I just had to make it and went on a mission to do just that. My only regret is adding only two cans of artichokes, as I do believe I ate at least one can of said artichokes before they even met the shrimp and pasta.

While not something I’d indulge in often while watching the waistline, this is definitely a meal I will make again. My husband loved it too and wow Mel, thanks for the introduction to a plate of heaven!

Fried Artichokes and Shrimp Pasta
Adapted from same recipe at Meals with Mel

2 14-ounce cans artichoke hearts, quartered
1 cup extra virgin olive oil
1 handful thyme sprigs
1 clove garlic, peeled and smashed
1/2 pound jumbo shrimp (16/20 count)
1 tablespoon butter
1/2 large shallot, diced small (about 1/3 cup)
2 cloves garlic, minced
1/4 teaspoon red pepper flakes
1/4 cup fresh parsley, chopped and divided
2 teaspoons fresh spicy oregano, minced
1/8 cup capers plus 2 teaspoons of the brine
1 large lemon, halved
1/2 cup dry white wine
4 to 6 ounces dried Linguine
salt and ground black pepper, to taste
Pecorino Romano, grated, for serving

Drain the artichoke hearts until they are almost completely dry. I squished them down in the colander with paper towels then let them set for about a half hour, blotting with more paper towels periodically.

Artichokes and Thyme Ready to Fry

Artichokes and Thyme Ready to Fry

Arrange the artichoke hearts in a single layer in the bottom of a cast iron skillet or other heavy skillet. Pour just enough olive oil over the artichokes to cover them. I used a cup.

Toss in the smashed clove of garlic and thyme sprigs. Turn the heat on to medium-high and allow the artichoke hearts to fry for about 30 minutes.

Artichokes Halfway Through Frying

Artichokes Halfway Through Frying

After about 10 minutes gently move the artichokes around to make sure they don’t stick to the bottom. After about 20 minutes carefully turn the artichoke hearts over to ensure even browning. After 30 minutes they should be golden brown, but don’t let them burn.

Remove the artichokes from the skillet and transfer to a paper towel-line plate. Lightly salt the hot fried artichoke hearts. Set aside and try not to eat them all. Trust me.

Fried Artichokes

Fried Artichokes ~ Maybe I should have moved them further away from my work space

Bring a large pot of salted water to a boil and cook to your preference according to package directions. Remove a cup or two of the cooking water and reserve, then drain the pasta

In another large skillet add about 2 tablespoons of the artichoke “frying” oil and a tablespoon of butter. Add the shallot and cook over medium heat until tender, about four minutes. Add in the garlic, red pepper flakes, oregano, capers and brine, half the chopped parsley, and the juice and zest of half the lemon. Season with a little salt and lots of ground black pepper, to taste. Cook for two minutes until fragrant, then add the white wine and reduce by half.

Cooking the Jumbo Shrimp

Cooking the Jumbo Shrimp

Add the shrimp and cook just until the shrimp turn pink, just a couple minutes per side. Add the cooked pasta to the skillet with the shrimp and fried artichokes and toss to combine. Loosen the pasta with the reserved cooking water.

Fried Artichokes and Shrimp Pasta

Fried Artichokes and Shrimp Pasta

Pour the skillet contents into large serving bowl and toss with the remaining parsley, the other lemon half squeezed, and a little fresh grated Pecorino Romano or other high-quality hard cheese. This is dinner-guest worthy! Enjoy!

P.S. I have been super busy the past few days getting our house and patio ready for a 4th of July party. I hope you all have a safe, memorable and enjoyable holiday weekend!

Fried Artichokes and Shrimp Pasta

Fried Artichokes and Shrimp Pasta

Download and Print this Recipe

Download and Print this Yummy Recipe!

Pecorino Romano Scalloped Potatoes

20 Mar
Pecorino Romano Scalloped Potatoes

Pecorino Romano Scalloped Potatoes

Having a mandoline slicer makes quick work of this easy side dish, but a good sharp knife will also work. I splurged and bought some nice Pecorino Romano (genuine Sini Fulvi) at Whole Foods last week and figured the nutty cheese would taste great in my standard scalloped potato recipe. The cheese had such a strong flavor that I used it sparingly, but cooking it really mellows it out. So feel free to use as much as you want in this dish, as it adds a subtle cheesy flavor to an otherwise rather plain potato dish. I also topped it with a scattering of crushed homemade garlic croutons for another flavorful kick. This is a very versatile potato dish, so feel free to use any kind of potatoes, onions, cheese, or croutons that you want! Serve this with any protein of choice and a salad or other vegetable.

Pecorino Romano Scalloped Potatoes

3 medium large russet potatoes, sliced thin
1/2 large sweet onion, sliced thin and quartered
3 heaping tablespoons flour, divided
1 1/2 cups half and half (or milk), divided
Sea salt and ground pepper, to taste
Pecorino Romano cheese or other hard cheese, grated, to taste
Crushed flavored croutons, to taste

Preheat oven to 350 degrees. Slice the potatoes thin, using a mandoline or very sharp knife.

Sliced Potatoes in Ice Bath

Sliced Potatoes in Ice Bath

To keep them from browning, place the slices in a bowl of ice water. Next slice the onion, then quarter the slices.

Humble Sliced and Quartered Onion

Humble Sliced and Quartered Onion

When done slicing, drain the bowl and pat the potato slices dry with paper towels.

Spray a small casserole dish with oil, then add one layer of potato slices. Sprinkle 1/3 of the flour over top, followed by 1/2 cup of half and half or milk.

First Layer of Dish

First Layer of Dish

Season with sea salt and ground pepper to taste, then grate the desired amount of Pecorino Romano on top. Spread 1/3 of the onion slices last. Repeat layers two more times, then top with crushed flavored croutons.

Potatoes After Removing Foil

Potatoes After Removing Foil ~ Feel free to grate more cheese on top at this point!

Cover tightly with foil, and bake in oven for one hour. Remove the foil, then bake another half hour or more, until the potatoes are fork tender. Let rest for a few minutes, then serve with additional grated cheese, if desired.

Pecorino Romano Scalloped Potatoes

Pecorino Romano Scalloped Potatoes

Download and Print this Recipe

Download and Print this Yummy Recipe!

Spinach and Feta Cheese Steak Rollups

27 Feb
Spinach and Feta Steak Rollups

Spinach and Feta Steak Rollups

How on earth does my mind come up with something like this? Just out of the blue! I guess I’m just getting used to “making do” with what I have in the house as I loathe shopping of any kind. Just ask my family. I really do hate shopping.

But what I do really like is coming up with some crazy idea for dinner and think yeah, the family will like this. But then when the family not only likes it, they LOVE it, I’m pretty darned happy. Even before this was finished cooking, my hubby said, “You know we can always order pizza if it isn’t good.” See, he DID have his doubts!

But doubt no more.

Oh shoot, a back story to the salted steak first. (Many of  my long-term readers know hubby is on a low-salt diet.) And a video, but you don’t have to watch it.

So somehow I came across a poor man’s video guide on the interwebz to make any tough meat tender. So, here is the video (sorry if you have to watch an ad first):

Watch here —> Poor Man’s Filet Mignon

And I also happened to watch it with hubby a few days before I made this. THEN (even with a little less now than a quarter cow in the freezer) I picked up some thin-sliced eye of round from the 50% off bin. I am a sucker for meat deals. Of course I froze it immediately. When I told hubby I brought home some store-bought beef and that it was a very tough cut, he actually got excited instead of rolling his eyes. He wanted us to test out this meat tenderizing trick.

Now, let me present to you my riff on a beef rollup stuffed with all kinds of yum. I would have liked to grill this, but it was freezing outside. Make note to cook this again on the grill when the weather is better. And yes, it came out very tender, more so than I expected! (And p.s. the family loved these!)

Spinach and Feta Steak Rollups

For the steak glaze:

Splash of olive oil
1 clove garlic, peeled and minced
1/4 cup balsamic vinegar
2 tablespoons red wine
2 teaspoons brown sugar
1 sprig fresh rosemary, or 1 teaspoon dried leaves
1/2 cup beef broth, preferably homemade

For the steak rollups

3/4 pound thin-sliced eye of round or any other thin-sliced steak (8 to 10 slices)
Coarse sea salt
8 ounces frozen chopped spinach, thawed and squeezed dry
3 ounces crumble Feta cheese
1/4 teaspoon crushed red pepper flakes
1 tablespoon fresh-squeezed lemon juice
Ground black pepper, to taste
2 teaspoons grapeseed oil or other high-heat tolerant neutral oil

Salting the Beef

Salting the Beef

If you have a tough cut of beef, follow the method in the video. But if you don’t want to watch it, basically add some course sea salt to the top of the steak and let it sit on the counter for 1 hour for every inch. This steak was so thin we did less than 10 minutes. But even in that short time I could see the steak sweating out and breaking up the fibers! Then you rinse the steak thoroughly of the salt. Pat dry and set aside ready for the stuffing.

But meanwhile you can make the steak glaze.

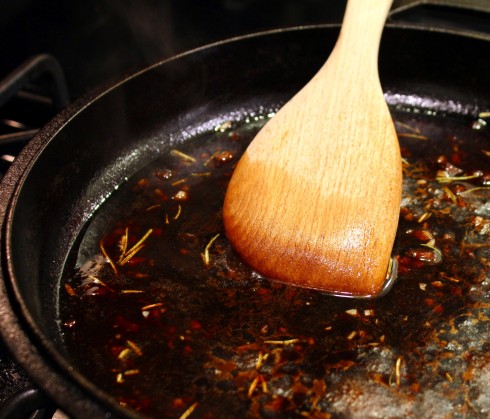
Making the Steak Glaze

Making the Steak Glaze

Add a splash of oil to a saucepan or skillet over medium heat and cook garlic until fragrant, just a minute or so. Add the rest of the glaze ingredients and cook and stir until reduced by about half. Remove rosemary sprig if not using dried. Take off heat and set aside.

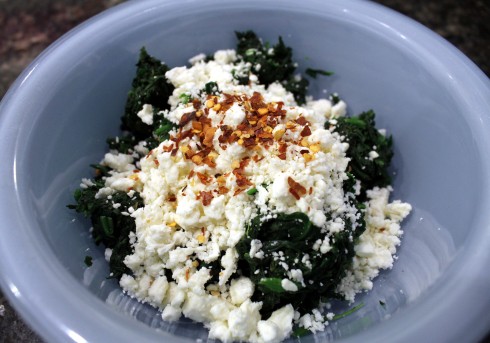
Spinach and Feta Cheese Stuffing

Spinach and Feta Cheese Stuffing

Next, take your thawed and squeezed-dry spinach (you did that already, right?) and add to a bowl along with the Feta cheese, red pepper flakes, and lemon juice and mix until thoroughly combined.

Glazed Steaks

Glazed Steaks

Brush the steak slices with the glaze with a pastry brush, (if you used dried rosemary, don’t worry as it just gets stuck in the brush anyways).

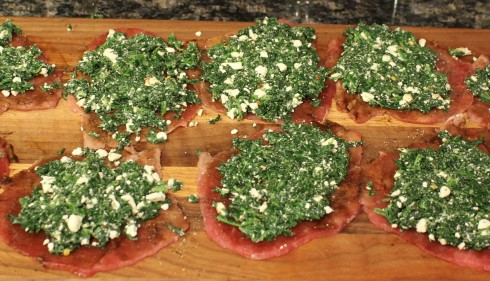
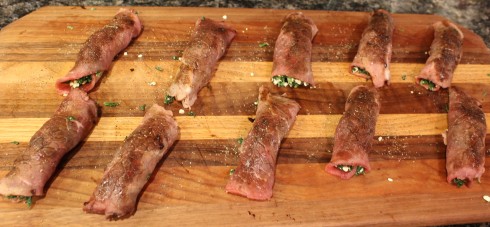
Adding the Spinach Stuffing

Adding the Spinach Stuffing

Grind a bunch of black pepper over the steaks. Top the steak slices evenly with the spinach mixture. Roll up and secure with twine or toothpicks. I found twine to be convenient since I wasn’t grilling.

Brush any remaining steak glaze you have over the rollups. Grind more black pepper over them again, to taste. I am kind of a ground black pepper freak.

Rolled and Stuffed Steaks

Rolled and Stuffed Steaks

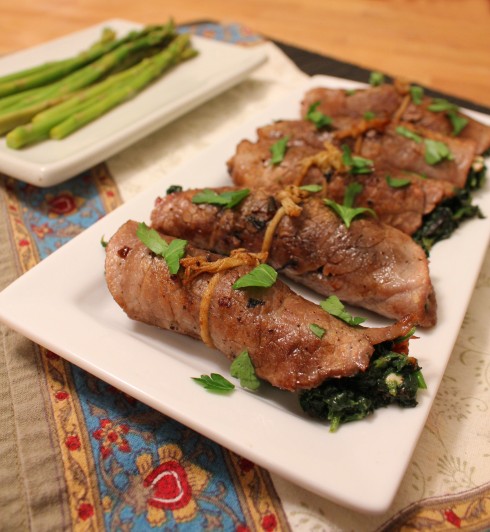
Heat a large cast iron or heavy bottom skillet over very high heat with two teaspoons of neutral high-heat oil. With tongs, add the rollups (in batches if needed) to the skillet and cook on all sides until browned. Just a minute or two on each side, rolling often. Remove to a plate and serve with a side vegetable of choice. I chose steamed asparagus. I suppose some kind of bread could be in order but I’m trying to lose weight. 🙂 Happy dining!

Spinach and Feta Steak Rollups

Spinach and Feta Steak Rollups


Download and Print this Recipe

Download and Print this Yummy Recipe!

Lipstick on a Pig Texas Chicken Spaghetti

9 Jan
Lipstick on a Pig Texas Chicken Spaghetti

Lipstick on a Pig Texas Chicken Spaghetti

Some dishes are just not photogenic. I made this dish last week and the family just gobbled it up and it got raves all the way around. So when I went to take a final “plating shot” I scattered some cilantro over the top of it and thought, “you know, this is just like putting lipstick on a pig.” HA! But mind you, this slow cooker dish is just the ticket for a bowl full of creamy, cheesy, chicken-noodley goodness. You will be licking that bowl clean! (And even better, this recipe is completely versatile!)

WARNING: Unpleasant food photos ahead. Really, there is nothing very appetizing to look at while making this dish. But the taste…! And yes, I am making fun of my photography, because sometimes it just works out that way. 😉

Lipstick on a Pig Texas Chicken Spaghetti

1 large boneless, skinless chicken breast (mine was 12 ounces, and frozen!)
Salt or Mrs. Dash and ground pepper, to taste
1/2 cup chopped onion
1/2 cup diced tomatoes (canned or otherwise, with liquid)
1 roasted Hatch chile, peeled, seeded, and diced (or sub with 2 tablespoons of canned diced green chiles)
2 1/2 cups homemade chicken stock (or sub low-sodium store-bought broth)
4 ounces spaghetti noodles, uncooked
2 ounces cream cheese
1 1/2 cups grated cheese, any kind (I used half Gruyere and half sharp cheddar)
1 teaspoon New Mexico chile powder (or regular)
1 teaspoon lime juice
Cilantro, for garnish (the lipstick on the pig!)

Season the chicken breast with salt or Mrs. Dash and pepper, to taste, then add to the crockpot. I actually added mine in frozen, no need to defrost — really!

Peeled and Seeded Roasted Hatch Chile Pepper

Peeled and Seeded Roasted Hatch Chile Pepper ~ Hmmm, how exciting.

Chop up the onion and peel and dice that roasted pepper. Wait, you don’t have a roasted Hatch chile pepper sitting around? Canned is fine.

Veggies and Chicken

Veggies and Chicken ~ Can’t see the raw chicken? You don’t want to. Trust me.

Toss in the onions, tomatoes, chiles and chicken stock/broth. (And I used turkey stock, see how I am?) Cover and cook on high for 4 hours.

Remove chicken breast and cover with foil until cool enough to handle. Shred the chicken with a fork and add back to the crockpot.

Shredding the Chicken

Shredding the Chicken ~ Hey, let’s take a really close up shot of the shredded chicken so you can even see the tomato bits stuck to it!

Grate your cheeses. No, don’t grate the cream cheese.

Grated Cheeses

Grated Cheeses ~ Finally, something tolerable to view. But it’s just cheese.

Break the uncooked noodles in half and add to the pot along with with the cheeses, chile powder and lime juice.

Adding the Dried Spaghetti

Adding the Dried Spaghetti ~ Really Kathryn? That’s just ick.

Stir around as best you can, then cover and cook for another half hour to an hour until the noodles are done. Give it one final stir to incorporate well, then serve in bowls garnished with lipstick, um, cilantro. 😀

Texas Chicken Spaghetti

Texas Chicken Spaghetti ~ Because putting a really old crockpot in the background with half-spent cilantro makes it look better, right?

Download and Print this Recipe

Download and Print this Yummy Recipe!


Merry Christmas Eve!

24 Dec
Hash Brown, Sausage, Egg, and Cheese Casserole

Hash Brown, Sausage, Egg, and Cheese Casserole

I hope all my wonderful friends and family have a blessed Christmas and a bright 2016!

Hash Brown, Sausage, and Egg Casserole

I’ll be making my traditional egg casserole again tonight, but with a couple of changes. I’ll prep the hash browns and sausage as normal, but leave the whisked eggs covered in a bowl, and add them and the cheese in the morning just before popping in the oven. My hubby thinks it will come out a little less dry, and I agree with him! Oh, and I’ll be mixing half breakfast sausage and half chorizo sausage, both homemade! I’ll have to get those recipes up here one of these days.

Next week I’ll be starting my fifth year of blogging. A special thanks to all my readers who have hung in with me through thick and thin. You are all very special. ❤


Italian Pasta Shells Stuffed with Spinach and Cheese

23 Mar

UPDATE! I so apologize to my readers, but I am so thankful for my readers who point out a mistake in my recipe and that they actually take the time to make my recipes! I am humbled!

However, I forgot to include in the instructions to mix the Mozzarella and Parmesan with the spinach and other ingredients. That has now been fixed, both in this post and in the PDF. I apologize for any inconvenience (or lack of taste) this has caused for you. As always, thank you so much for sticking with me on this adventure! XOXO

anotherfoodieblogger

Italian Pasta Shells Stuffed with Spinach and Cheese Italian Pasta Shells Stuffed with Spinach and Cheese

If you have some yummy spaghetti sauce on hand and want to make something different than plain ol’ spaghetti, this is a winning recipe! It’s not overly difficult to make (aside from stuffing those pesky shells) and makes a really nice meal that has all your veggies in it!

I pretty much used my recipe for my Spinach Lasagna Roll-Ups, but just changed some of the cheese amounts. I feel pretty proud of this recipe, as all the online versions I found for it made anywhere from 24 to 30 shells — way more than I wanted! I went with my gut feeling, and figured 16 shells would do the trick with the amount of stuffing I use for my roll-ups. I was SPOT ON! Woo hoo! I served this with green salad and baked garlic bread. We ate half one…

View original post 372 more words

Italian Pasta Shells Stuffed with Spinach and Cheese

21 Mar
Italian Pasta Shells Stuffed with Spinach and Cheese

Italian Pasta Shells Stuffed with Spinach and Cheese

If you have some yummy spaghetti sauce on hand and want to make something different than plain ol’ spaghetti, this is a winning recipe! It’s not overly difficult to make (aside from stuffing those pesky shells) and makes a really nice meal that has all your veggies in it!

I pretty much used my recipe for my Spinach Lasagna Roll-Ups, but just changed some of the cheese amounts. I feel pretty proud of this recipe, as all the online versions I found for it made anywhere from 24 to 30 shells — way more than I wanted! I went with my gut feeling, and figured 16 shells would do the trick with the amount of stuffing I use for my roll-ups. I was SPOT ON! Woo hoo! I served this with green salad and baked garlic bread. We ate half one night, then finished the other half the next, but you can freeze the leftovers if you want.

Italian Pasta Shells Stuffed with Spinach and Cheese

16 uncooked Jumbo shell pasta
3 cups Paul’s Spicy Spaghetti Sauce, or other prepared sauce
1 15-ounce container Ricotta cheese
3/4 cup shredded Mozzarella (I used a block of low-fat and shredded it with a grater)
1/4 cup shredded Parmesan
2 teaspoons minced garlic
10-ounces frozen chopped spinach, thawed and squeezed dry
1 large egg, beaten
Ground black pepper, to taste
Salt or Mrs. Dash, to taste
Pinch of ground nutmeg
Additional shredded Mozzarella, for topping

Preheat oven to 400°F. Cook the noodles to al dente according to package directions. While the noodles are cooking, combine the Ricotta, Mozzarella, Parmesan, garlic, spinach, egg, pepper, salt or Mrs. Dash, and a pinch of nutmeg in a medium bowl.

Stuffed Pasta Ingredients Ready to Mix

Stuffed Pasta Ingredients Ready to Mix

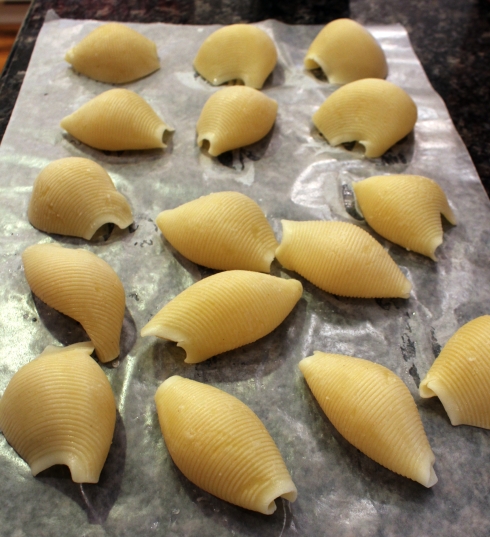
When the noodles are done, drain the noodles, let cool a bit, then lay them on parchment or wax paper in a single layer.

Cooked Pasta Shells

Cooked Pasta Shells

Spread 1 cup of spaghetti sauce on the bottom of a 2-quart casserole dish. Stuff 1/4 cup or so of the cheese and spinach mixture into each pasta shell and place into the dish.

Stuffed Shells Wanting Sauce and Cheese

Stuffed Shells Wanting Sauce and Cheese

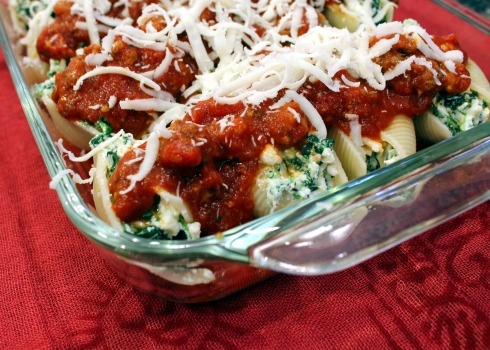
Pour 2 cups of spaghetti sauce over the stuffed shells. Grate additional mozzarella cheese over the top of the shells, then cover the pan with aluminum foil. Bake for 30 minutes. Uncover and turn on the broiler. Broil for about 5 to 10 minutes until cheese is bubbly.

Stuffed Shells Ready to Cook

Stuffed Shells Ready to Cook

Remove from oven and let sit for 5 minutes before serving. Serve with a green side salad and garlic bread. You can freeze the remaining shells in Ziploc bags for a quick and easy future meal. My family loved this so much we ate the rest of it up the next day!

p.s. (Please let me indulge you with photos of my daughter’s rose she got at her dance team’s end-of-year potluck celebration! That was a long journey to get through dance season with the football and basketball schedules!)

Italian Pasta Shells Stuffed with Spinach and Cheese2

Italian Pasta Shells Stuffed with Spinach and Cheese

Download and Print this Recipe

Download and Print this Yummy Recipe!

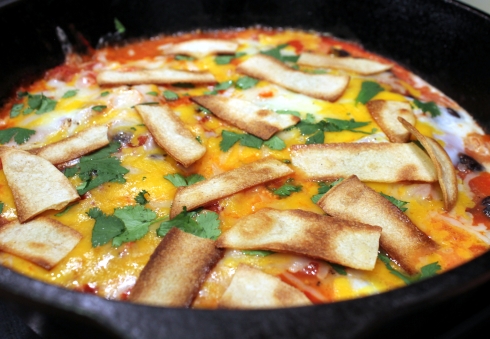
Skillet Huevos Rancheros with Homemade Tortilla Strips

14 Mar
Skillet Huevos Rancheros with Homemade Tortilla Strips

Skillet Huevos Rancheros with Homemade Tortilla Strips

I’ve been eying similar tomato sauce and egg dishes lately from the Middle East region, but “Shakshuka” uses quite a few spices that I simply don’t have. (And I have a LOT of spices!) But the ingredients and spices I almost always have on hand are Mexican in origin. Hence, I bring to you a riff on Shakshuka, Tex-Mex style!

My husband and I were disappointed I only cooked four of the six eggs. We both had large lunches, and decided one egg each would suffice. Oh boy, were we wrong! While are daughter munched happily on her second egg, we longed in silence. However, there was plenty of sauce leftover to make a repeat for lunch the next day!

Skillet Huevos Rancheros with Homemade Tortilla Strips

For the Ranchero Sauce:
1 tablespoon olive oil
1 Serrano (or jalapeño) pepper, diced small
1 cup onion, chopped
2 cloves garlic, peeled and minced
1 28-ounce can pureed tomatoes
1/4 teaspoon New Mexico ground chile (or chili powder)
1/8 teaspoon ground cumin
1 15-ounce can black beans, drained and rinsed
Salt and ground black pepper, to taste

For the Rest of It:
1 tablespoon olive oil
4 6-inch corn tortillas
Sea salt, to taste
4 to 6 large eggs
1/2 cup fresh-grated Monterrey Jack cheese
1/2 cup fresh-grated cheddar cheese
Handful fresh cilantro, (chopped) for garnish
Sour cream, for garnish

Simmering the Rancheros Sauce

Simmering the Rancheros Sauce

Preheat oven to 450 degrees. To make the sauce, add a tablespoon of oil to a cast iron or oven-proof skillet over medium heat. Add the spicy pepper, onion, and garlic, and cook for about 7 minutes until onions are softened. Pour in the can of tomatoes, then bring to a simmer. Lower the heat and simmer for 10 minutes. Stir in the black beans, and salt and pepper, to taste.

Prepping the Tortilla Strips

Prepping the Tortilla Strips

While the sauce is simmering, brush both sides of the corn tortillas with oil and sprinkle with a little salt. Cut into thin strips. Place on a baking sheet in a single layer and place in the preheated oven. Bake for about 3 minutes on each side, until lightly browned. Remove and set aside. (I tried making the strips before the sauce, and got so busy that I burnt my first batch. Lucky for me I always have a large bag of corn tortillas in the pantry!)

Eggs Nestled in Tomato Sauce

Eggs Nestled in Tomato Sauce (LOOK! There is plenty of room for two more eggs, silly!)

When the sauce has thickened, remove from the heat. Make indentations in the sauce with the back of a large spoon, and crack each egg into the wells. Return the pan to the heat and cover. Simmer gently for about 15 minutes, until the whites are partially set.

Skillet Eggs Ready for the Broiler

Skillet Eggs Ready for the Broiler

Turn the oven to broil. Sprinkle the grated cheese over the dish, then place the skillet under the broiler. Cook until the cheese is melted and bubbling and the eggs are cooked to your liking. This shouldn’t be more than a few minutes, unless you like hard-cooked eggs. Remove the skillet (carefully!) from the oven. Garnish with the tortilla strips and cilantro, scoop out your eggs and sauce, and serve with sour cream if you want.

Skillet Huevos Rancheros

Skillet Huevos Rancheros

Download and Print this Recipe

Download and Print this Yummy Recipe!