Tag Archives: rice

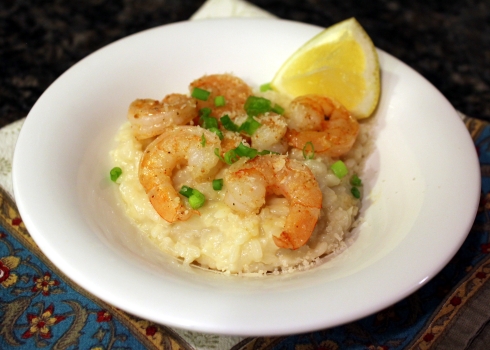
Shrimp and Spinach Risotto

18 Feb
Shrimp and Spinach Risotto

Shrimp and Spinach Risotto

Here’s a creamy and comforting dish that’s a little easier on your waistline with those terms than say, mac and cheese. Although I wouldn’t be one to pass that up either! Risotto is typically made with a short-grained Italian rice called Arborio, which I used here. But if you can’t find that or it’s a bit spendy at your store, you could use a sushi rice or even Calrose. Even a plain ol’ medium grain white rice would work, but it won’t be as creamy.

Leaving the shrimp whole would make this dish quite a bit prettier to present, but let’s face it — who wants to be cutting up their shrimp when you have some hot and creamy spinach risotto waiting to dig into?! Have everything chopped/prepped up front for this. You’ll also want to use some homemade or high-quality chicken broth with this, along with a good dry white wine, such as Pinot Grigio. A dish with a short shopping list needs quality for it to shine!

Shrimp and Spinach Risotto

4 cups homemade or good-quality chicken broth
1/2 pound large shrimp, peeled, deveined and cut into bite-sized pieces
Salt and pepper, to taste
3 tablespoons butter, divided
1 clove garlic, peeled and minced
1/2 cup chopped onion
1 cup Arborio rice
1/4 cup dry white wine
A pinch or two of red chile flakes (optional)
6 ounces chopped fresh spinach
1 teaspoon fresh lemon juice
1/2 cup quality shredded Parmesan

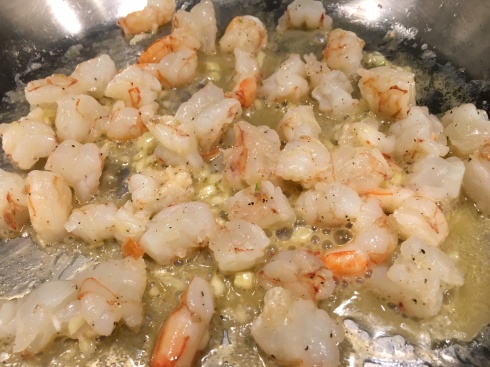
Shrimp and Garlic

Shrimp and Garlic

Heat the chicken broth in a saucepan or microwave until steaming. Season the shrimp with salt and pepper, to taste. Melt one tablespoon of the butter in a large skillet over medium-high heat, then add the garlic and shrimp. Cook the shrimp for just a few minutes on each side, until starting to turn opaque. Remove with a slotted spoon and set aside, and cover to keep warm.

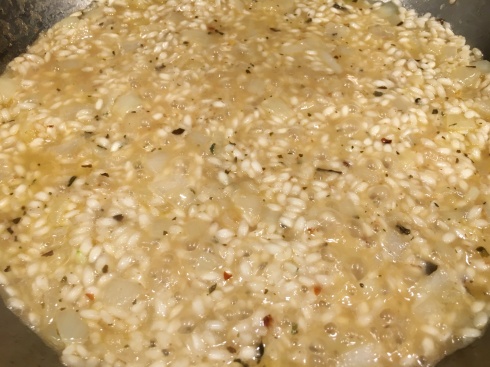
Risotto Beginnings

Risotto Beginnings

Add another tablespoon of butter to the pan, then add the chopped onion. Cook for about 5 minutes, then add the rice and toss to coat. Cook for a few more minutes until the rice begins to color. Add the white wine and simmer and stir until the wine is completely absorbed by the rice. At this point, because I couldn’t resist, add a pinch or two of red chile flakes if you want.

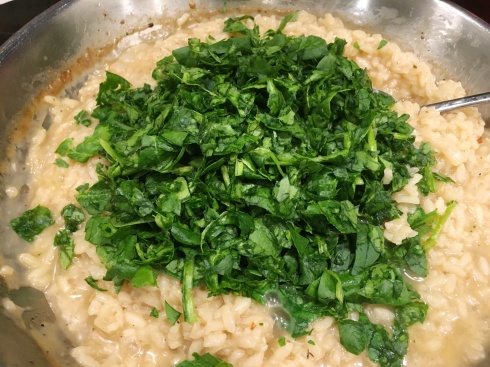
Adding the Spinach

Adding the Spinach

Using a ladle or measuring cup, add about 1/2 cup of hot chicken broth to the rice. Simmer and stir until the liquid is absorbed. Keep repeating this process, ensuring the liquid is absorbed before the next ladle, until the broth is almost gone, stirring constantly. Headphones with music is fun during this task, stir to the beat! Just before the last ladle of broth is used, stir in a tablespoon of butter, the spinach, shrimp, lemon juice, and then the Parmesan. Stir to completely combine, then add just enough of remaining broth to loosen it up. Stir until the spinach is wilted and the shrimp is cooked through, then serve immediately.

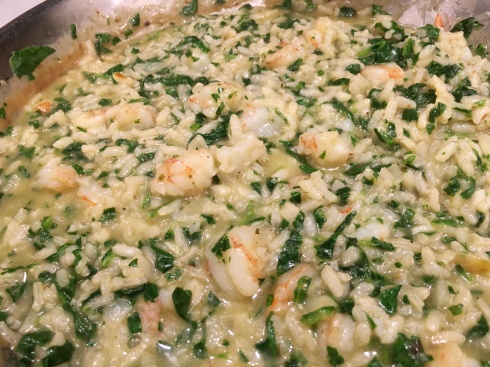
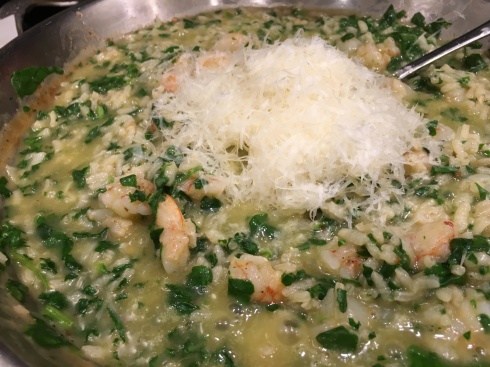
Good Quality Parmesan to Finish

Good Quality Parmesan to Finish

Download and Print this Yummy Recipe!

Download and Print this Yummy Recipe!


Unstuffed Cabbage Roll Casserole

20 Jan
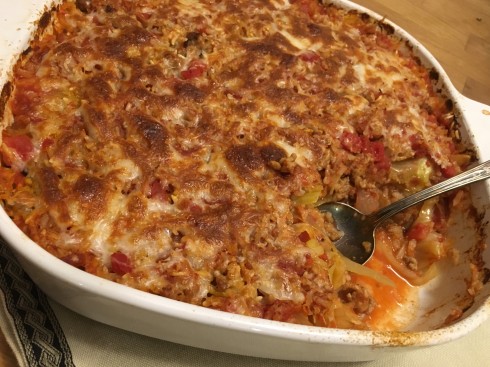
Unstuffed Cabbage Roll Casserole

Unstuffed Cabbage Roll Casserole

I made a soup with similar ingredients to this many moons ago with a mile-long ingredients list, so this time around I decided to simplify it a bit more plus turn it into a casserole. As much as I love soup, sometimes I crave a bit more heft in the bite.

I ALMOST made this inedible, as I had the Hungarian sweet paprika and cayenne pepper sitting side by side in identical containers during prep. I actually poured ONE TABLESPOON of cayenne pepper on top of the tomatoes, but praise be I immediately noticed my mistake and was able to scoop most of it out before stirring it in. The end result was still a tad spicier than I intended, but overall a great comforting meal for a cold night. It sure warmed my husband up, lol! And even though this is over an hour in the oven, I guarantee this is way less time than the traditional stuffed method!

Unstuffed Cabbage Roll Casserole

1 tablespoon olive oil
1  pound ground beef, pork, or turkey (I used half beef/half pork)
1 cup chopped onion
1 teaspoon minced garlic
Ground black pepper and salt, to taste
1 14-ounce can diced tomatoes
1 8-ounce can no-salt tomato sauce
1 tablespoon Hungarian sweet paprika
1/4 teaspoon cayenne pepper
1/2 teaspoon Worcestershire sauce
2 teaspoons rice wine or white vinegar
1/2 cup white rice, uncooked
1 3/4 cups homemade or low sodium beef broth
1 small head cabbage (about 1 pound), quartered and sliced thin
1/2 cup shredded mozzarella

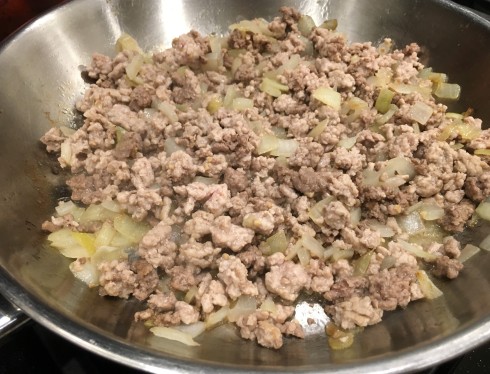
Ground Beef and Pork Mixture

Ground Beef and Pork Mixture

Preheat oven to 375 degrees. In a skillet, brown the ground ground meat and chopped onions in the olive oil over medium heat until meat is cooked through, about 10 minutes. Add the minced garlic and cook a minute or two more. Drain the grease, if any. Grind a bunch of black pepper over it and add salt, to taste. Set aside.

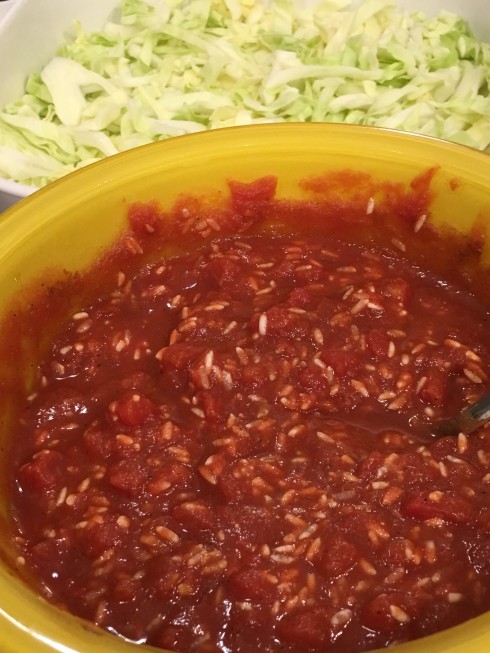
In a bowl, mix in the next 7 ingredients (diced tomatoes through the rice).

Tomato Rice Mixture

Tomato Rice Mixture

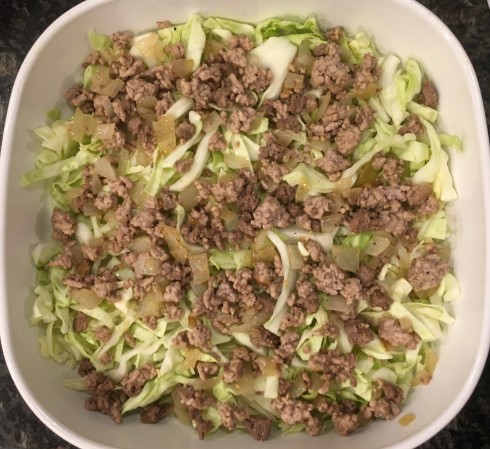
Lightly spray an 8 x 8 casserole dish with oil, then layer half the cabbage on the bottom.

Cabbage and Beef Layer

Cabbage and Beef Layer

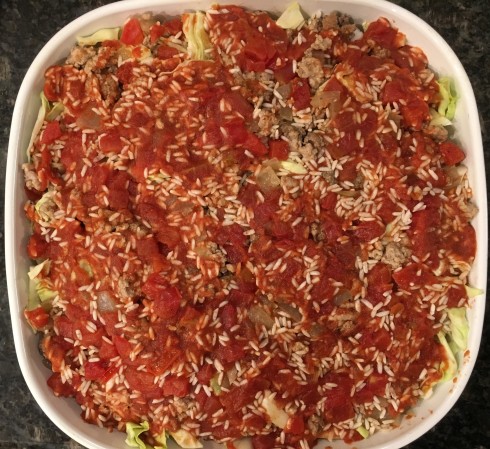
Top with half the ground meat mixture, then half the tomato sauce mixture. Repeat. Last, pour the beef broth over all.

Layers Complete

Layers Complete

Cover dish tightly with foil, and cook in oven for 1 hour 15 minutes. Remove foil, sprinkle cheese over top and broil for just a few minutes to melt cheese. Remove and let rest for 5 minutes, then serve.

p.s. We had to say goodbye to our beloved Hannah Banana last week. Our rescue dog of 14 years is deeply missed.

Hannah Banana

Hannah Banana

Hannah Banana

Hannah Banana

Download and Print this Yummy Recipe!

Download and Print this Yummy Recipe!


Red Beans and Rice with Andouille Sausage

17 Aug
Red Beans and Rice with Andouille Sausage

Red Beans and Rice with Andouille Sausage

After two months of no measurable rain and temps in mostly the 90s and triple digits, we had a welcome day of rain and cool temps in the 70s. The sudden change in weather gave me the opportunity to come up with a one-pot meal that was both satisfying with plenty of heat.

The weather seems to have moderated now back into temperatures normal for Central Oregon, with abundant blue skies. Just in time for the pending Apoc-Eclipse, which we are escaping from for a week to our private RV property on the coast. The forecast is for mostly sunny skies, and we’ll be uncrowded and safely ensconced away from the madness that is sure to come here. We are also in the path of totality over there, and even if we end up with a few clouds and maybe fog, it will still get dark, right?

I know I’ve gone missing in the WordPress world, but the power went out last Friday and fried our modem, and our “stellar” internet provider could not get a tech out here until Tuesday. And now I’ll be absent again for another week. So I’d best get this recipe out to you!

Red Beans and Rice with Andouille Sausage
Adapted from Tastes of the South

2 tablespoons grapeseed or olive oil
1/2 pound Andouille sausage, sliced
1/3 cup chopped onion
1/3 cup chopped celery
1/3 cup chopped red bell pepper
1 teaspoon minced garlic
1 (15-ounce) can light red beans, drained and rinsed
1 (15-ounce) cans diced tomatoes, undrained
1/2 tablespoon chopped fresh thyme
1 teaspoon smoked paprika
1 teaspoon Cajun seasoning
Dash of cayenne pepper
1/2 cup long grain rice
1 1/2 cups chicken broth, homemade or low sodium
1/2 cup panko (Japanese bread crumbs)
1 tablespoon unsalted butter, melted

Preheat oven to 350 degrees. In a large cast-iron skillet, heat the oil over medium-high heat. Add the sausage, chopped vegetables and garlic, and cook about 10-15 minutes until vegetables are tender and sausage is browned. Add the beans, tomato, thyme, paprika, cayenne pepper, and Cajun seasoning. Cook 5 more minutes and remove from heat. Stir in rice and broth.

In a small bowl, stir together bread crumbs and melted butter; set aside.

Add the skillet to the oven and bake for 20 minutes. Carefully slide skillet out and sprinkle with the bread crumb mixture. Continue to bake until golden brown, 10 to 15 minutes more. Serve with a side of cornbread.


Shrimp in Pepita Tomatillo Sauce

7 May
Shrimp in Pepita Tomatillo Sauce

Shrimp in Pepita Tomatillo Sauce

We have a nice stash of jumbo (16-20 count) shrimp in the freezer, and this tasty/tangy shrimp dish caught my eye in my blog readerboard a couple of weeks ago. It is right up my alley using Mexican-inspired ingredients, and is served over something other than a tortilla, ha!

I adapted this from Josette’s Shrimp in Green Mole over at thebrookcook, and the vibrant green sauce did not disappoint. I halved the shrimp amount since there were only two of us eating it, but kept the sauce amount the same since she said she would have enjoyed more sauce. I substituted pepitas, which are pre-roasted baby pumpkin seeds and ground cumin for seeds, so that eliminated a couple of steps. I’m all about easy. I also omitted the romaine lettuce in the sauce, which admittedly was a mistake but the sauce came out delish all the same! Here’s how I did it:

Shrimp in Pepita Tomatillo Sauce
Adapted from Shrimp in Green Mole at thebrookcook

1/2 cup hulled pepitas
1/2 pound tomatillos, husked, rinsed and quartered
1/2 serrano or jalapeño, stemmed
1/4 cup chopped white onion
2 garlic cloves, peeled
1/4 cup tightly pack chopped cilantro
1/8 teaspoon ground cumin
1 1/2 cups homemade or low-sodium chicken stock
1/2 tablespoon olive oil
Kosher salt and ground black pepper, to taste
1/2 pound jumbo tail-on shrimp, shelled and deveined
Pepitas and cilantro, for garnish
Cooked rice, for serving

Place the pepitas, tomatillos, chile pepper, onion, garlic, cilantro, cumin, and 1/2 cup of the chicken stock in a blender or food processor. Blend until smooth, stirring and scraping down sides as necessary.

Heat the oil in a skillet (cast-iron if available) over medium-high heat. Add the tomatillo mixture, which will spatter so be prepared with a screen or lid! Cook, stirring often, for about 8 to 10 minutes. Add the remaining chicken stock, bring to a simmer, and reduce heat to medium low, simmering softly and stirring often until sauce is thick and creamy, about another 10 minutes. Season to taste, with salt if necessary.

Season shrimp with kosher salt and pepper, then add to the simmering sauce. Cook on each side for 3 or 4 minutes until the shrimp are just cooked through. Serve over rice garnished with pepitas and cilantro.


Jodi’s Crockpot Honey Garlic Chicken

22 Oct
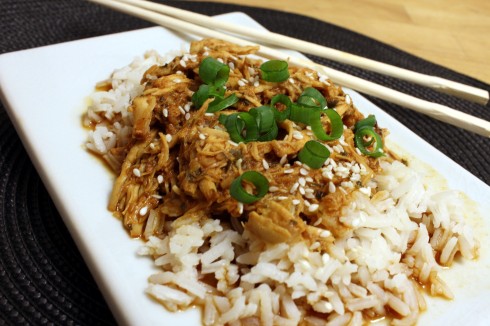
Crockpot Honey Garlic Chicken

Crockpot Honey Garlic Chicken

This meal is so easy even this one-handed cook pulled it off handily. (I crack myself up.) 😀

My wonderful blog friend Jodi at The Creative Life in Between posted yet another mouth-watering dish for me to steal. I followed her recipe except cut it in half and used smoked paprika in place of the optional smokey paprika chipotle.

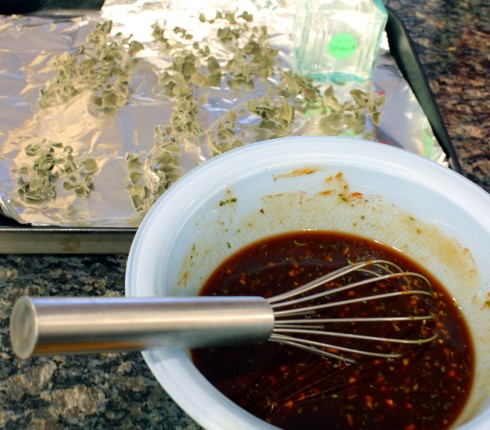
Dried Oregano and Honey Garlic Sauce

Dried Oregano and Honey Garlic Sauce

I thought I was out of dried oregano so snipped some fresh and dried it in the toaster oven first, but then found my last year’s dried batch — not in the empty and clearly labeled oregano jar — but in a Mrs. Dash container labeled in Sharpee with my husband’s printing. Go figure.

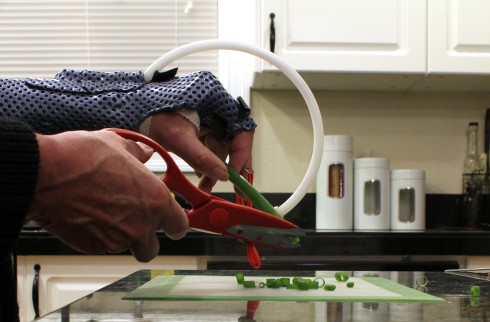
We served ours over rice and garnished with additional sesame seeds and snipped green onion (I demonstrate my prowess with that task below).

Snipping Green Onion Wearing Traction Device

Snipping Green Onion Wearing Traction Device

This is a spicy, slightly sweet explosion of flavor! The daughter went back for seconds and had the leftovers the next day. My husband ate a large sub just a few hours earlier and didn’t have any. Hiss loss!

Please pop on over to Jodi’s place to find a handy-dandy printable recipe here —> Crockpot Honey Garlic Chicken.

Crockpot Honey Garlic Chicken

Crockpot Honey Garlic Chicken

17 Cinco de Mayo Recipes

4 May
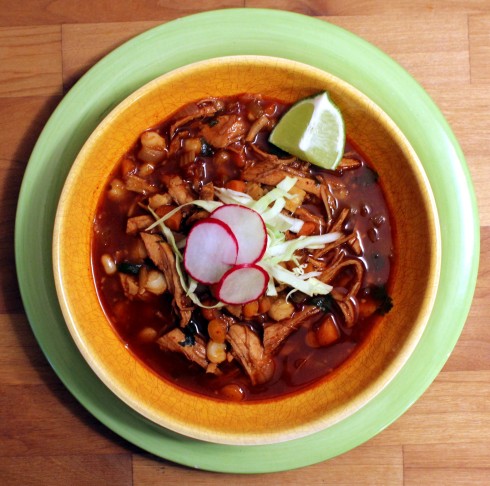
Turkey Chipotle Posole

Turkey Chipotle Posole

Yeah, yeah, I am always late to the game. I always forget I have a bunch of recipes you can make for Cinco de Mayo. But heck, don’t let that stop you from making any of these recipes on any other day either! UPDATE: I can NOT get some of my links to work, so if you want to look at a recipe here without a link, please try the search box in the upper right corner. Sorry ’bout that!

Turkey Chipotle Posole (lead-in photo)

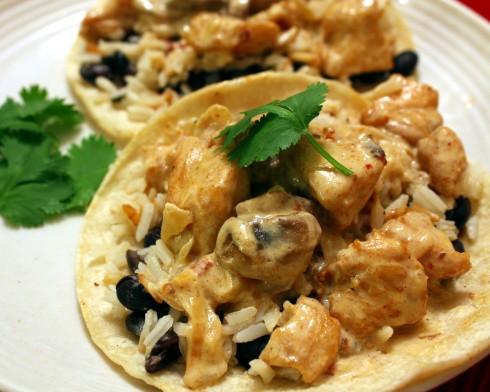
Marcos Pollo Tacos

Marcos Pollo Tacos

Marcos Pollos Tacos

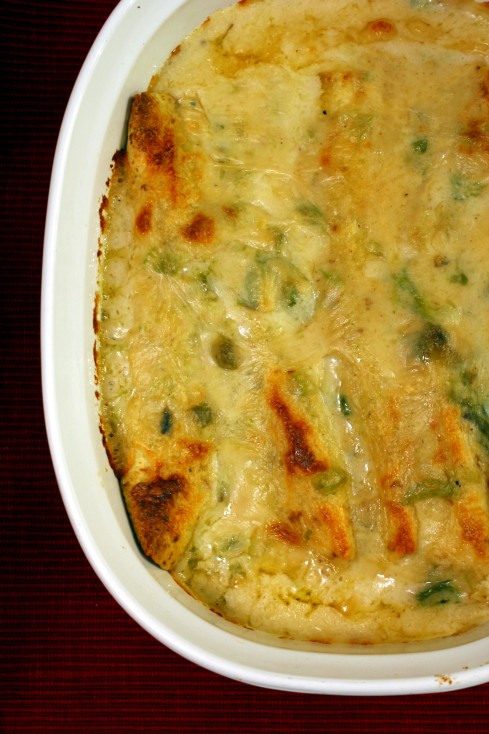
Chorizo and Beef Enchiladas with Cheesy Hatch Chile Sauce

Chorizo and Beef Enchiladas with Cheesy Hatch Chile Sauce

Chorizo and Beef Enchiladas in Cheesy Hatch Chile Sauce

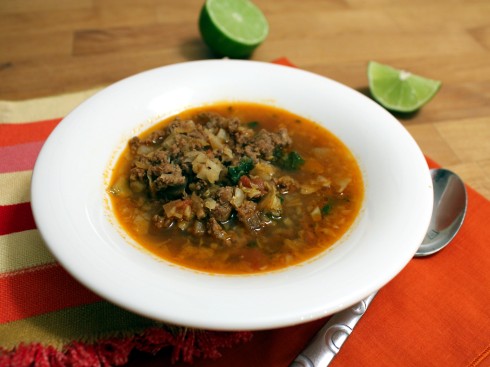
Mexican-Style Beef and Cabbage Soup

Mexican-Style Beef and Cabbage Soup

Mexican-Style Beef with Cabbage Soup

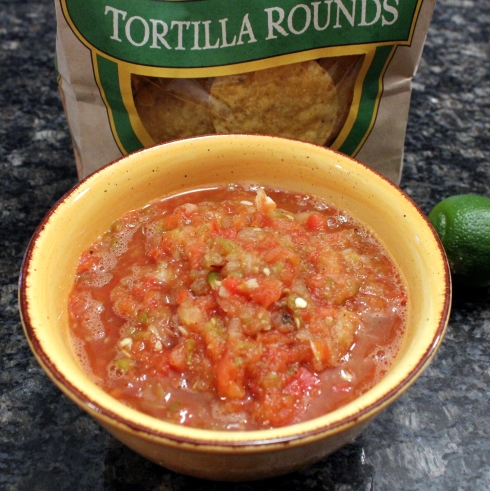
Hatch Chile Fire-Roasted Salsa

Hatch Chile Fire-Roasted Salsa

Hatch Chile Fire-Roasted Salsa

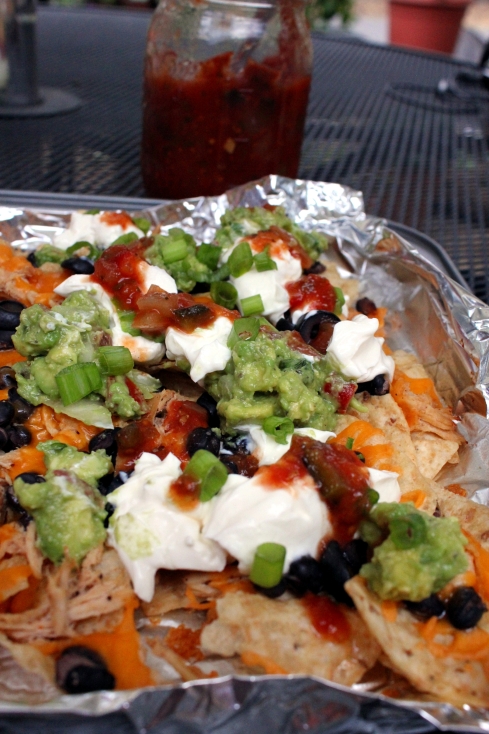
Chunky Guacamole Grilled Nachos with Chicken

Chunky Guacamole Grilled Nachos with Chicken

Grilled Nachos with Chicken and Chunky Guacamole plus Grilled Mexican Tortilla Pizza

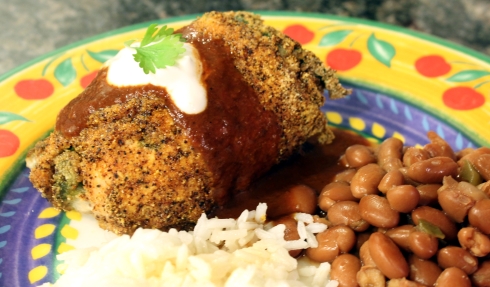
Chile Relleno Chicken Rollups

Chile Relleno Chicken Rollups

Chile Relleno Chicken Rollups

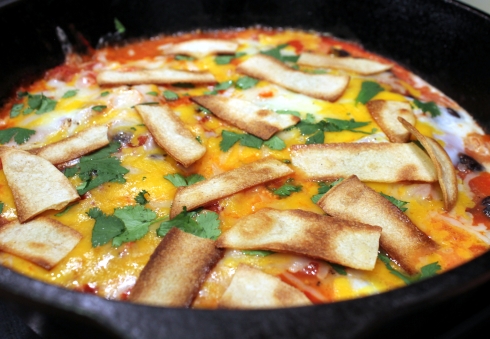
Skillet Huevos Rancheros with Homemade Tortilla Strips

Skillet Huevos Rancheros with Homemade Tortilla Strips

Skillet Huevos Rancheros with Homemade Tortilla Strips


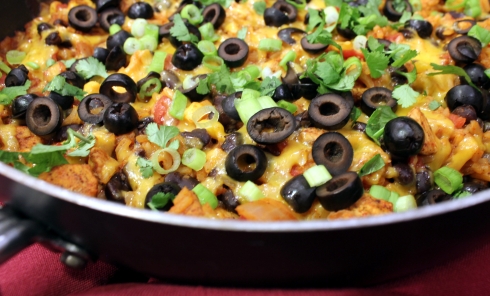
Chicken Enchilada Skillet

Chicken Enchilada Skillet

Chicken Enchilada Skillet

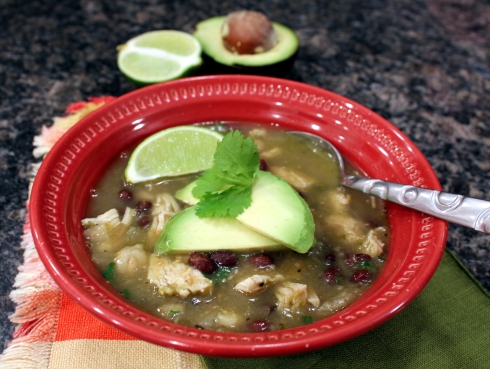
Chicken Chile Verde Posole

Chicken Chile Verde Posole

Chicken Chile Verde Posole

Authentic Tex-Mex Cheese Enchiladas with Chile Gravy

Authentic Tex-Mex Cheese Enchiladas with Chile Gravy

Authentic Tex-Mex Cheese Enchiladas with Chile Gravy


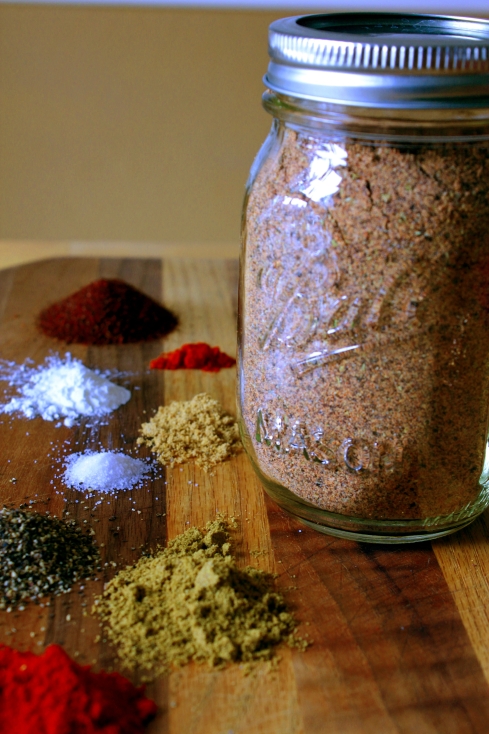
Large Batch Taco Mix

Large Batch Taco Mix

DIY Taco Mix (Large Batch)

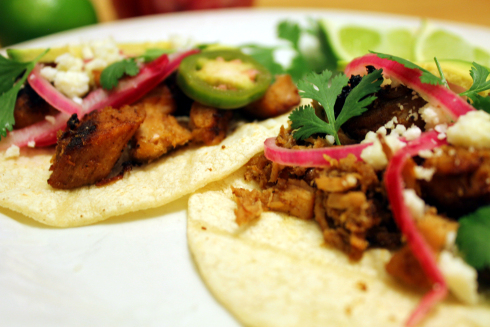
Carnitas Tacos with Spicy Pickled Red Onions

Carnitas Tacos with Spicy Pickled Red Onions

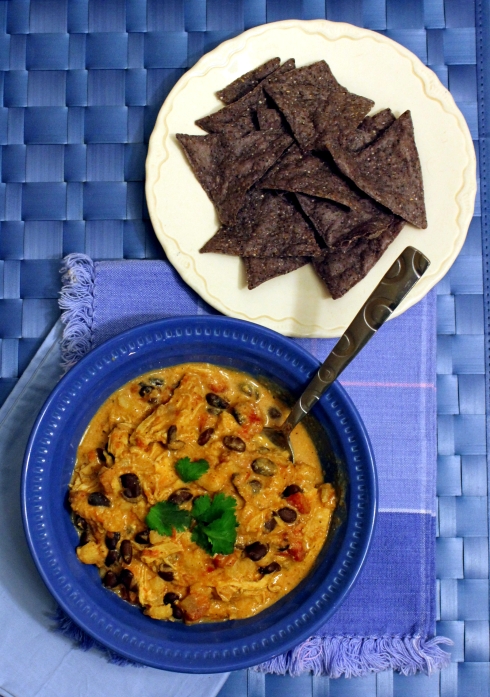
Creamy Chicken Chili and Beans

Creamy Chicken Chili and Beans

Creamy Chicken Chili and Beans

Chicken Fideo Soup

Chicken Fideo Soup

Chicken Fideo Soup (Mexican Chicken Noodle Soup)

Black Bean, Potato, and Chorizo Soup

Black Bean, Potato, and Chorizo Soup

Black Bean, Potato, and Chorizo Soup

And last but not least!

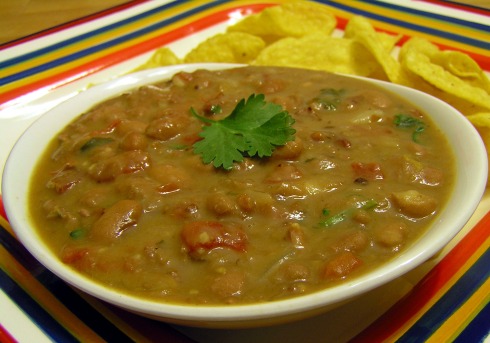
Charro, or Borracho Beans

Charro, or Borracho Beans

Cinco de Mayo Charro, or Burracho Beans

Happy Eating Y’all!

Shrimp Risotto with Cajun-Spiced Shrimp

5 Nov
Shrimp Risotto with Cajun-Spiced Shrimp

Shrimp Risotto with Cajun-Spiced Shrimp

Ahhhh, risotto. It is such a lovely taste and texture but can be the bane of a cook who doesn’t have the time to bring it up to that incredible creamy  “ahhhh” in your mouth sensation. But if you are short on time, a pressure cooker will take all that “non-time” away to give you a perfectly creamy risotto, full of flavor. Add some Cajun-spiced shrimp on top, and tah-dah! Dinner served. In less than a half-hour. Job accomplished.

Shrimp Risotto with Cajun-Spiced Shrimp
Risotto recipe adapted from Perfect Risotto at bonafidefarmfood.com

For the Risotto:

1/2 cup finely diced yellow onion
4 tablespoons unsalted butter, divided
1/4 cup dry white wine
1 cup Arborio or California Pearl rice
4 to 5 cups shrimp stock, recipe here —> Homemade Shrimp Stock
1/2 cup fresh-grated Parmesan cheese, from a block

Diced Onions

Diced Onions ~ HEY! Who doesn’t eat microwaved popcorn while prepping dinner, huh???

For the Cajun-Spiced Shrimp:

1 tablespoon unsalted butter
1/2 pound large shrimp, shelled and deveined
Cajun-spiced seasoning, to taste
Fresh-grated Parmesan cheese, for garnish
Chopped green onion ends, for garnish
Lemon wedges, for garnish

Get all your ingredients prepped. This doesn’t take long at all!

Prepping the Ingredients

Prepping the Ingredients

Heat your pressure cooker (at minimum 3-quart size) over medium-high heat. Add 2 tablespoons of the butter until hot, then add the chopped onions. Cook until soft, about 5 minutes.

Wine Pouring Shot

Wine Pouring Shot ~ Something went awry with my camera settings for this shot so you get the “Instagram” look!

Add the dry white wine and bring to a boil. Boil for a few minutes more then add the rice  and the shrimp stock.

Risotto Ready to Pressure Cook

Risotto Ready to Pressure Cook

Put on the lid to your pressure cooker and lock into place, then bring up the pressure to high according to manufacturer’s directions. (I have a manual one, that means when the pressure gauge starts rocking. Results may vary by what you have.)

My Pressure Cooker

My Pressure Cooker

Once the gauge is rockin’ (or up to pressure for you high-tech electronic owners), set the timer for 7 minutes.

Meanwhile, cook the shrimp. Add a tablespoon of butter to a hot skillet and heat until foamy. Add the garlic, then add the shrimp in one layer. Season with Cajun-seasoning of choice. Cook for about 2 to 3 minutes per side. Don’t overcook! Remove shrimp from skillet and set aside until risotto is done.

Cajun-Spiced Shrimp

Cajun-Spiced Shrimp

At the end of the 7 minute-timer, remove pressure cooker from heat and run the pot under cold water to release the pressure immediately. Don’t remove the lid until all pressure is released.
Stir in the rest of the butter and the half cup of Parmesan cheese.

Perfect Risotto

Perfect Risotto

Serve Risotto in bowls , topped with the Cajun-Spiced Shrimp, and garnish with fresh-grated Parmesan cheese, green onions, and lemon wedges.

Shrimp Risotto with Cajun-Spiced Shrimp

Shrimp Risotto with Cajun-Spiced Shrimp

Download and Print this Recipe

Download and Print this Yummy Recipe!

Keema ~ A Taste of India

11 Apr
Keema  ~ A Taste of India

Keema ~ A Taste of India

About six years ago my employer decided that hosting an Indian Cuisine potluck would be a good idea for some newly hired employees from India who were training at our local office for an extended period of time. At that time, I had zero experience with Indian cuisine, so had asked one of the new hires for a recipe I could make for them. The next day I was handed a photocopy from an unknown cookbook. It was titled simply “Keema.” I made it for the potluck and remember it was a hit! But then it remained forgotten in my loose-leaf recipe archive (read “mess”) until last week.

I had obviously adapted it the first time around, as it had scratch outs, scribbles, and additions and substitutions written all over it. This time around, I decided to search it out on the internet. There are so many variations of Keema that I felt I had good liberty to basically “redo” it again to my family’s tastes as they are today. My new remake got two thumbs up from the family! My only regret was not buying some cottage cheese to serve on the side, as it makes a refreshing accompaniment to the meal. Since this made way too much for one meal, I went straight to the store the next day and bought cottage cheese for the leftovers. No leftovers were thrown out, I am glad to say!

This is traditionally made with ground lamb, but I used ground beef as a substitute, but you could use either one or a combination of the two. Make sure you use at least a 12-inch skillet, as this makes a LOT! Feel free to halve the recipe.

Keema

1 to 1 1/2 pounds ground beef or lamb
3/4 cup chopped onion
2 cloves garlic, peeled and minced (about 2 teaspoons)
2 tablespoons garam masala (I used dried Mild Curry #512, according to the bulk bin I bought it from)
1 teaspoon salt or Mrs. Dash table blend
1/2 teaspoon ground cumin
Pinch of cayenne pepper
2 heaping tablespoons of tomato paste
1 1/2 cups homemade or low sodium beef broth
1 can diced tomatoes
1 can garbanzo beans (chickpeas), drained and rinsed
1/2 cup frozen peas
Lime wedges, for garnish
Chopped cilantro, for garnish
Cooked rice, for serving
Cottage cheese, for serving

Ground Beef and Onions

Ground Beef and Onions

In a large skillet over medium heat, cook the ground beef or lamb with the chopped onion until evenly browned. Drain off any grease. Stir in the garlic and cook for about a minute more, then add the spices and combine.

Spices Added to Ground Beef Mixture

Spices Added to Ground Beef Mixture

Add the the rest of the ingredients except the frozen peas and garnishes. Reduce the heat and simmer for about 20 minutes. In the last five minutes, add the frozen peas and cook until heated through.

Keema Ready to Serve

Keema Ready to Serve

Serve over a bed of rice, with a squeeze of lime, and cilantro. Please add cottage cheese to the side as a lovely, refreshing side.

Keema

Keema

Download and Print this Recipe

Download and Print this Yummy Recipe!

Asian Style Cube Steak

5 Apr
Asian Style Cube Steak

Asian Style Cube Steak

I’ve been hard-pressed to come up with new dinner ideas for all the packages of tenderized top round (aka cube steak) we have in our freezer. After I spied a new Teriyaki sauce that had sesame seeds in it at the store, I decided to buy it and figured the steak could be dressed up with it for an Asian flair. Throw in some onions, carrots, and sugar snap peas and voila! A perfect meal to serve over a bed of rice. I got two thumbs up from the family for this one!

Asian Style Cube Steak

1 pound tenderized top round
Salt or Mrs. Dash
Ground black pepper
1/4 cup flour
Vegetable oil, for frying
1/2 to 1 cup sliced onions
1 3/4 cup beef broth, homemade or low sodium
1/4 cup Teriyaki sauce with sesame seeds
8 ounces baby carrots
8 ounces sugar snap peas
3/4 cup uncooked rice

Cube Steaks and Teriyaki Sauce

Cube Steaks and Teriyaki Sauce

Preheat oven to 350 degrees. Cut the cube steak into serving portions then season with salt and pepper, to taste. Dredge the steaks through the flour, pressing in firmly to stick. Reserve the leftover flour.


Cube Steaks and Onions

Cube Steaks and Onions

Heat about 1/8 inch of oil in an oven-proof or cast-iron skillet over medium-high heat. Fry the steaks on one side for about five minutes, the carefully flip over. Add the sliced onions, then cook the steak and onions for about another five minutes. Add the reserved flour to the pan, stirring into the oil as best you can around the steaks.

In a large measuring cup, add the beef broth, then add the Teriyaki sauce with sesame seeds (I used Soy Vay brand) to the 2-cup mark and whisk to incorporate. (If you can’t find that brand of sauce, simply add about a tablespoon of sesame seeds to any Teriyaki sauce.) Pour the mixture over the steak an onions.

Carrots Added to the Pot

Carrots Added to the Pot

Add the baby carrots around the steaks. Cover with an oven-proof lid, and bake in the oven for about 45 minutes. Carefully remove lid, stir in the snap peas, then cook covered for an additional 15 minutes.

Snap Peas Added to the Pot

Snap Peas Added to the Pot

While the steak is in the oven, you can cook the rice according to package directions and keep warm until serving time. When the steaks and vegetables are done, serve over the rice with plenty of sauce.

Download and Print this Recipe

Chicken Enchilada Skillet

7 Mar
Chicken Enchilada Skillet

Chicken Enchilada Skillet

I’ve been keen on making one-pot meals these days. I had a hankering for enchiladas, but I sure mess up a lot of dishes in that process. I’ve done the enchilada casserole before, which does use a few less dishes, but that is still too many when you just want to throw everything into ONE dish and cook it. Yes, a slow cooker works like that, but it was 6 pm and no time for that. A few interwebz searches yielded the brainchild for the following recipe. I’ve decided to call it Chicken Enchilada Skillet, because that is exactly what it is. And you could make it with ground burger, steak, or pork too! A cheesy, filling dish that tastes like enchiladas, but made in only a skillet! Win-win.

Chicken Enchilada Skillet

1 pound boneless, skinless chicken (white or dark)
2 tablespoons olive oil
Ground black pepper, to taste
1 teaspoon cumin
2 teaspoons chili powder
3/4 cup chopped onion
3/4 cup uncooked rice
1 1/2 cups chicken broth
1 10-ounce can Rotel diced tomatoes with green chiles (off-brands are now available)
1 10-ounce can red enchilada sauce (freeze the rest if larger)
1 cup frozen corn
1 15-ounce can black beans, drained and rinsed.
1 cup grated cheddar cheese
2.25 ounce can sliced black olives
Cilantro, diced green onions, for garnish
Sour cream and warmed tortillas, for serving

Chop the chicken into bite-size pieces, then season with the pepper, cumin, and chile powder.

Seasoned Chicken and Onions

Seasoned Chicken and Onions

Add the oil to a large oven-proof skillet over medium-high heat, and cook the chicken and onion until browned, about 7 minutes, stirring occasionally.
Browning the Chicken and Onions

Browning the Chicken and Onions

Add the rice to the skillet and cook about 3 to 4 more minutes, stirring occasionally.
Sauteeing the Rice with Chicken

Sauteing the Rice with Chicken

Next add the chicken broth, canned tomatoes with green chiles, enchilada sauce, and corn. Heat up to a low boil, then turn down to a simmer.

Simmering the Enchilada Misture

Simmering the Enchilada Mixture

Cover the skillet and cook for 20 to 25 minutes, until the rice is cooked through and absorbed most of the liquid.

Enchilada Skillet Ready for Garnishes

Enchilada Skillet Ready for Garnishes

Remove from the heat, then add the black beans. Top with the grated cheese and black olives. Put under a broiler for a few minutes until the cheese is melted. Garnish with the green onions and cilantro, and serve with sour cream and tortillas.

Chicken Enchilada Skillet

Chicken Enchilada Skillet

You can add the mixture to a tortilla and roll into a burrito, or just use it to dip into the enchilada skillet surprise!

Download and Print this Recipe

Download and Print this Yummy Recipe!