Tag Archives: white wine

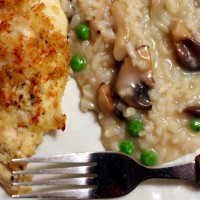
Shrimp and Spinach Risotto

18 Feb
Shrimp and Spinach Risotto

Shrimp and Spinach Risotto

Here’s a creamy and comforting dish that’s a little easier on your waistline with those terms than say, mac and cheese. Although I wouldn’t be one to pass that up either! Risotto is typically made with a short-grained Italian rice called Arborio, which I used here. But if you can’t find that or it’s a bit spendy at your store, you could use a sushi rice or even Calrose. Even a plain ol’ medium grain white rice would work, but it won’t be as creamy.

Leaving the shrimp whole would make this dish quite a bit prettier to present, but let’s face it — who wants to be cutting up their shrimp when you have some hot and creamy spinach risotto waiting to dig into?! Have everything chopped/prepped up front for this. You’ll also want to use some homemade or high-quality chicken broth with this, along with a good dry white wine, such as Pinot Grigio. A dish with a short shopping list needs quality for it to shine!

Shrimp and Spinach Risotto

4 cups homemade or good-quality chicken broth
1/2 pound large shrimp, peeled, deveined and cut into bite-sized pieces
Salt and pepper, to taste
3 tablespoons butter, divided
1 clove garlic, peeled and minced
1/2 cup chopped onion
1 cup Arborio rice
1/4 cup dry white wine
A pinch or two of red chile flakes (optional)
6 ounces chopped fresh spinach
1 teaspoon fresh lemon juice
1/2 cup quality shredded Parmesan

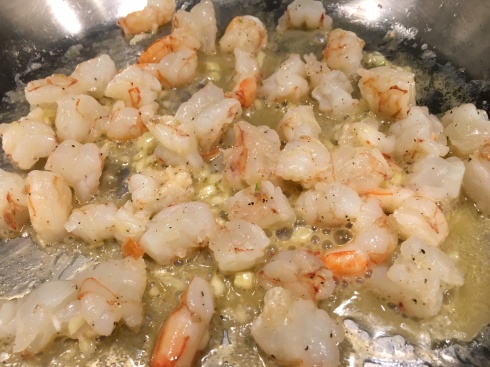
Shrimp and Garlic

Shrimp and Garlic

Heat the chicken broth in a saucepan or microwave until steaming. Season the shrimp with salt and pepper, to taste. Melt one tablespoon of the butter in a large skillet over medium-high heat, then add the garlic and shrimp. Cook the shrimp for just a few minutes on each side, until starting to turn opaque. Remove with a slotted spoon and set aside, and cover to keep warm.

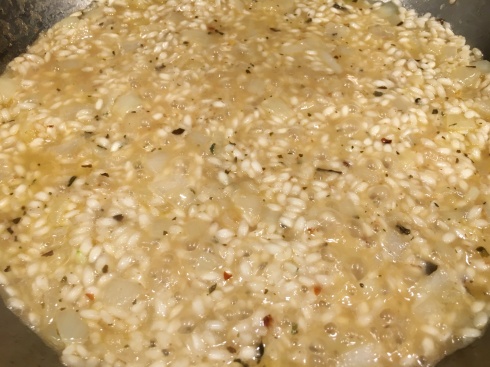
Risotto Beginnings

Risotto Beginnings

Add another tablespoon of butter to the pan, then add the chopped onion. Cook for about 5 minutes, then add the rice and toss to coat. Cook for a few more minutes until the rice begins to color. Add the white wine and simmer and stir until the wine is completely absorbed by the rice. At this point, because I couldn’t resist, add a pinch or two of red chile flakes if you want.

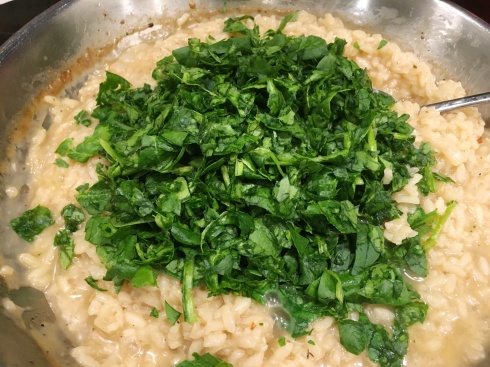
Adding the Spinach

Adding the Spinach

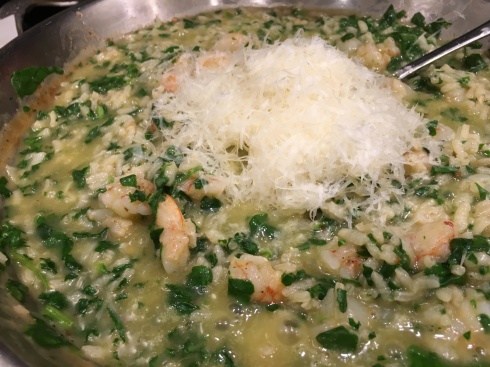
Using a ladle or measuring cup, add about 1/2 cup of hot chicken broth to the rice. Simmer and stir until the liquid is absorbed. Keep repeating this process, ensuring the liquid is absorbed before the next ladle, until the broth is almost gone, stirring constantly. Headphones with music is fun during this task, stir to the beat! Just before the last ladle of broth is used, stir in a tablespoon of butter, the spinach, shrimp, lemon juice, and then the Parmesan. Stir to completely combine, then add just enough of remaining broth to loosen it up. Stir until the spinach is wilted and the shrimp is cooked through, then serve immediately.

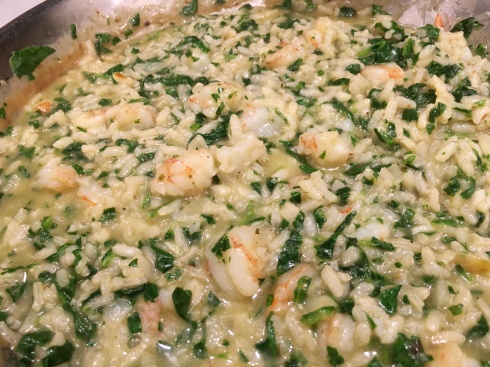
Good Quality Parmesan to Finish

Good Quality Parmesan to Finish

Download and Print this Yummy Recipe!

Download and Print this Yummy Recipe!


Chicken with Shallot Dijon Sauce

3 Feb
Chicken in Shallot Dijon Sauce

Chicken with Shallot Dijon Sauce

Oooh, sounds fancy-pants, huh? Well, it is, actually. I’d serve this right up to guests in my house any day of the week. In reality, it was just me and the hubs chowing on it, but THAT SAUCE! The sauce with the shallots, dijon, tarragon, and the luscious cherry tomatoes that are cooked until just bursting is way up there on the yum-meter. I served this over pappardelle noodles, but it would go equally well with roasted or smashed potatoes, rice, etc.

I riffed this from a recipe I found on New York Times Cooking. They’ve been giving me quite a few ideas lately about what to cook, with their handy “What to Cook This Week” email subscription. (Which is free.) I get a lot of spammy email, but that is one email I always click on to see what inspires my tastebuds. I usually read the “most helpful” rated comments and adapt the recipe based on people’s changes who actually made the recipe, as the NYTC recipes are not always golden. OK enough of that endorsement (which I was not paid for, lol).

Chicken with Shallot Dijon Sauce

1 pound chicken, fileted to equal-ish sizes
Salt and pepper, to taste
2 tablespoons flour
2 tablespoons unsalted butter
1 1/2 cups shallots, (6 ounces) sliced thick length-wise
1/2 cup white wine
1/2 cup homemade or good-quality chicken broth
1 tablespoon stone-ground Dijon mustard
1/2 teaspoon dried tarragon (2 sprigs fresh if you have it)
1 cup cherry tomatoes, sliced in half

Browning the Chicken

Browning the Chicken

Season the chicken with salt and pepper, then dredge the chicken through the flour, patting down to lightly coat. Melt the butter in a large skillet over medium-high heat until it starts foaming, then cook the chicken pieces on both sides for several minutes until browned. Remove and set aside.

Sliced Shallots

Sliced Shallots ~ I added this shot because I think shallots are lovely

In same pan, reduce heat a little and add the shallots and cook until they start to soften and caramelize, about 10 minutes. Pour in the wine and chicken broth and deglaze the pan with a large spoon. Stir in the Dijon mustard and tarragon, add back in the chicken, then cover the skillet and simmer for about 15-20 minutes, reducing heat more if necessary.

Remove the lid, then nestle in the cherry tomatoes around the chicken. Simmer until tomatoes start to wilt and burst and the sauce thickens, about 10-15 minutes more. Stir lightly to combine, then serve.

Chicken in Shallot Dijon Sauce

Chicken with Shallot Dijon Sauce

p.s. Go Pats! 😉

Download and Print this Yummy Recipe!

Download and Print this Yummy Recipe!


Grated Zucchini and Fresh Tomato Pasta

12 Oct
Grated Zucchini and Fresh Tomato Pasta

Grated Zucchini and Fresh Tomato Pasta

Hello my long-lost foodie friends! In my six years of food blogging I have never taken a six-week break from blogging, but life kept happening at a lightning-quick pace. My daughter has flown the coop and gone off to college, I’ve taken a couple of much-needed vacations, and I’m about to wind down my food cart business for the winter. I’ve got one last hurrah at a local pumpkin patch event this weekend which I am looking forward to.

While I’ve done plenty of cooking at home between all this, I couldn’t find the time to get it together to photograph and post for you. And speaking of last hurrahs, my newest recipe comes from the zucchini from the last farmer’s market and pretty much the last of our ripe garden tomatoes. We have a late summer produce season here in Central Oregon, so while this may come to you too late for you in your neck of the woods, feel free to save this for next year’s bounty! And of course you can always use any good-looking store-bought produce when you can find it.

Grated Zucchini and Fresh Tomato Pasta

I have made this sauce three times in the past month, that’s how absolutely delicious and easy it is! Plus it’s versatile, too. It can be completely vegetarian, and truth be told, I wouldn’t miss the meat but I add it in for the hubby. He wants me to make it again with shrimp next time, too, which would be wonderful. The first time I made this I served it over cheese raviolis, and the next two times over garlic and herb pappardelle noodles with chicken. The pappardelle is my favorite! Any kind of pasta would work, but I do love the herb-infused kind with this. You can also use any variety of tomatoes. I used a combination of yellow, purple and red heirloom from our garden.

p.s. to my WordPress friends: I’ll be catching up with you soon! I really do miss reading all your posts. xoxo

Grated Zucchini and Fresh Tomato Pasta
(Serves two, easily doubled or tripled)

4 ounces pappardelle noodles, or other quick-cooking pasta
1 small zucchini
1 tablespoon olive oil
1/4 cup diced onion or shallots
1 pound fresh tomatoes
Splash of white wine
Salt and pepper, to taste
1/4 teaspoon dried Italian herbs
1 tablespoon unsalted butter
Chopped cooked chicken (optional)
Fresh-grated Parmesan cheese, for serving

Set a pot of water on to boil for the pasta. Meanwhile, using a box grater, grate the zucchini onto a sided plate (I used a pie plate.) Spread out and lightly salt and let rest for a few minutes, then pat dry with paper towels.

In a skillet, heat the olive oil over medium-low, then add the grated zucchini and onions or shallots, stirring occasionally. While the zucchini cooks, grate the tomatoes with the same grater. To grate, core the tomato, then slice a very thin slice off the bottom side. With a flat had, grate the tomato from the cut side until all that’s left is the peel. Discard peel and grate the remaining tomatoes.

Zucchini Tomato Sauce

Zucchini Tomato Sauce

When the zucchini and onions are softened, add a splash of wine to the pan. Add the tomatoes, salt and pepper to taste, and the dried Italian herbs. Simmer the sauce on low. Now add your pasta to the boiling water and cook according to package directions. Just before the noodles are ready, add the tablespoon of butter and the cooked chicken, if using, to the sauce. Stir until butter is melted and chicken is heated through. Drain the pasta and add to a serving dish. Pour the sauce over the noodles, and pass with grated Parmesan. A good thick slice of crusty buttered bread is also a must for sopping up the delicious sauce! Enjoy!

Grated Zucchini and Fresh Tomato Pasta

Grated Zucchini and Fresh Tomato Pasta

Download and Print this Yummy Recipe!

Download and Print this Yummy Recipe!


Grilled Foil Pack Pacific Cod with Summer Veggies

5 Aug
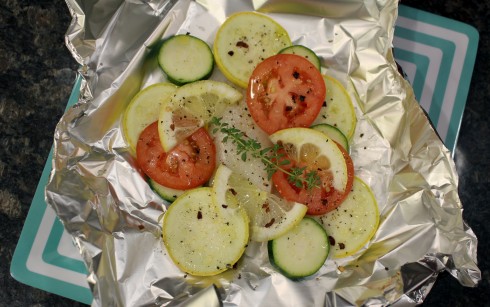
Grilled Foil Pack Pacific Cod and Veggies

Grilled Foil Pack Pacific Cod and Veggies

I do think I’ve run out of things to say about not posting new recipes recently, so why don’t I just cut to the chase. My new taco cart adventure is successful, YAY!

Here is a post from FB from one of my new (and very excited) customers, lol. I figure it’s OK to post it to the world since this Facebook page is a public page.

Austin Street Tacos Happy Customer

Austin Street Tacos Happy Customer

And yes, I cook for the fam quite frequently, but simply forget to snap a photo or even think to write a post about it. This recipe, however, I remembered. This took less than a half hour max to prep and cook on the grill. The ONLY downfall with it is I FORGOT THE RED ONIONS! I had full intentions of slicing some red onion real thin to add to this, but then my seester from Texas called all excited about a new job she just landed, and I was basing my recipe off one I had just brought up on my phone, and well, you know…

Either way, this was such a fantastic summer meal to enjoy on our deck. I hope you enjoy it too.

This recipe adapts handily to any number of mouths you are feeding, adjust accordingly. The one below is for two and just base the amount of vegetables on how hungry you are (or how big your foil sheets are). If you can, use the bounty from your vegetable garden or head to the farmer’s market for the veggies!

Grilled Foil Pack Pacific Cod and Veggies
Adapted from Serious Eats

2 6-ounce Pacific cod filets, or other mild white fish
Kosher salt and ground black pepper
Zucchini, cut into thin rounds
Yellow summer squash, cut into thin rounds
Thin-sliced red onion
Sliced tomato
Crushed red pepper flakes
Olive oil, for drizzling
Dry white wine, for splashing
Thin lemon slices
Sprigs of fresh lemon thyme (or regular)

Preheat the grill (or oven) to 450 degrees. Lay out sheets of heavy-duty aluminum foil for each person. Season the fish with salt and pepper and place a piece of fish on each one. Arrange the vegetables around the fish, top with lemon slices, then sprinkle with red chile flakes and perhaps a bit more pepper if you like. Drizzle a bit of olive oil over all, and splash a bit of wine over it too. Top each packet with a fresh lemon thyme sprig.

Wrap the foil around everything, leaving some head space for steaming, and seal completely. Set packets on the preheated grill (or in oven) and cook for 8 to 10 minutes, depending on thickness of fish.
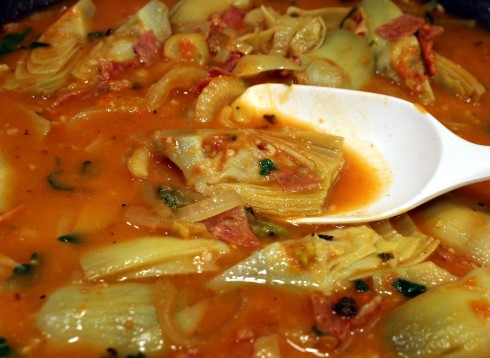
Remove and CAREFULLY open (it will be steamy hot) to check fish. If done, serve immediately or re-cover and cook a tad more. I chose to also serve some mashed potatoes, but pasta or rice would be great too.

Download and Print PDF

Download and Print PDF


Pacific Cod with Chorizo and Tomatoes

11 Jun
Pacific Cod with Chorizo and Tomatoes

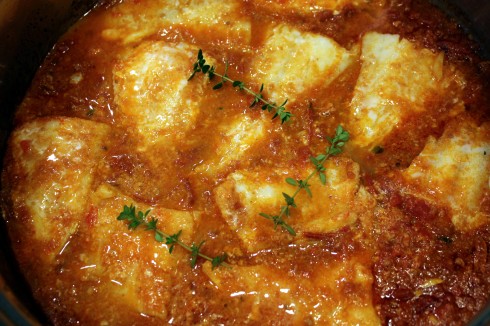
Pacific Cod with Chorizo and Tomatoes

With my parents visiting from Texas to celebrate various milestones in my family (including an 18th birthday and high school graduation), we’d been eating out a lot or ordering some pretty heavy take-out food. I decided it was time to cook a bit lighter fare last night before we send them back to the Lone Star State tomorrow (but not after a big feast of Texas Brisket tonight!).

Here are my parents enjoying their meal

This is an elegant and definitely guest-worthy meal that comes together quickly. The small amount of spicy chorizo and the bright taste of lemon thyme pairs perfectly with the sweet red peppers and fresh tomatoes. Do serve this with copious amounts of crusty bread for sopping up the tasty sauce. I chose to serve the fish and tomato sauce over pan-seared polenta slices with a side of steamed asparagus.
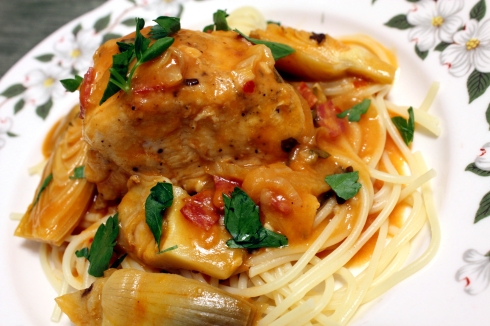
Pacific Cod with Chorizo and Tomatoes
Adapted from Roasted Cod with Linguica,
by Steven Lee Meyers on Food52

1 tablespoon olive oil
5 ounces Mexican chorizo
3 cloves garlic, sliced
Pinch of red pepper flakes
1 cup dry white wine
1 red bell pepper, cored and seeded and blended with 1/2 teaspoon salt
4 Roma tomatoes, chopped
Leaves from 3 sprigs lemon thyme, plus more for garnish
1.5 to 2 pounds Pacific cod, or other firm white fish
Salt to taste

Heat the oil in a large oven-proof skillet over medium and brown the chorizo, about 10 minutes. Add the sliced garlic and saute until fragrant. Add a pinch of red pepper flakes, then deglaze the pan with the white wine.

Add the pureed red pepper, chopped tomatoes, and lemon thyme. (If you don’t have lemon thyme, you can use regular thyme and squeeze in a small amount of fresh lemon juice.) Simmer the sauce until the tomatoes break down, about 15 minutes. You want it a bit soupy to hold the fish.

While the sauce is simmering, preheat the oven to 425 degrees. Lightly sprinkle the cod with salt, then nestle the pieces into the tomato sauce. Carefully place the hot skillet into the oven and roast until fish is done, about 7 to 10 minutes. The fish should flake easily with a fork.

Remove from oven and serve fish over polenta cakes, spooning the sauce over and around it.  Garnish with lemon thyme sprigs.


p.s. I’m starting to get the hang of running my food cart and the day-to-day tasks needed. We won’t talk about the day I forgot to bring the cheese or the other day I forgot the salsas, OK? But really, I’m having a blast with it and have also been contacted to be a vendor at a dog rescue fundraising event in August. I’ve also started applying to have the cart at various summer festivals and other events. Some are already booked for this year, but I’m getting a good list for next year in the process!


Easy Chicken Gratin and a Partial Reveal

30 Apr
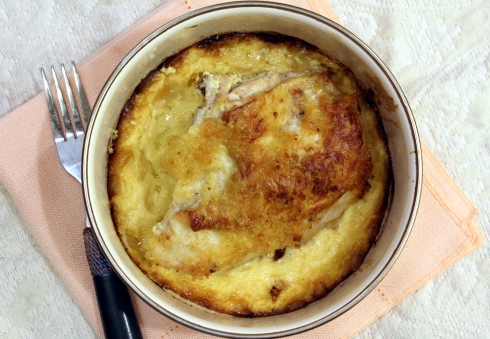
Chicken Gratin

Chicken Gratin

As much as I love tacos, truth be told we cannot simply eat tacos every night of the week. Therefore I’m still cooking other things and taking a photo here and again. Due to the time I’m committing to my new venture now, I’m limiting my recipe photos to one or two.

I saw this lovely dish on Food52 website and knew it would be a meal I’d be making soon. It’s very simple and cooks up in one dish! My kind of dinner. If you use the amount of chicken called for the chicken can nestle further into the gratin sauce, but my lonely piece wasn’t so fortunate. However, my husband was duly impressed with the curdled lemon cheese sauce (it’s supposed to be that way!) and it was truly an elegant meal.  I served the chicken over buttered rice and peas. Delicious!

Here is a link to the recipe —> Richard Olney’s Chicken Gratin (which is printable over there if you are so inclined).

Of course, you’ll need to adapt depending on the amount of chicken you are cooking.

NOW, drumroll please…

My new food cart name is…


Austin Street Tacos


This is not the full logo, as I sent it back for some tweaking. But I couldn’t resist sharing! I also wanted to give a HUGE thank  you to all my friends and readers for your overwhelming support for my new career. It means the world to me. xoxo


Shrimp and Chorizo Soup

15 Apr
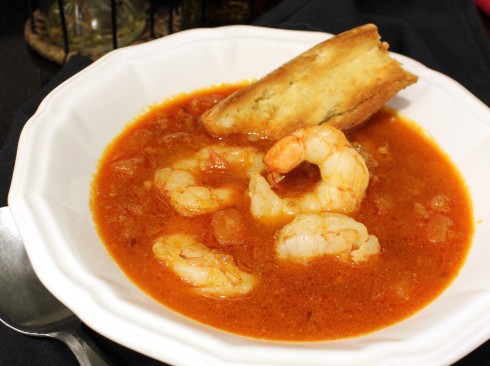
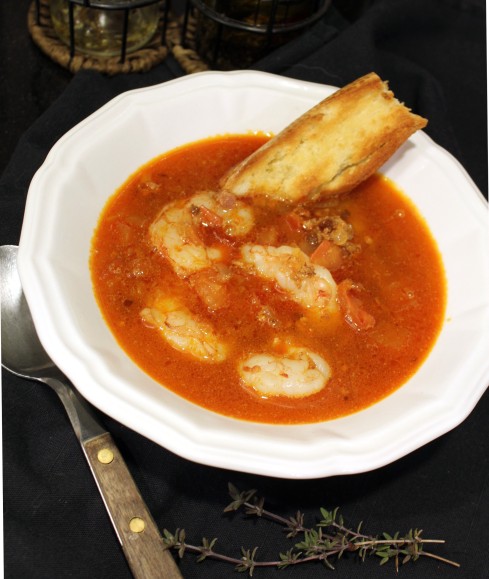
Shrimp and Chorizo Soup

Shrimp and Chorizo Soup

I saw this recipe on Food52 a few days ago, the daughter was gone for the night (she doesn’t like shrimp, crazy huh?) and it was a quick and easy recipe — especially since I had a bag of homemade shrimp stock in the freezer. No-brainer for me. Thirty minutes TOPS to make this if you have the stock. There are lots of great flavors going on in this. If you don’t have shrimp stock on hand, the original recipe here has the method to make it, which doesn’t take that long. Don’t forget the crusty bread to sop up the soup!

I was hoping to post my “big announcement” this weekend, but I’m still dealing with the logistics. Hopefully next week!

Shrimp and Chorizo Soup
Adapted from Shrimp and Chorizo Stew, by Josh Cohen at Food52

4 ounces Mexican chorizo sausage
1 tablespoon olive oil
1/3 cup minced shallots
1/2 cup diced tomatoes (fresh is better if you have it)
1/2 teaspoon smoked paprika
1/4 cup dry white wine
2 1/2 cups shrimp stock
1/2 pound jumbo shrimp, peeled and deveined
Salt, to taste
Fresh thyme sprigs, for garnish
Crusty toasted buttered bread, for serving

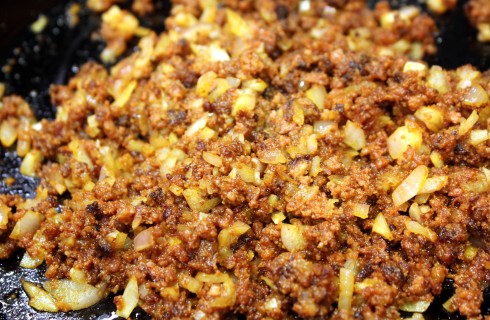
Chorizo and Shallots

Chorizo and Shallots

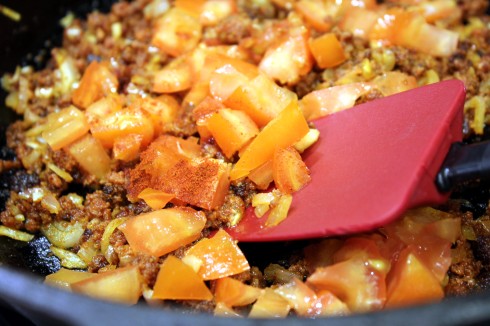
Remove the chorizo from its casing and cook in the oil over medium-high heat in a deep skillet, until cooked through and a bit caramelized. Add the minced shallots and cook until translucent, then add the diced tomatoes and smoked paprika. Cook and stir gently until tomatoes just start to break down.

Tomatoes and Smoked Paprika Added

Tomatoes and Smoked Paprika Added

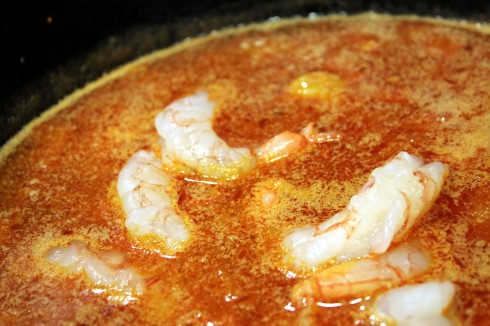
Add the white wine and shrimp stock, then turn to high and bring to a boil. Reduce heat until just simmering, then add the shrimp.

Simmering Shrimp

Simmering Shrimp

At this point you can start toasting your bread.  When the shrimp are cooked through (about 5 to 7 minutes), turn off heat, taste for salt, and add if necessary. Ladle into bowls, garnish with fresh thyme leaves, and serve with hot buttered crusty bread.
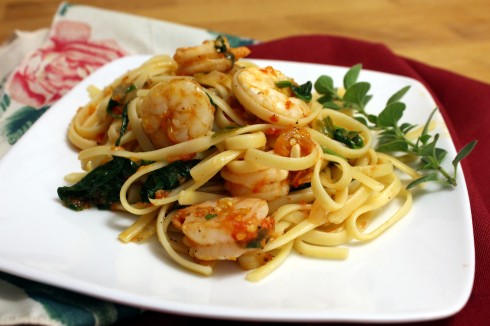
Shrimp and Chorizo Soup

Shrimp and Chorizo Soup

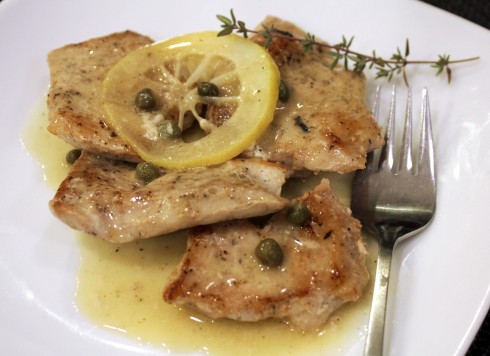
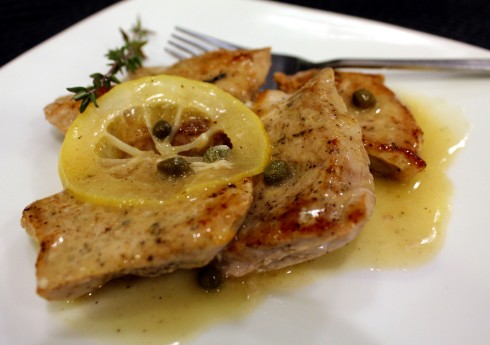
Sous Vide Pork Scallops with Lemons and Capers

9 Apr
Sous Vide Pork Scallops with Lemons and Capers

Sous Vide Pork Scallops with Lemons and Capers

I’m a sucker for deals on meat, no matter what cut you end up with. Because with a sous vide circulator, you can make delicious meals with even the cheapest of cuts. In this case, I had a couple of boneless pork loins, each in a very different shape and thickness. I cut and pounded the meat into similar-sized portions, spiced and bagged, then let the sous vide do its magic. After a relatively short bath, a quick sear and gravy will give you a restaurant-worthy dish. Pair it with a quick pressure-cooked risotto and peas side, and you’ve got a meal!

Down to business:

Sous Vide Pork Scallops with Lemons and Capers
Slightly adapted from Foodiecrush

3/4 pound boneless pork
Salt and pepper, to taste
Fresh sage leaves, one per slice
4 tablespoons butter, divided
2 teaspoons oil, preferably high-heat such as grapeseed
2 tablespoons flour
1/2 cup white wine
1 cup chicken stock
1 lemon, half for juice and half sliced
1/8 cup capers

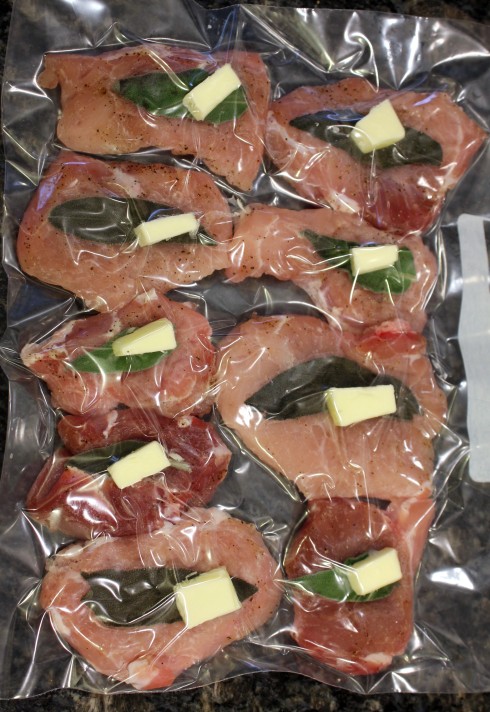
Seasoned and Vacuum Sealed Pork Scallops

Seasoned and Vacuum Sealed Pork Scallops

Cut pork into equal portions, then pound to about 1/4-inch thickness. Salt and pepper each side, to taste. Press a sage leaf onto each portion, then a small pat of butter on top of each leaf. Place the pork in one layer in a gallon zip-top bag, then vacuum seal using the water immersion method.

Cook in the sous vide bath for one hour with the temperature set at 139 degrees F. When done, remove pork to a plate and discard sage leaves. Reserve the juice left in the bag for the gravy.

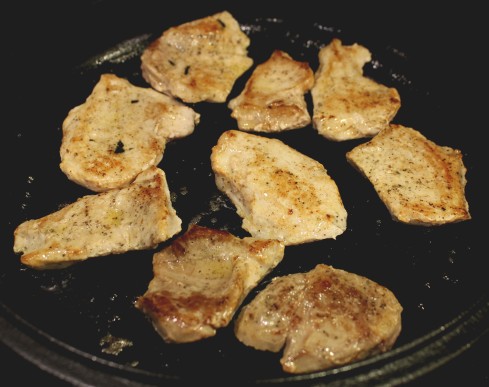
Quick-Searing the Pork

Quick-Searing the Pork

Heat oil in a skillet to medium high, then sear the pork quickly on each side until browned. Remember the pork is cooked through now. Set pork aside on a plate and make the gravy.

Add 2 tablespoons of butter to the skillet, then stir in the flour to make a paste. Pour in the reserved pork juices, wine, and chicken stock, whisking until thickened.

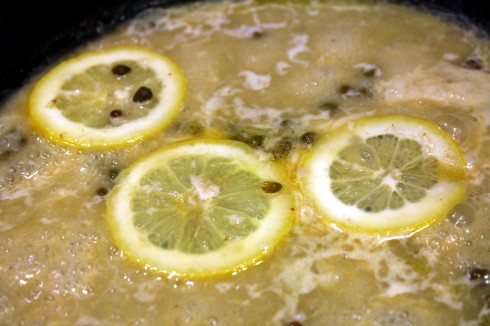
Lemon and Caper Pan Sauce

Lemon and Caper Pan Sauce

Squeeze in the juice of half the lemon, the capers, and stir to combine. Nestle the pork scallops into the gravy, then top with remaining lemon slices. Heat until pork is warmed through. Serve with pan-gravy and sides of choice.

Sous Vide Pork Scallops with Lemons and Capers2

Sous Vide Pork Scallops with Lemons and Capers

p.s. I have some exciting news to share with you soon regarding my future, so stay tuned!


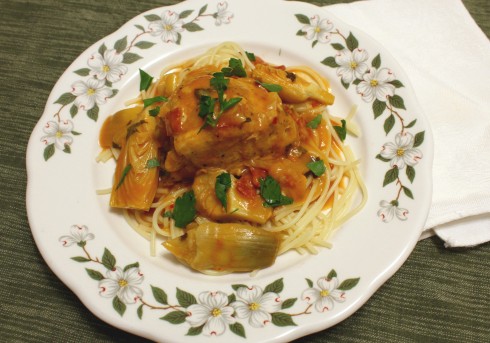
Braised Lemon Chicken with Artichokes and Salami over Pasta

11 Mar
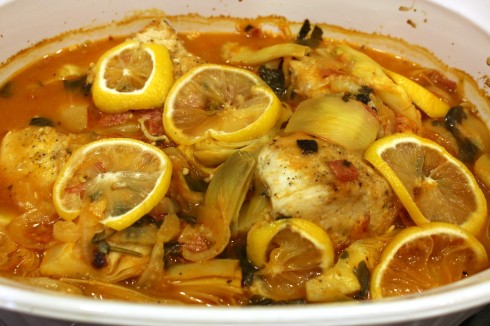
Braised Lemon Chicken with Artichokes and Calabrese Salami Over Pasta

Braised Lemon Chicken with Artichokes and Calabrese Salami Over Pasta

Call me crazy for making this, but it turned out so awesome (to me) that I ate it for lunch THREE DAYS STRAIGHT. Never mind the opinions of the household members.

I had some lingering Calabrese salami and frozen artichokes hanging out in the usual places, and decided to throw caution to the wind and make something up. As it turns out, mixing chicken and salami is not so uncommon (it’s a New Orlean’s dish). Neither is mixing artichokes and salami (pizza, anyone?). Why not marry them all into one dish?? And then serve it over pasta?

This is a delight for the taste buds and even guest-worthy, if you have friends who aren’t intimidated by the bold and adventurous. 🙂

Braised Lemon Chicken with Artichokes and Salami over Pasta

1 1/4 pounds chicken breasts or thighs (mine were boneless/skinless breasts)
Salt and black pepper for seasoning chicken, to taste
2 tablespoons olive oil
1/2 cup sliced onions
1 large garlic clove, peeled and minced
1/2 cup sliced fennel bulb
5 ounces frozen artichokes (that’s 1/2 bag of Trader Joe’s)
1/2 cup large-diced salami (I used Calabrese, also TJ’s)
1 large stalk fresh sage
1/2 teaspoon dried oregano
1/4 cup chopped fresh Italian flat-leafed parsley, plus more for garnish
1/4 teaspoon crushed red pepper flakes
1/4 dry white wine
2 tablespoons tomato paste
2 tablespoons flour
1 1/4 cups homemade or low-sodium chicken stock
Juice of 1/2 small lemon, plus lemon slices from the other half
Cooked pasta of choice

Preheat oven to 375 degrees.

Cut chicken into large sections, if large. Season the chicken with salt and pepper, to taste. Over medium-high heat, add the oil and sear the chicken until browned on all sides, a few minutes a side. The chicken will cook more later, so remove and place in a 2-quart casserole dish with a cover.

Veggies and Salami

Veggies and Salami

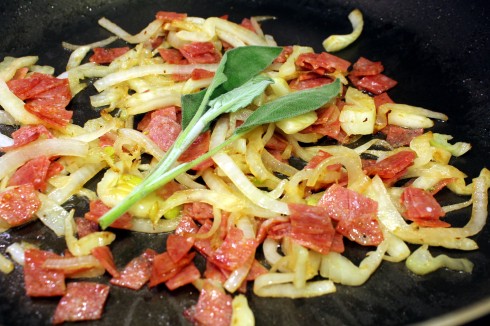
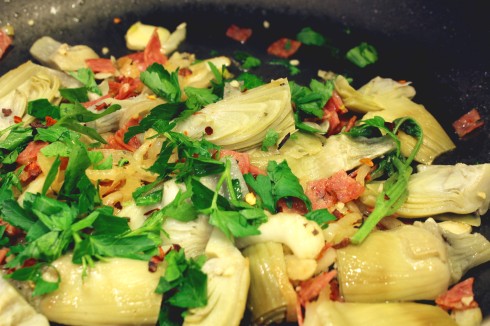
Add the sliced onion and fennel to the hot skillet for about 5 minutes, stirring until starting to soften and brown, then add the salami and sage. Cook until the salami begins to crisp up a bit. Add the garlic, artichoke hearts, oregano, parsley, and red pepper flakes.

Beautiful Base for Sauce

Beautiful Base for Sauce

Pour in the wine to deglaze the pan, scraping the bits off the bottom. Add the tomato paste and stir to incorporate. Then add the flour, again stirring to incorporate. Now pour in the chicken stock and bring to a simmer, stirring constantly until slightly thickened. Last, squeeze in the juice of the half lemon.

Sauce Mixture for Chicken

Sauce Mixture for Chicken

Pour the mixture over the chicken in the casserole dish, arrange sliced lemons over top, cover with foil, then with the lid.

Cooked Chicken in Veggie Salami Sauce

Cooked Chicken in Veggie Salami Sauce

Place in heated oven and roast for about 40 to 45 minutes until chicken is cooked through.

Meanwhile, cook the pasta according to directions.

Uncover and sprinkle with fresh parsley, for garnish. Serve over cooked pasta of choice (I used angel hair) with plenty of sauce and vegetables. For the leftovers, I found shredded Mozzarella cheese to be a fantastic addition!

Braised Lemon Chicken with Artichokes and Calabrese Salami

Braised Lemon Chicken with Artichokes and Calabrese Salami


Download and Print this Recipe

Download and Print this Recipe


Grated Heirloom Tomato and Shrimp Pasta

27 Aug
Grated Heirloom Tomato and Shrimp Pasta

Grated Heirloom Tomato and Shrimp Pasta

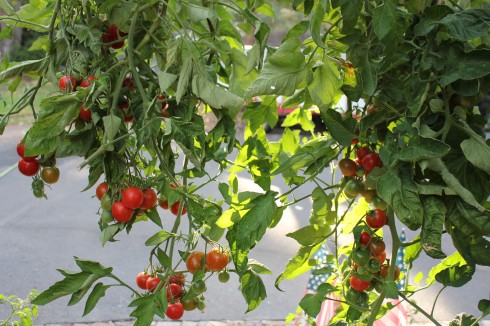
My good WP and FB friend Kat shared a video a couple of weeks ago of how to make a fresh box grater tomato sauce, and with a garden full of ripening tomatoes I knew I would be making a fresh-grated tomato sauce in the immediate future.

Hanging Tomato Plants

Hanging Tomato Plants

And of course I had to add shrimp, as my hubby and I are really enjoying our lack of daughter’s presence for dinners this summer so that we can eat this scrumptious shellfish, which is the ONLY seafood she doesn’t like.

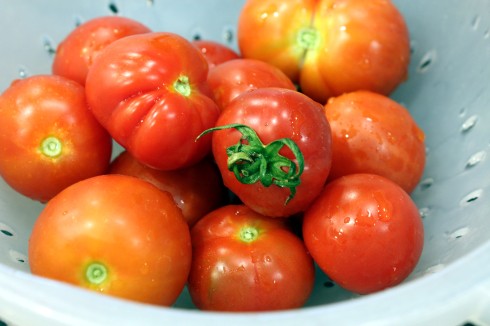
The tomatoes in our garden are really small this year, so I didn’t even bother to slice them in half before grating. I just trimmed a tiny slice off the top, then grated away! I am sold on this method of preparing tomatoes for a sauce. Since I was planning on adding shrimp to this, I gussied everything up and cooked it for a short spell so that the shrimp would have a delicious sauce to simmer in.

Fresh Picked Heirloom Tomatoes

Fresh Picked Heirloom Tomatoes

My husband said I should put a tomato meter rating on my recipes, like the movie review site Rotten Tomatoes does, lol. With that, we give this recipe 5 ripe tomatoes! (Note: This recipe feeds two. Feel free to double as necessary.)

So what am I waiting for?! Here is the recipe:

Grated Heirloom Tomato and Shrimp Pasta

4 ounces dry Linguine or other pasta
3 tablespoons olive oil, divided
2 cloves garlic, peeled and minced
1/4 sweet onion, chopped
Large splash of good white wine
Enough tomatoes for 1 cup grated sauce
1 tablespoon chopped fresh oregano leaves
1 tablespoon chopped fresh basil leaves
Salt or Mrs. Dash and ground black pepper, to taste
Large pinch of crushed red pepper flakes
1/4 pound raw shrimp, peeled and deveined
2 cups fresh spinach, roughly chopped

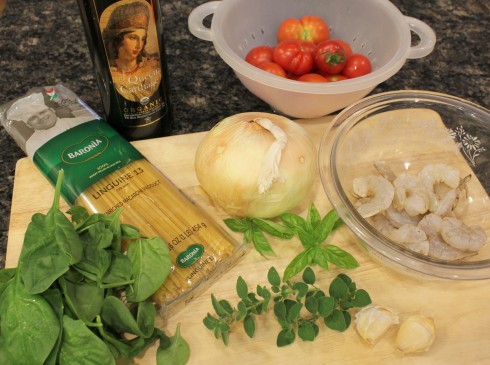
Shrimp and Pasta Dish Ingredients

Shrimp and Pasta Dish Ingredients

Cook pasta according to package directions. When done, reserve about a half cup of liquid, then drain and return to pot, cover and keep warm on lowest setting. Add small splashes of reserved pasta water and stir occasionally to keep it from sticking while preparing the rest of the dish.

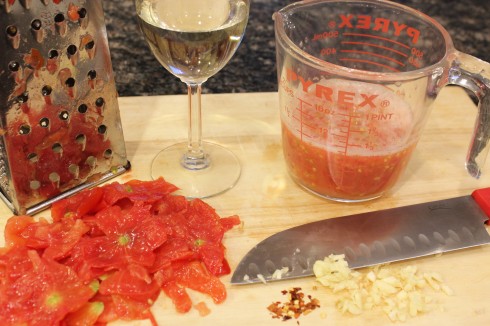
While pasta is cooking, slice a small piece off the top of each tomato and grate flat-handed on a box grater down to the skin. Grate enough tomatoes for 1 cup of sauce.

Grated Tomatoes and Such

Grated Tomatoes and Such

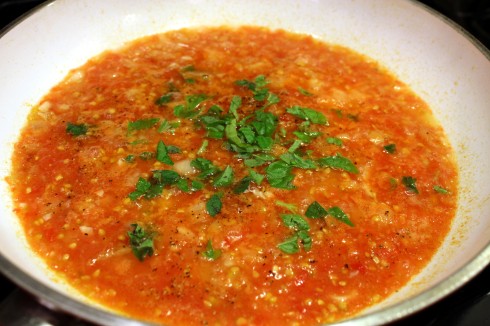
Add half the oil to a skillet over medium heat and cook the onion until translucent. Add the garlic for a minute more then add in a splash of wine. Add the rest of the oil, the grated tomato sauce, oregano, basil, and seasonings. Bring to a low simmer.

Simmering Fresh Tomato Sauce

Simmering Fresh Tomato Sauce

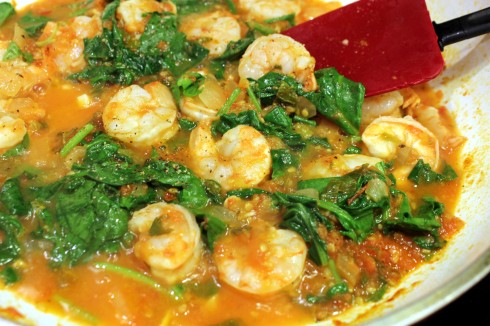
Nestle the shrimp into the sauce and cook for a few minutes, then flip over with tongs and cook for a few more until almost done. Last, add the chopped spinach, and simmer until wilted and shrimp are just cooked through.

Shrimp and Spinach Added to Sauce

Shrimp and Spinach Added to Sauce

Stir in the cooked pasta and additional reserved water until desired consistency. Serve on plates with a side salad and/or rustic bread.

Cooked Pasta Added to Sauce

Cooked Pasta Added to Sauce

Note how I did NOT add any cheese to this, as apparently the European world eschews cheese on seafood so I followed suit. I did not miss the cheese at all! I must say, this is the brightest, freshest tomato sauce I have ever tasted.

Oh! And if you want to see the referenced video, here it is: How to Make Fresh Tomato Sauce | Food and Wine

Download and Print this Recipe

Download and Print this Yummy Recipe!