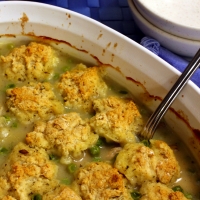
Unstuffed Cabbage Roll Casserole
I made a soup with similar ingredients to this many moons ago with a mile-long ingredients list, so this time around I decided to simplify it a bit more plus turn it into a casserole. As much as I love soup, sometimes I crave a bit more heft in the bite.
I ALMOST made this inedible, as I had the Hungarian sweet paprika and cayenne pepper sitting side by side in identical containers during prep. I actually poured ONE TABLESPOON of cayenne pepper on top of the tomatoes, but praise be I immediately noticed my mistake and was able to scoop most of it out before stirring it in. The end result was still a tad spicier than I intended, but overall a great comforting meal for a cold night. It sure warmed my husband up, lol! And even though this is over an hour in the oven, I guarantee this is way less time than the traditional stuffed method!
Unstuffed Cabbage Roll Casserole
1 tablespoon olive oil
1 pound ground beef, pork, or turkey (I used half beef/half pork)
1 cup chopped onion
1 teaspoon minced garlic
Ground black pepper and salt, to taste
1 14-ounce can diced tomatoes
1 8-ounce can no-salt tomato sauce
1 tablespoon Hungarian sweet paprika
1/4 teaspoon cayenne pepper
1/2 teaspoon Worcestershire sauce
2 teaspoons rice wine or white vinegar
1/2 cup white rice, uncooked
1 3/4 cups homemade or low sodium beef broth
1 small head cabbage (about 1 pound), quartered and sliced thin
1/2 cup shredded mozzarella

Ground Beef and Pork Mixture
Preheat oven to 375 degrees. In a skillet, brown the ground ground meat and chopped onions in the olive oil over medium heat until meat is cooked through, about 10 minutes. Add the minced garlic and cook a minute or two more. Drain the grease, if any. Grind a bunch of black pepper over it and add salt, to taste. Set aside.
In a bowl, mix in the next 7 ingredients (diced tomatoes through the rice).

Tomato Rice Mixture
Lightly spray an 8 x 8 casserole dish with oil, then layer half the cabbage on the bottom.

Cabbage and Beef Layer
Top with half the ground meat mixture, then half the tomato sauce mixture. Repeat. Last, pour the beef broth over all.

Layers Complete
Cover dish tightly with foil, and cook in oven for 1 hour 15 minutes. Remove foil, sprinkle cheese over top and broil for just a few minutes to melt cheese. Remove and let rest for 5 minutes, then serve.
p.s. We had to say goodbye to our beloved Hannah Banana last week. Our rescue dog of 14 years is deeply missed.

Hannah Banana

Hannah Banana

Download and Print this Yummy Recipe!