Archive | Side Dishes RSS feed for this section

Game Day Recipe ~ Amish Onion Patties

4 Feb
Amish Onion Patties

Amish Onion Patties

Do you need a last-minute game day appetizer but don’t want to run to the store? Here’s a quick and easy recipe that is short on ingredients but HUGE on flavor! You more than likely have everything you need for this in your fridge and pantry. The taste is incredibly hard to describe, but they certainly were not what I expected. Like amped-up onion rings, only better.

I searched high and low on the interwebz for the origin of this recipe, but can only guess it’s from a printed Amish cookbook. I found it initially in my FB feed from a third party advertisement. I followed the recipe except for the amount of salt (I halved the salt, as written below) and the oil called for. When it came to cook the patties, I coated my hot cast iron skillet with a thin layer of oil, then replenished between batches. No need to deep-fry these puppies, they turn out great without all that extra fat!

My husband kept calling them potato patties. No, there are no potatoes in this. Well then they must have eggs in them! No sweetie, no eggs either. Pretty much just flour, milk, and LOTS of sweet onions. Even if you don’t watch the Big Game, you can still enjoy some Amish Onion Patties for any occasion!

Amish Onion Patties
Origins Unknown

3/4 cup flour
1 tablespoon sugar
2 teaspoons baking powder
1 teaspoon salt
3/4 cup milk
2 1/2 cups chopped sweet onion (I used Walla Walla)
High heat oil, for cooking (I used grapeseed)

Dry Ingredients

Dry Ingredients ~ I give you a boring flour shot just to prove that I DO cook with flour, on occasion.

Mix together the dry ingredients in a bowl. Add milk and stir to combine; the batter will be thick. Add the onions and mix thoroughly.

Onion Patty Batter

Onion Patty Batter

Heat a cast iron or heavy skillet over medium-high heat. Add just enough oil to coat the bottom. Drop spoonfuls of onion batter into the skillet, then flatten with the back of a spatula.

Patties Ready to Flip

Patties Ready to Flip

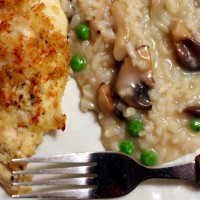
When the bottom is brown and crispy and releases easily from the skillet, flip over and brown the other side. Remove and drain on paper towels. This will take a few batches. Enjoy with your favorite sauce! I thought they were good enough on their own plain. I served these for dinner with my Garlic Parmesan Chicken Tenders, which were baked while cooking the patties.

Amish Onion Patties

Amish Onion Patties

Download and Print this Recipe

Download and Print this Yummy Recipe!


Quick Cucumber, Tomato, Onion, and Radish Salad

2 Sep
Quick Cucumber, Tomato, Onion, and Radish Salad

Quick Cucumber, Tomato, Onion, and Radish Salad

It’s that time of year! No, not all the fresh summer produce salad recipes, but my quickie recipes for when we are headed to the coast again to go fishing and/or crabbing. Once again, we’ll be on another extended weekend trip so am posting this one early instead of Saturday.

We didn’t catch any halibut last trip, it was super-windy with 6-to-8-foot horrible wind waves and our bait wouldn’t stay on the bottom with all the rocking and rolling. Then I got seasick as hell, WAHHH! Hubby will attempt again this weekend, while I’ll stay behind and fish the calm river for salmon.

I was wanting to make a Panzanella salad out of what produce I had on hand, but last minute hubby couldn’t help with the prep of this and ran out of time to make the bread cubes since I didn’t have any stale bread on hand. So this is what I came up with. Lively, fresh, and delicious!

The cucumber came from a friend’s garden, the tomatoes from our own, and the radishes from the farmer’s market. The rest came from the store (organic as possible).

And this would also make a great side dish for a Labor Day BBQ or picnic! This no-mayo recipe makes it a snap to store and serve.

Quick Cucumber, Tomato, Onion, and Radish Salad

1 English cucumber, sliced and quartered (about 2 cups, can be more or less)
1 cup fresh diced tomatoes
1/2 cup diced sweet onion
1/2 cup diced radishes
1 tablespoon extra-virgin olive oil
2 teaspoons fresh-squeezed lemon juice
1 teaspoon rice vinegar, or plain white
1/2 cup chopped fresh parsley
Salt and ground black pepper, to taste

Prep all the ingredients, toss in a bowl and stir to combine. Refrigerate one hour or more. Serve with a slotted spoon. See? Quick and easy. Yumm!

Download and Print this Recipe

Download and Print this Yummy Recipe!


Sage-Infused Sirloin Tips and Mushrooms with Cacio e Pepe

14 Aug
Sage-Infused Sirloin Tips and Mushrooms with Cacio e Pepe

Sage-Infused Sirloin Tips and Mushrooms with Cacio e Pepe

I follow some fantastic food blogs, and many of their recipes are the inspiration for our meals. The past couple of days yielded a bonanza for me for a meal that had everything I already had in the pantry, garden, or freezer. The hubby thought it was quite good!

Huge thanks to Linda at Fabulous Fare Sisters and to Mimi at Chef Mimi Blog for providing the motivation to make this super-tasty meal. Go check out their blogs when you have a chance!

On to the preparation!

Sage-Infused Sirloin Tips and Mushrooms
Inspired by Linda at Fabulous Fare Sisters

Garden Sage Plant

Garden Sage Plant

8 ounces sirloin tips
2 tablespoons fresh chopped sage
2 tablespoons fresh chopped green onions (green part only) or chives
2 garlic cloves, minced
4 ounces sliced mushrooms
3 tablespoons extra virgin olive oil, divided
Fresh ground pepper and salt or Mrs. Dash, to taste

Finely Chopped Sage and Green Onion

Finely Chopped Sage and Green Onion

Place the chopped sage, green onion or chives and garlic in a shallow dish. Add 3 tablespoons of the olive oil, pepper and salt or Mrs. Dash, and whisk to combine.

Add the sirloin tips, mix well, then marinate at room temperature for a half hour.

Sirloin Tips in Herby Maridade

Sirloin Tips in Herby Maridade

Meanwhile, add another tablespoon of olive oil to a cast iron skillet over medium-high heat. Add the mushrooms and cook until liquid has released and mushrooms have browned. Remove from skillet and set aside and turn off heat.

Cooking the Mushrooms

Cooking the Mushrooms

Next, prepare the Cacio e Pepe (recipe below).

When pasta is cooked, reheat the same cast iron skillet on high. Drizzle a little olive oil into the hot skillet. Add the sirloin tips and sage mixture and sauté 3 to 5 minutes until cooked to your liking.

Steak Tips in Sage Sauce

Steak Tips in Sage Sauce

Add the mushrooms and stir until heated through. Remove from heat and serve immediately with the Cacio e Pepe.

Cacio e Pepe
Inspired by Chef Mimi Blog

2 ounces Pecorino Romano cheese, finely grated
4 ounces dried spaghetti noodles
1 teaspoon ground black pepper, plus more for serving

Finely Grated Pecorino Romano Cheese

Finely Grated Pecorino Romano Cheese

Place a large pot full of salted water on the stove over high heat and cook spaghetti according to package directions.

When the pasta is done to your liking, reserve 2 cups of the pasta water in a bowl. Drain the pasta and return the pasta to the pot. Immediately add about a half cup of pasta water to the pot, stirring gently.

Add a teaspoon of coarsely ground pepper and the grated cheese, along with more pasta water as needed, (I kept having to add about a 1/4 cup at a time throughout and did end up with some clumpy cheese at the bottom, but that’s OK).

Pasta, Cheese, and Pepper

Pasta, Cheese, and Pepper

Stir vigorously through out this process until cheese is melted and pasta is creamy. Keep warm until steak tips are done, and add a little more pasta water to loosen up just before serving. Serve with additional ground pepper, if desired (recommended!)

Sage-Infused Sirloin Tips and Mushrooms with Cacio e Pepe

Sage-Infused Sirloin Tips and Mushrooms with Cacio e Pepe

Download and Print this Recipe

Download and Print this Yummy Recipe!

Spicy Refrigerated Dill Pickles

16 Jul
Spicy Refrigerated Dill Pickles

Spicy Refrigerated Dill Pickles

A big shout out goes to Gail at snapshotsincursive for prompting me to head to my local farmer’s market and pick up some pickling cucumbers. It was a beautiful day to stroll around the market! I also scored some garlic scapes, which I hear are great grilled and will be grilling those up tonight too to go with some BBQ beef.

I pretty much used my Spicy Dilly Pickle recipe for this, but used crushed red pepper flakes instead of dried red chiles as I didn’t have any. I also used fresh dill from my herb garden! I’ll be bringing a jar or two of these to my friends I am visiting on the coast tomorrow for a couple of days as a housewarming gift. (I’m also bringing a beautiful summer squash I also picked up.)

Do like I did and get out to your local farmer’s market now and pick up some great fresh veggies and fruits that are now available!

Spicy Refrigerated Dill Pickles

About 2 pounds fresh pickling cucumbers
1 clove of garlic per jar, peeled
1/8 teaspoon crushed red chile flakes per jar
Small handful of fresh dill, per jar
1/2 teaspoon black or mixed peppercorns per jar
1/2 teaspoon mustard seed per jar
5 cups water
5 cups white vinegar
1/2 cup of pickling salt

Wash and dry 4 pint canning jars. Cut the ends of the cucumbers and slice them in half. Drop the garlic cloves, chile flakes, dill, peppercorns, and mustard seed in each jar, then pack the cucumbers lengthwise over them. Bring the water, vinegar and salt to a boil then pour it over the cucumbers. Refrigerate for at least 12 hours or overnight. Keep in refrigerator and use within 2 to 3 weeks. Crunch!

Download and Print this Recipe

Download and Print this Yummy Recipe!

Guest Post: Spicy Skillet Corn with Tomatoes

10 Jun
Spicy Skillet Corn with Tomatoes

Spicy Skillet Corn with Tomatoes

I am so very delighted to share a guest post with you for Cheryl “Cheffie Cooks” Wiser while she’s on a much-needed vacation with her family overseas. I affectionately call her “CCC” for short so she in turn calls me KR. She is an amazing cook and “whips up” some outstanding healthy dinners to feed her five children and husband, all the while managing nine (yes, you read that right) blogs! Her recipes focus on healthy non-fried foods with lots of fresh seafood, meats, vegetables, and fruit. She has a lemon and lime orchard on her property, so one of her blogs focuses on all thing citrusy. I’ve only been a follower of her blog(s) for a few months, but we became fast interwebz friends so I am honored to guest post for her.

I wanted to share something that she would enjoy cooking for her family, which meant it had to be fresh, quick, and easy (and also include citrus!). So I chose my Spicy Skillet Corn with Tomatoes, which I found in my archives when I was looking for a side dish to serve with some Cilantro Lime grilled chicken. The original recipe is from almost three years ago, so I’ve updated it to include a handy-dandy printable PDF! Note that this is not really that spicy, as the spice is very tempered by the lime juice.

So without further adieu:

Spicy Skillet Corn with Tomatoes
Adapted from Southwest Corn Skillet with Chili and Lime from Barefeet in the Kitchen

1 tablespoon butter
4 ears of fresh sweet corn, kernels removed from the cob
Lots of ground black pepper
1/4 teaspoon cumin
1/4 teaspoon Hungarian sweet paprika (or regular paprika)
1/4 teaspoon New Mexico red chile powder (or regular chili powder)
3 strips of bacon, torn into bite-sized pieces
1 cup of cherry tomatoes, quartered
Juice of 1/2 lime

Heat a large skillet over medium heat and melt the butter. Add the rest of the ingredients except the tomatoes and lime juice and stir to heat through, about five minutes. Add the tomatoes and lime juice and toss to combine. Remove from skillet and serve immediately with your meal. Easy and delicious!

Note: You can omit the bacon if you want.

P.S. I hope you are having a FANTASTIC vacation CCC! xoxo

P.S.S. She has almost 1500 recipes posted on Tasty Kitchen! I haven’t quite mastered the search method over there to get you to all of hers, but you can find many of them with this link —> here.

Spicy Skillet Corn with Tomatoes

Spicy Skillet Corn with Tomatoes

Download and Print this Recipe

Download and Print this Yummy Recipe!

17 Cinco de Mayo Recipes

4 May
Turkey Chipotle Posole

Turkey Chipotle Posole

Yeah, yeah, I am always late to the game. I always forget I have a bunch of recipes you can make for Cinco de Mayo. But heck, don’t let that stop you from making any of these recipes on any other day either! UPDATE: I can NOT get some of my links to work, so if you want to look at a recipe here without a link, please try the search box in the upper right corner. Sorry ’bout that!

Turkey Chipotle Posole (lead-in photo)

Marcos Pollo Tacos

Marcos Pollo Tacos

Marcos Pollos Tacos

Chorizo and Beef Enchiladas with Cheesy Hatch Chile Sauce

Chorizo and Beef Enchiladas with Cheesy Hatch Chile Sauce

Chorizo and Beef Enchiladas in Cheesy Hatch Chile Sauce

Mexican-Style Beef and Cabbage Soup

Mexican-Style Beef and Cabbage Soup

Mexican-Style Beef with Cabbage Soup

Hatch Chile Fire-Roasted Salsa

Hatch Chile Fire-Roasted Salsa

Hatch Chile Fire-Roasted Salsa

Chunky Guacamole Grilled Nachos with Chicken

Chunky Guacamole Grilled Nachos with Chicken

Grilled Nachos with Chicken and Chunky Guacamole plus Grilled Mexican Tortilla Pizza

Chile Relleno Chicken Rollups

Chile Relleno Chicken Rollups

Chile Relleno Chicken Rollups

Skillet Huevos Rancheros with Homemade Tortilla Strips

Skillet Huevos Rancheros with Homemade Tortilla Strips

Skillet Huevos Rancheros with Homemade Tortilla Strips


Chicken Enchilada Skillet

Chicken Enchilada Skillet

Chicken Enchilada Skillet

Chicken Chile Verde Posole

Chicken Chile Verde Posole

Chicken Chile Verde Posole

Authentic Tex-Mex Cheese Enchiladas with Chile Gravy

Authentic Tex-Mex Cheese Enchiladas with Chile Gravy

Authentic Tex-Mex Cheese Enchiladas with Chile Gravy


Large Batch Taco Mix

Large Batch Taco Mix

DIY Taco Mix (Large Batch)

Carnitas Tacos with Spicy Pickled Red Onions

Carnitas Tacos with Spicy Pickled Red Onions

Creamy Chicken Chili and Beans

Creamy Chicken Chili and Beans

Creamy Chicken Chili and Beans

Chicken Fideo Soup

Chicken Fideo Soup

Chicken Fideo Soup (Mexican Chicken Noodle Soup)

Black Bean, Potato, and Chorizo Soup

Black Bean, Potato, and Chorizo Soup

Black Bean, Potato, and Chorizo Soup

And last but not least!

Charro, or Borracho Beans

Charro, or Borracho Beans

Cinco de Mayo Charro, or Burracho Beans

Happy Eating Y’all!

Pecorino Romano Scalloped Potatoes

20 Mar
Pecorino Romano Scalloped Potatoes

Pecorino Romano Scalloped Potatoes

Having a mandoline slicer makes quick work of this easy side dish, but a good sharp knife will also work. I splurged and bought some nice Pecorino Romano (genuine Sini Fulvi) at Whole Foods last week and figured the nutty cheese would taste great in my standard scalloped potato recipe. The cheese had such a strong flavor that I used it sparingly, but cooking it really mellows it out. So feel free to use as much as you want in this dish, as it adds a subtle cheesy flavor to an otherwise rather plain potato dish. I also topped it with a scattering of crushed homemade garlic croutons for another flavorful kick. This is a very versatile potato dish, so feel free to use any kind of potatoes, onions, cheese, or croutons that you want! Serve this with any protein of choice and a salad or other vegetable.

Pecorino Romano Scalloped Potatoes

3 medium large russet potatoes, sliced thin
1/2 large sweet onion, sliced thin and quartered
3 heaping tablespoons flour, divided
1 1/2 cups half and half (or milk), divided
Sea salt and ground pepper, to taste
Pecorino Romano cheese or other hard cheese, grated, to taste
Crushed flavored croutons, to taste

Preheat oven to 350 degrees. Slice the potatoes thin, using a mandoline or very sharp knife.

Sliced Potatoes in Ice Bath

Sliced Potatoes in Ice Bath

To keep them from browning, place the slices in a bowl of ice water. Next slice the onion, then quarter the slices.

Humble Sliced and Quartered Onion

Humble Sliced and Quartered Onion

When done slicing, drain the bowl and pat the potato slices dry with paper towels.

Spray a small casserole dish with oil, then add one layer of potato slices. Sprinkle 1/3 of the flour over top, followed by 1/2 cup of half and half or milk.

First Layer of Dish

First Layer of Dish

Season with sea salt and ground pepper to taste, then grate the desired amount of Pecorino Romano on top. Spread 1/3 of the onion slices last. Repeat layers two more times, then top with crushed flavored croutons.

Potatoes After Removing Foil

Potatoes After Removing Foil ~ Feel free to grate more cheese on top at this point!

Cover tightly with foil, and bake in oven for one hour. Remove the foil, then bake another half hour or more, until the potatoes are fork tender. Let rest for a few minutes, then serve with additional grated cheese, if desired.

Pecorino Romano Scalloped Potatoes

Pecorino Romano Scalloped Potatoes

Download and Print this Recipe

Download and Print this Yummy Recipe!

Smashed Roasted Little Potatoes

27 Dec
Smashed Roasted Little Potatoes

Smashed Roasted Little Potatoes

This is not so much a recipe as a “method” that I picked up off of Pinterest, which has been making the rounds again for these yummy ‘taters. I made these for Christmas dinner, but did the prep the day before so all I had to do was brush with oil and season them before popping into the oven while our prime rib roast “rested.” I also made creamed spinach for dinner (recipe to come later) and that turned out pretty darned yummy too!

The potatoes I used were from The Little Potato Company, and I’ve fallen in love with their small potato varieties! No I am not endorsed by them in any way, it’s just that their potatoes are so delicious! The variety I used this time was called the Terrific Trio. If you are a follower of my blog you may recall the Baby Boomer variety I used in my Roasted Pattypan Squash and Potatoes recipe.

Uncooked Little Potatoes

Uncooked Little Potatoes ~ Just look at these beauties!

Now I made 1.5 pounds of these little suckers for the three of us, and there was a meager half-serving left! I’m thinking that attests to how good my family enjoyed these potatoes, and I hope you do too!

Smashed Roasted Little Potatoes

1.5 pounds of little potatoes, any variety
Infused olive oil, for brushing (I used Mediterranean Garlic)
Seasonings and black pepper, to taste (I used a wee bit of salt and Mrs. Dash with the pepper)

Boil the potatoes covered with one inch of water until just tender (don’t overcook). This took about 15 minutes after the water came to a boil. Drain.

Lay a clean kitchen towel down and one at a time remove a potato to the towel with tongs. Using a folded up washcloth, smash the potato down gently with the palm of your hand. Some will fall apart a bit but don’t worry about that.

Smashing the Cooked Potatoes

Smashing the Cooked Potatoes

Once all the ‘taters are smashed, arrange them in one layer on a parchment-lined baking sheet using a spatula. At this point you can continue with the recipe or cover them with plastic wrap and refrigerate overnight or until ready to cook.

Smashed Potatoes Ready to Cook

Smashed Potatoes Ready to Cook

Once you are ready to cook them, preheat the oven to 450 degrees. Brush the potatoes on one side with an infused (or plain) good quality olive oil of choice, then sprinkle on the seasonings, to taste. Gently flip them to the other side and brush with more oil and add seasonings. Again, don’t worry if they fall apart a bit. The crispy bits are delightful!

Seasoned and Oiled Smashed Potatoes

Seasoned and Oiled Smashed Potatoes

Place in preheated oven for 30 minutes, flipping over gently at the halfway mark. Serve immediately. Where are the leftovers?

Download and Print this Recipe

Download and Print this Yummy Recipe!

Shrimp Risotto with Cajun-Spiced Shrimp

5 Nov
Shrimp Risotto with Cajun-Spiced Shrimp

Shrimp Risotto with Cajun-Spiced Shrimp

Ahhhh, risotto. It is such a lovely taste and texture but can be the bane of a cook who doesn’t have the time to bring it up to that incredible creamy  “ahhhh” in your mouth sensation. But if you are short on time, a pressure cooker will take all that “non-time” away to give you a perfectly creamy risotto, full of flavor. Add some Cajun-spiced shrimp on top, and tah-dah! Dinner served. In less than a half-hour. Job accomplished.

Shrimp Risotto with Cajun-Spiced Shrimp
Risotto recipe adapted from Perfect Risotto at bonafidefarmfood.com

For the Risotto:

1/2 cup finely diced yellow onion
4 tablespoons unsalted butter, divided
1/4 cup dry white wine
1 cup Arborio or California Pearl rice
4 to 5 cups shrimp stock, recipe here —> Homemade Shrimp Stock
1/2 cup fresh-grated Parmesan cheese, from a block

Diced Onions

Diced Onions ~ HEY! Who doesn’t eat microwaved popcorn while prepping dinner, huh???

For the Cajun-Spiced Shrimp:

1 tablespoon unsalted butter
1/2 pound large shrimp, shelled and deveined
Cajun-spiced seasoning, to taste
Fresh-grated Parmesan cheese, for garnish
Chopped green onion ends, for garnish
Lemon wedges, for garnish

Get all your ingredients prepped. This doesn’t take long at all!

Prepping the Ingredients

Prepping the Ingredients

Heat your pressure cooker (at minimum 3-quart size) over medium-high heat. Add 2 tablespoons of the butter until hot, then add the chopped onions. Cook until soft, about 5 minutes.

Wine Pouring Shot

Wine Pouring Shot ~ Something went awry with my camera settings for this shot so you get the “Instagram” look!

Add the dry white wine and bring to a boil. Boil for a few minutes more then add the rice  and the shrimp stock.

Risotto Ready to Pressure Cook

Risotto Ready to Pressure Cook

Put on the lid to your pressure cooker and lock into place, then bring up the pressure to high according to manufacturer’s directions. (I have a manual one, that means when the pressure gauge starts rocking. Results may vary by what you have.)

My Pressure Cooker

My Pressure Cooker

Once the gauge is rockin’ (or up to pressure for you high-tech electronic owners), set the timer for 7 minutes.

Meanwhile, cook the shrimp. Add a tablespoon of butter to a hot skillet and heat until foamy. Add the garlic, then add the shrimp in one layer. Season with Cajun-seasoning of choice. Cook for about 2 to 3 minutes per side. Don’t overcook! Remove shrimp from skillet and set aside until risotto is done.

Cajun-Spiced Shrimp

Cajun-Spiced Shrimp

At the end of the 7 minute-timer, remove pressure cooker from heat and run the pot under cold water to release the pressure immediately. Don’t remove the lid until all pressure is released.

Stir in the rest of the butter and the half cup of Parmesan cheese.

Perfect Risotto

Perfect Risotto

Serve Risotto in bowls , topped with the Cajun-Spiced Shrimp, and garnish with fresh-grated Parmesan cheese, green onions, and lemon wedges.

Shrimp Risotto with Cajun-Spiced Shrimp

Shrimp Risotto with Cajun-Spiced Shrimp

Download and Print this Recipe

Download and Print this Yummy Recipe!

Roasted Pattypan Squash and Baby Boomer Potatoes

24 Oct
Roasted Pattypan Squash and Baby Boomer Potatoes

Roasted Pattypan Squash and Baby Boomer Potatoes

This post is a bit dated since it is now mid-October and most people’s gardens are pretty much spent by now, but I’m only just now getting around to it. But, if you are still lucky enough to have some fresh squash in your area…

Our kind neighbor gave us some home-grown pattypan squash, and the only thing I could think to do with it besides soup was to roast it. I went to the store to buy some fingerling potatoes to go with them, but the bin was flat out. Then I spied this bag of Baby Boomer Potatoes. Not sure what that has to do with my generation (yah, I’m old) but they were the perfect size, and the bag said “great for roasting.” I’m in!

This was a perfectly simple side dish paired with some marinated grilled pork chops. I mixed in some fresh dill, then just roasted the heck out of them until they looked beautifully crisp on the outside (and were wonderfully creamy on the inside.)

Not your everyday side dish, but it’s a great way to use up your or your neighbor’s harvest! I hope you enjoy.

Pattypan Squash from Neighbor

Pattypan Squash from Neighbor

Roasted Pattypan Squash and Baby Boomer Potatoes

1 pound pattypan (or other) squash
1 pound small potatoes (Baby Boomers or otherwise)
1 to 2 tablespoons olive oil to coat
Fresh chopped dill
Salt, pepper, and any other seasonings, to taste

Dill-Seasoned Vegetables

Dill-Seasoned Vegetables

Preheat oven to 400 degrees. Cut the pattypan squash into chunks to match your potato size, to ensure even roasting. Place the squash and potatoes into a bowl, and pour over some olive oil and mix around to distribute evenly. Add the chopped fresh dill, then season with salt, pepper, and any other seasonings, to taste.

Pour bowl of veggies onto a lightly oil-sprayed baking sheet, then evenly distribute them in one layer.

Vegetables in Oven for Roasting

Vegetables in Oven for Roasting

Roast in oven for about 40 minutes, turning over halfway through. Just keep an eye on them in the last half hour and remove if getting too dark.

We served this with grilled marinated pork, but it would go pretty much with any protein of choice.

Download and Print this Recipe

Download and Print this Yummy Recipe!